- 5 -
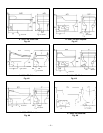
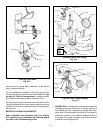
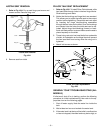
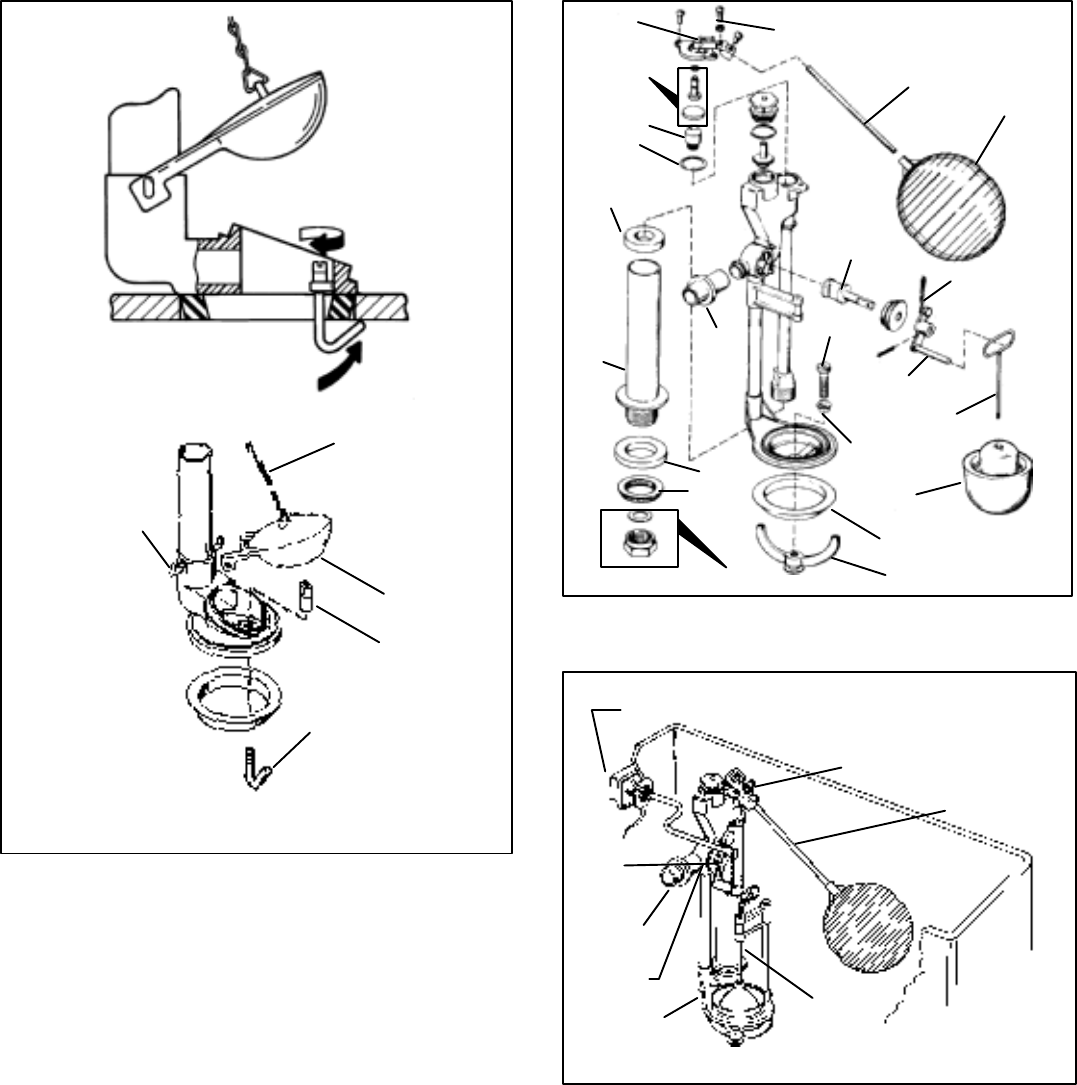
Old Style Flush Valve
Fig. #13
Trip Chain
Flush Ball
Flapper Hooks
Mounting Hooks
Screws
controls flow at various water pressures. An antiĆsiphon
valve prevents backflow.
For most satisfactory operation of this toilet, 25 to 80 psi
working pressure is required at the fixture. A full 1/2" supĆ
ply stop (K-7653) is recommended. A pressure regulaĆ
tor is recommend when pressure exceeds 125 psi.
The flush valve controls the flow of water from tank to bowl.
The flush ball and lift wire control valve operation at the end
of the flush. The lift wire provides for the accurate seating of
the flush ball.
BEFORE YOU BEGIN ADJUSTMENTS:
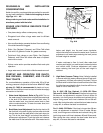
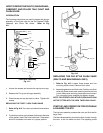
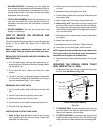
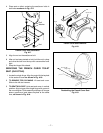
Refer to exploded view illustration (Fig. #14) and Fig.
#15. Make sure you understand the following before
you refer to the Troubleshooting Chart.
Rotor
Rochelle/Palarre Tank Fitting
Fig. #14
Float Ball
Float Rod
Adjusting Screw
Plunger S.A.
Seat
O-ring
Supply Connection
Lift Wire
Rotor Arm
Lift Chain
Hush
Tube
Rubber Gasket
Flush Ball
Cap Assembly
Rim
Flush
Tube
Locknut
Gasket
Rubber Seat Gasket
Seat Clamp
Plastic Collar
Screw
Trip Lever Tank Fitting Assembly
Fig. #15
Volume Control
Trip Lever Assembly
Flush Valve
Lift Wire
Rotor
Directional
Valve
Rim Flush
Tube
Float Rod
S WATER LEVEL. The water level must be at the waterline
indicated at the back of the tank for proper flushing of
bowl. Bend float rod if necessary to obtain the proper
water level. The flush valve will not shut off if the water is
above the overflow. If any pressure variation occurs in
the supply line, adjust the water level when the water
pressure is at its highest point.


