


HOW TO CUT AND CONNECT THE TUBES
Your Reverse Osmosis Water System includes push-in fit-
tings for quick tubing connection. Review the following
instructions before connecting the tubes in the next step.
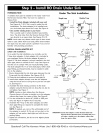
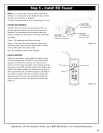
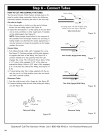
Cut tubes to length
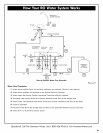
1. Use a sharp cutter or knife to cut the end of tubing.
Always cut the tubing square. See Figure 16.
2. Inspect the end (about 1") of the tubing to be sure there
are no nicks, scratches or other rough spots. If needed,
cut the tubing again. See Figure 16.
NOTE: Tubing lengths should allow for the removal of
the assembly from the hanger washers for servicing. If
tubing lengths are shortened for neater appearance, it
may be necessary to keep the assembly on the hanger
washers for service.
Connect tubes
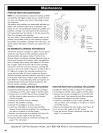
1. Push tubing through collet, until it engages the o-ring.
See Figure 17. Continue pushing until the tube bottoms
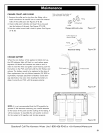
out against the back of the fitting. See Figure 18. A
common mistake is to stop pushing when the tube
engages the o-ring. This will lead to future leaks. When
a 1/4" tube is fully engaged, 11/16" of the tube has
entered the fitting. When a 3/8" tube is fully engaged,
3/4" of the tube has entered the fitting. See Figures 17
&18.
2. If using tubing other than tubing supplied with the sys-
tem, be sure it is of high quality, exact size and round-
ness with a smooth surface.
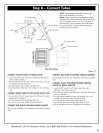
Disconnect Tubes
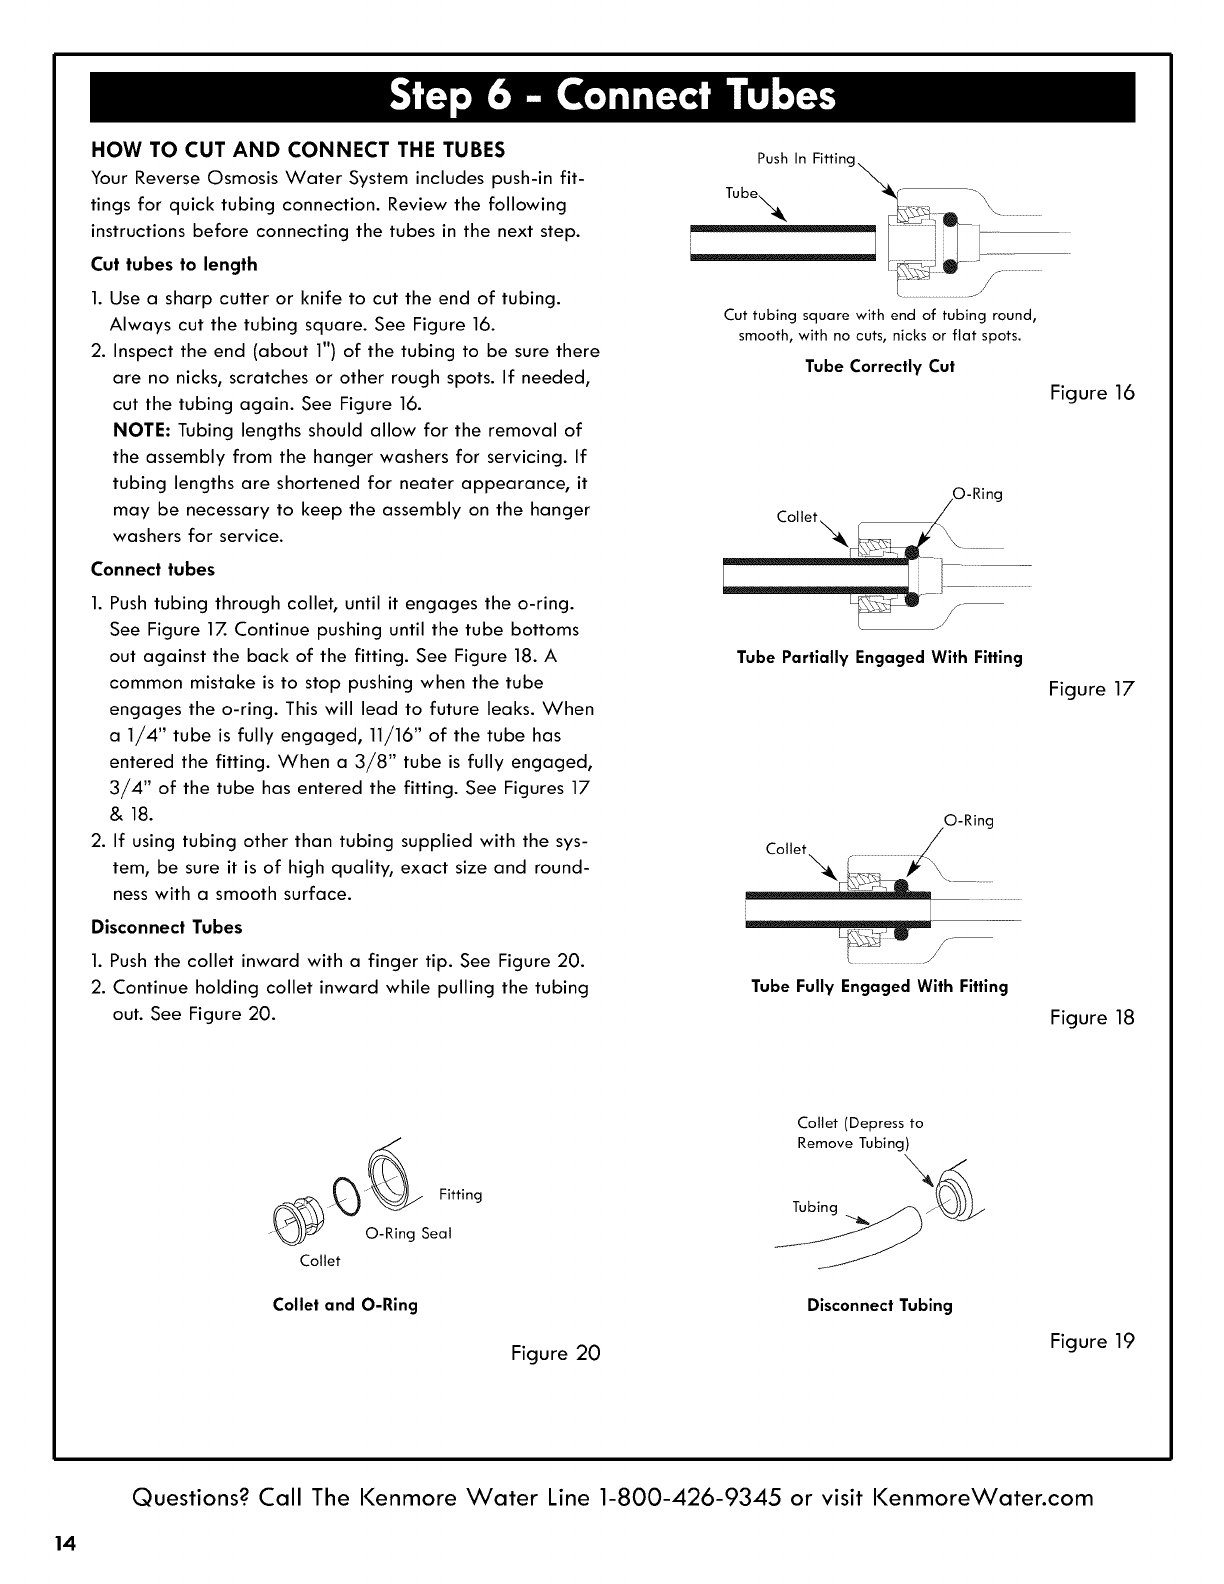
1. Push the collet inward with a finger tip. See Figure 20.
2. Continue holding collet inward while pulling the tubing
out. See Figure 20.
Cut tubing square with end of tubing round,
smooth, with no cuts, nicks or flat spots.
Tube Correctly Cut
Figure 16
Coltet
TubePartially EngagedWithFitting
Figure 17
O-Ring
Callet Y
........ J
Tube Fully Engaged With Fitting
Figure 18
Fitting
O-Ring Seat
Callet
Collet and O-Ring
Figure 20
Cotlet (Depress to
RemoveTubing)
Disconnect Tubing
Figure 19
Questions? Call The Kenmore Water Line 1-800-426-9345 or visit KenmoreWater.com
14