ADJUST(NG THE FLOAT
1. Disconnect the water suppiy at quick disconnecL
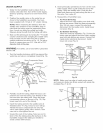
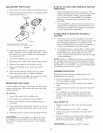
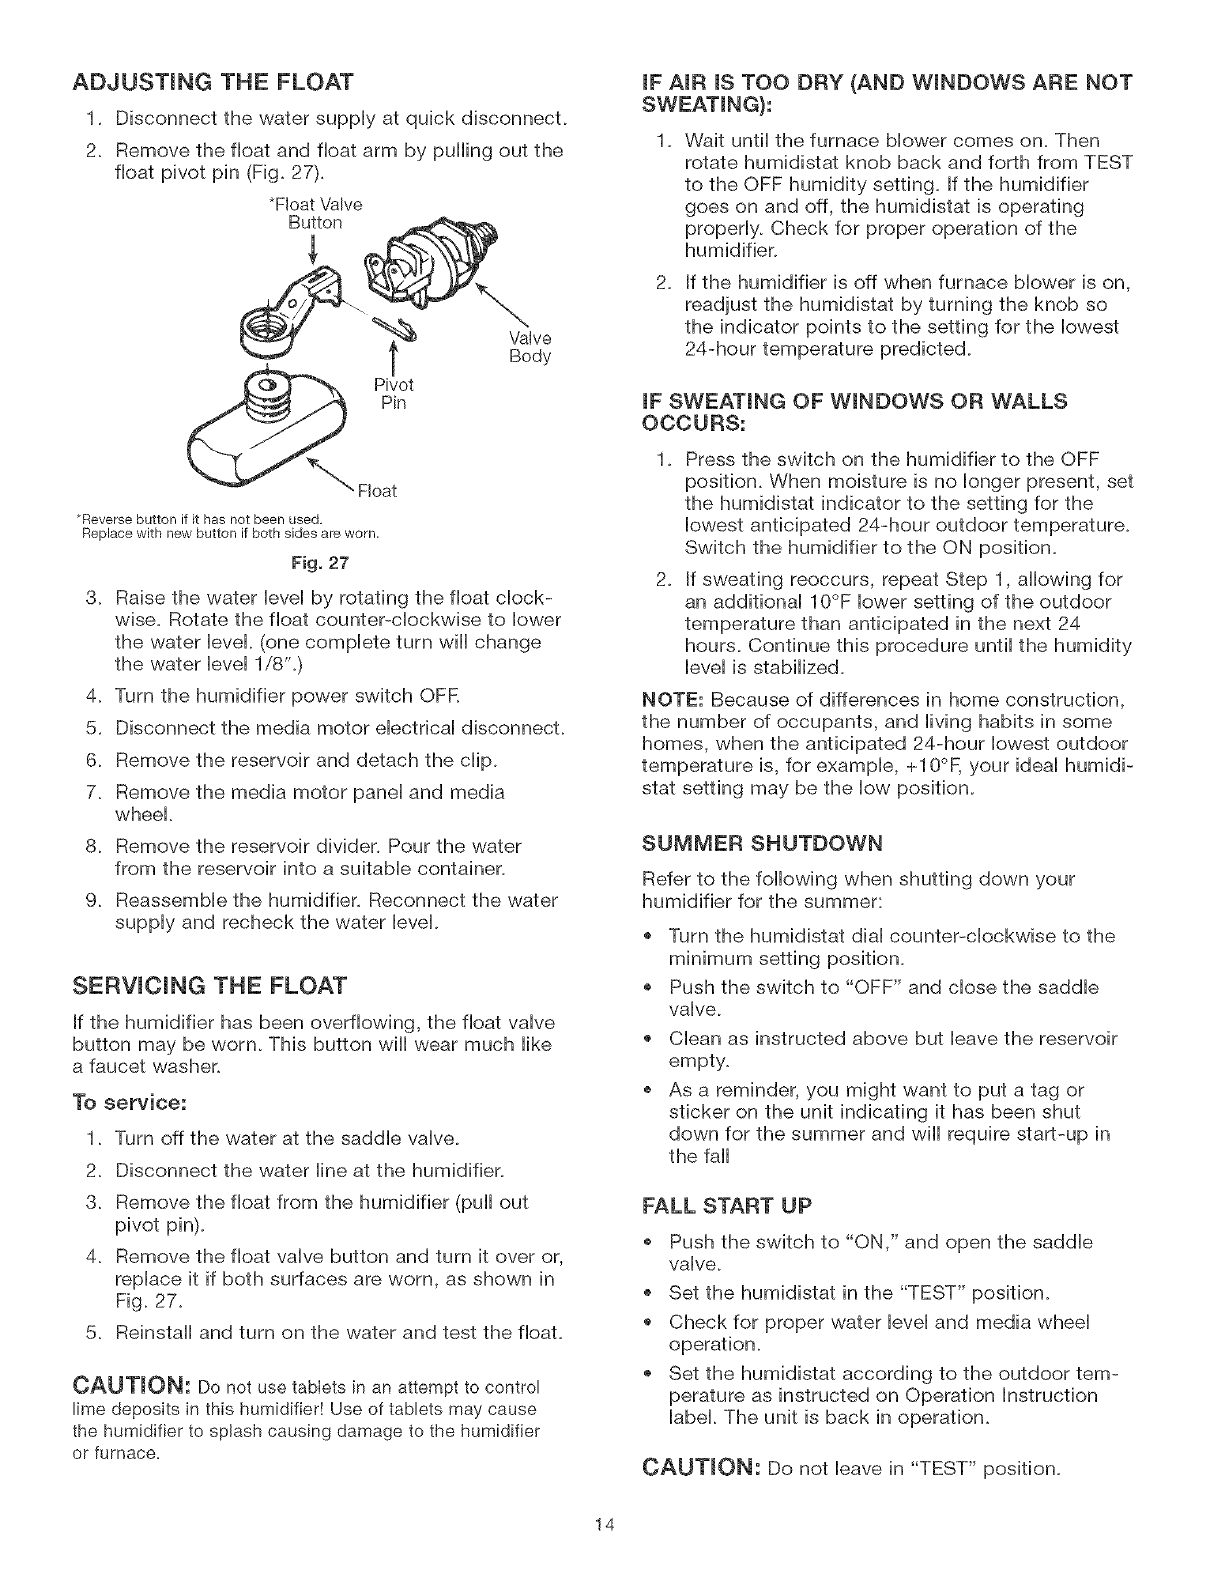
2. Remove the float and float arm by puiiing out the
float pivot pin (Fig. 27).
*Heat Valve
_"x Hoat
Reverse button if it has not been used.
Replace with new button if both sides are worn,
Fig, 27
3. Raise the water ]eve] by rotating the float chock-
wise. Rotate the float counter-cHockwbe to ]ower
the water ieveL (one compiete turn wiii change
the water level 1/8".)
4. Turn the humidifier power switch OFR
5. Disconnect the media motor electrical disconnect.
6. Remove the reservoir and detach the chip.
7. Remove the media motor panel and media
wheei.
8. Remove the reservoir divider. Pour the water
from the reservoir into a suitabie container.
9. Reassembie the humidifier. Reconnect the water
suppiy and recheck the water ieveL
SERV(C(NG THE FLOAT
If the humidifier has been overflowing, the float valve
button may be worn. This button wiii wear much like
a faucet washer.
To services
1. Turn off the water at the saddle valve.
2. Disconnect the water line at the humidifier.
3. Remove the float from the humidifier (pull out
pivot pin).
4. Remove the float valve button and turn it over or,
replace it if both surfaces are worn, as shown in
Fig. 27.
5. Reinstall and turn on the water and test the float.
CAUTION," Do not use tabIets in an attempt to control
lime deposits in this humidifier! Use of tablets may cause
the humidifier to sp(ash causing damage to the humidifier
or furnace.
(F A(R (S TOO DRY (AND W(NDOWS ARE NOT
SWEAT(NG):
1. Wait until the furnace blower comes on. Then
rotate humidistat knob back and forth from TEST
to the OFF humidity setting. If the humidifier
goes on and off, the humidistat is operating
properly. Check for proper operation of the
humidifier.
2_
If the humidifier is off when furnace blower is on,
readjust the humidistat by turning the knob so
the indicator points to the setting for the lowest
24-hour temperature predicted.
iF SWEATING OF WINDOWS OR WALLS
OCCURS:
2_
Press the switch on the humidifier to the OFF
position. When moisture is no longer present, set
the humidistat indicator to the setting for the
lowest anticipated 24-hour outdoor temperature.
Switch the humidifier to the ON position.
If sweating reoccurs, repeat Step 1, allowing for
an additional 10°F iower setting of the outdoor
temperature than anticipated in the next 24
hours. Continue this procedure until the humidity
level is stabilized.
NOTE: Because of differences in home construction,
the number of occupants, and living habits in some
homes, when the anticipated 24-hour lowest outdoor
temperature is, for example, +10°F, your ideal humidi-
stat setting may be the low position.
SUMMER SHUTDOWN
Refer to the following when shutting down your
humidifier for the summer:
Turn the humidistat dial counter-clockwise to the
minimum setting position.
Push the switch to "OFF" and close the saddle
valve.
Clean as instructed above but leave the reservoir
empty.
o As a reminder, you might want to put a tag or
sticker on the unit indicating it has been shut
down for the summer and wiii require start-up in
the fall
FALL START UP
@
@
@
@
Push the switch to "ON," and open the saddle
valve.
Set the humidistat in the "TEST" position.
Check for proper water level and media wheel
operation.
Set the humidistat according to the outdoor tem-
perature as instructed on Operation Instruction
label. The unit is back in operation.
CAUTION: Do not leave in "TEST" position.
14


