


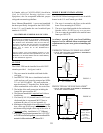
WARNING:
DO NOT INSTALL IN A BEDROOM/SLEEPING
ROOM. THE STRUCTURAL INTEGRITY OF THE
MOBILE HOMES FLOOR, WALL, CEILING/ROOF
MUST BE MAINTAINED.
OPERATION
Before building a fire in your new OSLO F500, please
read the following section carefully and completely.
Do Not Burn
First this stove is designed to burn natural wood ONLY,
wood that has been air-dried for a period of 6 to 14
months will provide the cleanest most efficient heat.
Do not burn:
*Coal *Treated or painted wood
*Garbage *Chemical Chimney cleaners
*Cardboard *Colored paper
*Solvents *Any synthetic fuel or logs
The burning of any of these materials can result in
the release of toxic fumes. Never use gasoline,
gasoline-type lantern fuel, kerosene, charcoal lighter
fluid, or similar liquids to start or freshen-up the
fire. Always keep such liquids away from the heater
at all times.
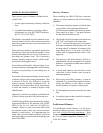
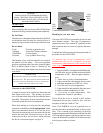
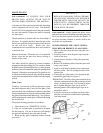
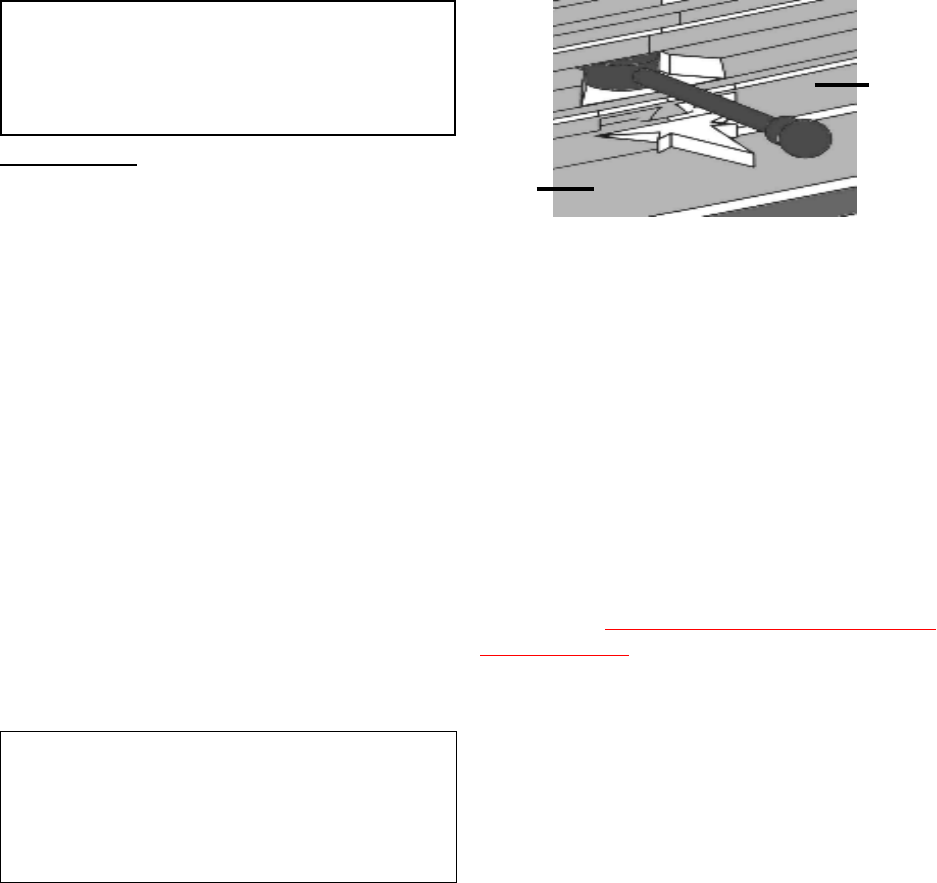
Controls on the OSLO F500
A single air control lever controls the burn time and
heat output of the stove. This primary air control
lever is located on the front of the stove directly above
the ashlip. The primary air lever controls the amount
of air that enters the stove for combustion.
When first starting or reviving the fire: the primary
control lever should be at the far right position, which
allows the maximum amount of air into the stove.
The more air entering the stove the hotter the fire the
shorter the burn time. Moving the lever to the left
reduces the air-flow into the stove which prolongs
the fire at a lower heat output.
See figure 11.
Breaking in your new stove
Your new OSLO F500 is constructed of cast iron and
stove furnace cement. This type of construction
requires the stove to be broken-in gradually so that
heat expansion does not occur too quickly and cause
damage.
Complete the following steps for the proper break-in
procedure for the OSLO F500:
To monitor the stoves temperature, Jøtul
recommends the use of a magnetic stove-top
thermometer, placed directly on the corner of the
stoves top plate.
1. Light a small fire, newspaper and kindling only,
only allow the stove to reach a maximum surface
temperature of 200°. Burn for approximately 1
hour.
2. Allow stove to cool to room temperature.
3. Light a second fire, allowing the stove to reach
a maximum temperature of 300° for 1 hour.
4. Cool the stove to room temperature.
5. Light a third fire and gradually allow the stove
to reach a surface temperature of 400°
6. Cool stove to room temperature. This
completes the break-in procedure.
Never allow the stove to exceed a 400° surface
temperature during any break-in fire with the
exception of the last break-in fire.
Note: IT IS NORMAL for a new painted stove to
emit an odor and even smoke during its first several
fires. This is caused by the seasoning of the high
temperature paint and will diminish with each fire and
will eventually disappear. Opening a window or door
to provide additional ventilation will reduce the odor
as this process takes its course.
13
FIGURE 11
IMPORTANT
NEVER BUILD OR ALLOW THE FIRE TO REST DIRECTLY
ON
THE GLASS. THE LOGS SHOULD ALWAYS BE SPACED
AT
LEAST ONE INCH FROM THE GLASS TO ALLOW FOR
PROPER
AIR FLOW WITHIN THE STOVE.
FAR
RIGHT
FULL
OPEN
FAR
LEFT
FULL
CLOSED