


ECR International
Hyundai Ductless Split System4
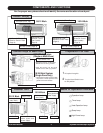
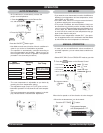
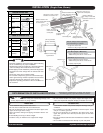
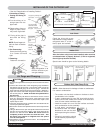
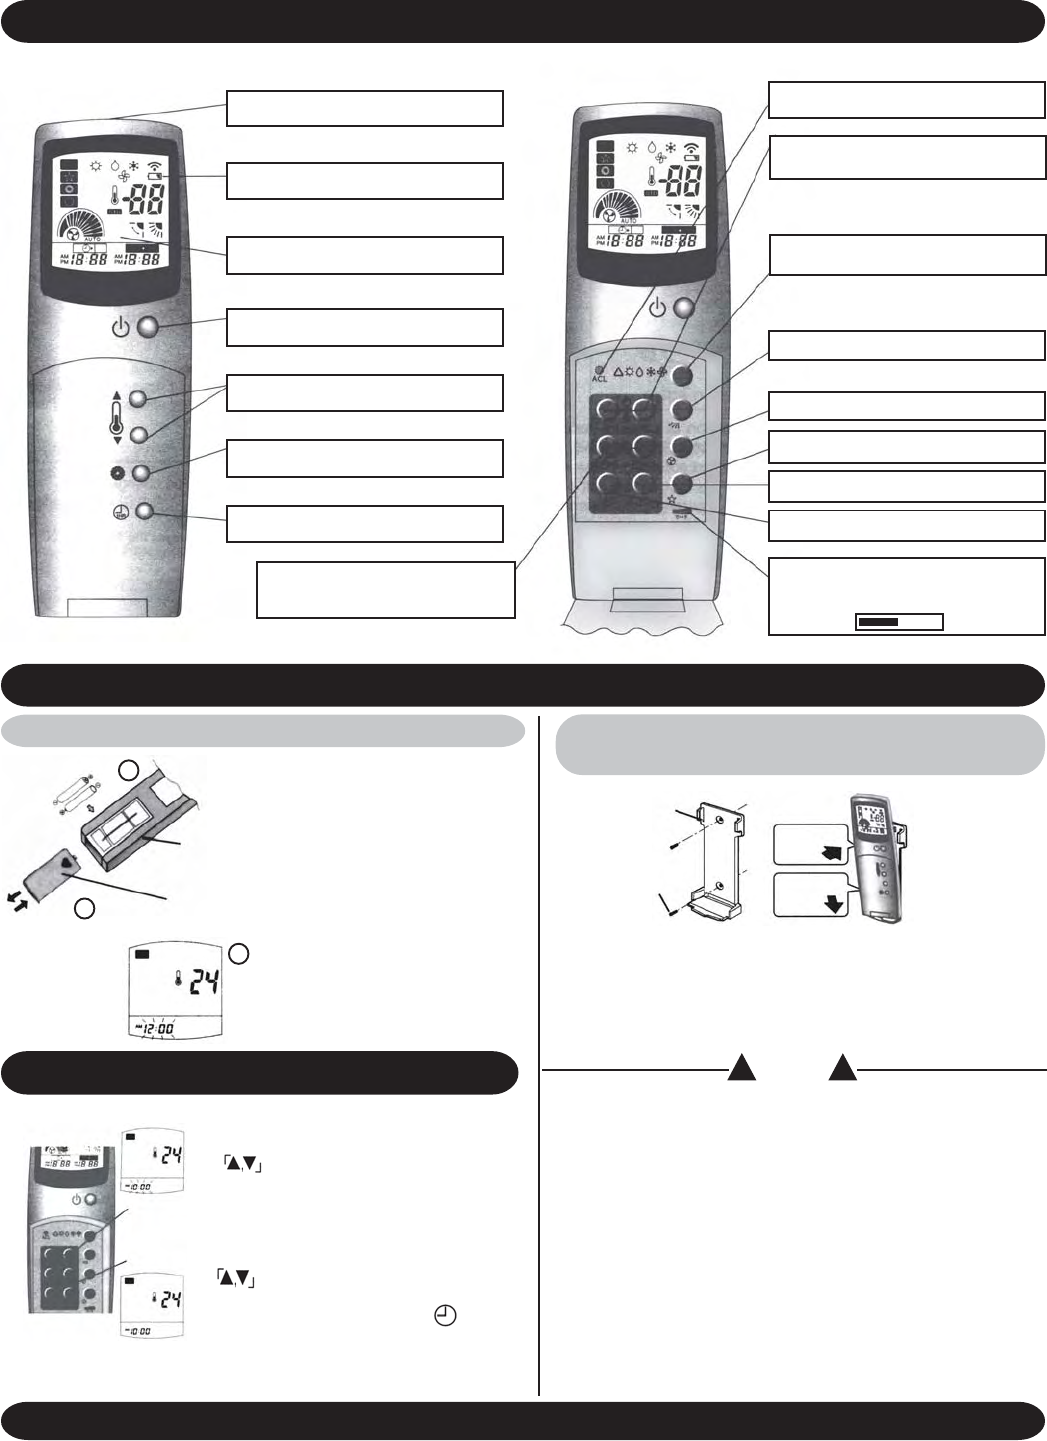
PART NAME OF REMOTE CONTROL AND KEY FUNCTION
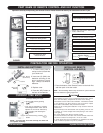
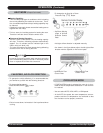
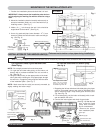
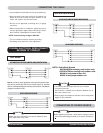
1. To lift the cover press in
and up on the lid latch with
your thumb nail.
2. Insert two (2) (AAA) size
batteries according to the
plus (+) and minus (-) mark-
ings. Always use Alkaline
batteries.
3. Replace cover.
4. Press the “ACL” button on
the face of the Remote.
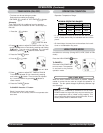
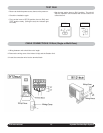
• When it is attached to the wall.
• Place the bottom of the Remote Control on the hook first
and then push it into the holder.
NOTE: The transmitting distance may be shorter in a place where the
room has electronic lighting equipment.
PREPARATION BEFORE OPERATION
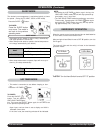
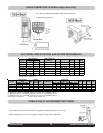
CURRENT TIME ENTRY
• If the batteries are not in use for a prolonged period of time, remove
them from the battery compartment to avoid undue draining.
• The batteries can be used for about 6 months. If the Remote Control
is not operating even when placing it near the receiver, replace
them with 2 new batteries and press the ACL button.
• Please do not use manganese batteries. It may cause the remote to
malfunction.
• Avoid extremely hot or cold locations such as placing it near or over
a radiator, or in direct sunlight. Also avoid placing it near fluores-
cent lighting.
• Do not let children play with the Remote Control.
• To avoid interference, the indoor unit and the Remote control unit
should be at least 3 feet away from a TV set or a radio.
• In cases where than two air conditioners are installed in the same
room, individual operation may not be possible.
Transmitter
Low Battery Indicator
Display Window
ON/OFF Button
Temperature Setting Button
High Power Button
One Hour Timer Button
ON-Timer/OFF-Timer
Selector Buttons
ACL Button
Timer Setting/Temperature Setting
Operation Mode Selector Button
Selects the mode (AUTO, HEAT, DRY,
COOL, CIRCULATE)
Airflow Direction Button
Fan Speed Button
Sleep Operation Button
Timer Cancellation Button
Time Set Button
Celsius (°C) Fahrenheit (°F)
Selector Switch
Celsius (°C)
Fahrenheit (°F)
C
F
D
D
Up/Down Air Flow Direction Control
ACL Button
(Front Cover)
Cover
“AM 12:00”
Blinking
1
2
3
INSTALLING REMOTE
CONTROL HOLDER(S)
INSTALLING BATTERIES
! CAUTION !
2
Push
1
Place
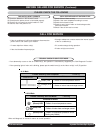
(Example) Setting AM 10:00;
OPEN
CLOSED
1. Set time AM 10:00 by pressing
button.
• Time can be adjusted by pressing
and holding the button. It can also be
adjusted in one minute intervals by
single pressing and releasing the
button.
2. Set current time by pressing
button.
1
2
NOTE: If current time is not set correctly, the timer will
not operate normally.
Operation starts by manipulating the Remote Control. Please check and identify the name and location of part.