42729-01 12/20/2006 5
ENGLISH
aSSembly
LINE CORD SAFETY TIPS
1. NEVER pull or yank on the cord
or the appliance.
2. To insert plug, grasp it firmly
and guide it into the outlet.
3. To disconnect the appliance,
grasp the plug and remove it
from the outlet.
4. Before each use, inspect the line
cord for cuts and/or abrasion
marks. If any are found, the ap-
pliance should be serviced and
the line cord replaced. Please
return it to our Service Depart-
ment or to an authorized service
representative.
5. NEVER wrap the cord tightly
around the appliance, as this
could place undue stress on the
cord where it enters the appli-
ance and could cause it to fray
and break.
6. DO NOT operate appliance if
the line cord shows any dam-
age, if the appliance works
intermittently or stops working
entirely.
7.
DO NOT use an extension cord
with this fan.
note:
Assembly of this fan will
be easier if performed by two
people.
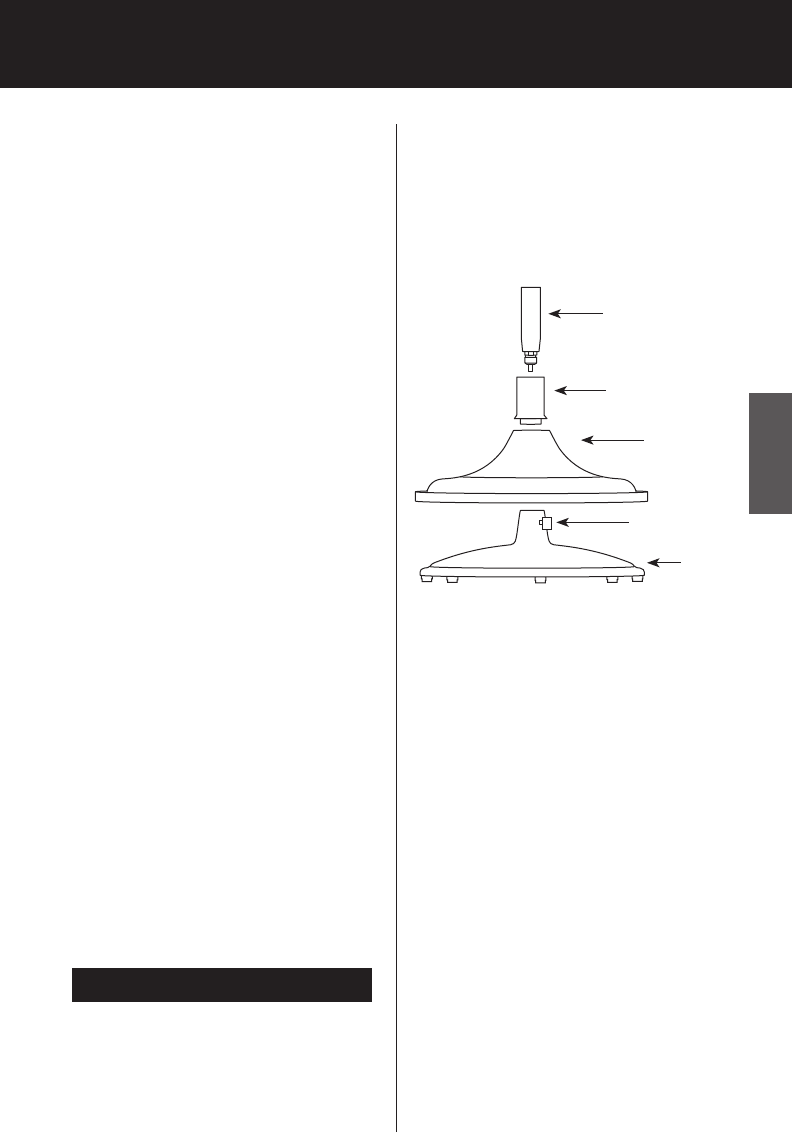
1. Slide the Cover Support Cap
over the bottom of the Tele-
scoping Pole. See Figure 1.
FIGURE 1
Telescoping Pole
Cover Support Cap
Base Cover
Pole Setscrew
(pre-installed,
tagged)
Cast
Iron
Base
2. Insert the bottom of the Tele-
scoping Pole through the Base
Cover. See Figure 1.
3. Place the bottom of the Tele
-
scoping Pole into the Cast Iron
Base, making sure the plug con-
nector from the bottom of the
Telescoping Pole goes through
the Cast Iron Base. Twist the
Telescoping Pole clockwise to
secure it into the Cast Iron Base.
4. Locate the Pole Setscrew (pre-
installed, tagged) in the neck of
the Cast Iron Base. See Figure 1.
5. Use an adjustable wrench to
tighten the Pole Setscrew (pre-
inserted, tagged) until it seats
firmly against the Telescoping
Pole. See Figure 1.
1. For Model 9017X, remove the
plastic sleeve from the bottom
of the Telescoping Pole.
preparatIon


