


41451-01 6
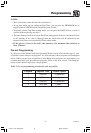
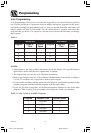
Operation
Initial Operation
This section provides basic instructions on the use of your air purifier. After following these
initial directions, please continue reading this booklet to learn how to operate the more
advanced features of your air purifier.
Basic Operation of the Air Purifier:
1. Take the air purifier out of the box and remove the clear plastic protective bag.
Place the unit on a firm level floor.
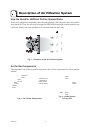
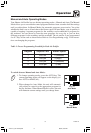
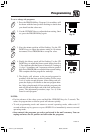
2. Before turning on the air purifier, you need to confirm that the filters are firmly
in place and have not become loose during shipping. To check the filters, first
open the front grill. For Models 30400 and 30401, release the front grill by plac-
ing your fingers behind the tabs and pulling forward. For all other models, gently
press the push tabs until the front grill slides pass them and is released. Refer to
Fig. 2 (pg. 4).
3. Next, check the HEPA filter by pressing firmly on all four corners of the filter to
ensure that it is fully inserted into the filter opening.
4. The carbon pre-filter is mounted inside the front grill with hook tape. Confirm
that it properly covers the grill vents. You may notice a few black particles com-
ing off the pre-filter. Those particles are part of the odor-removing activated car-
bon and will be collected on the filter during use.
5. Place the front grill back onto the unit. First, line up the tabs on the bottom of
the grill with the openings on the purifier base and then push the top of the
grill forward until it is closed. NOTE: This unit will not operate unless the
grill is in the correct position. The display will read “door” if the grill is not
attached properly.
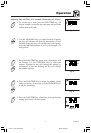
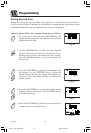
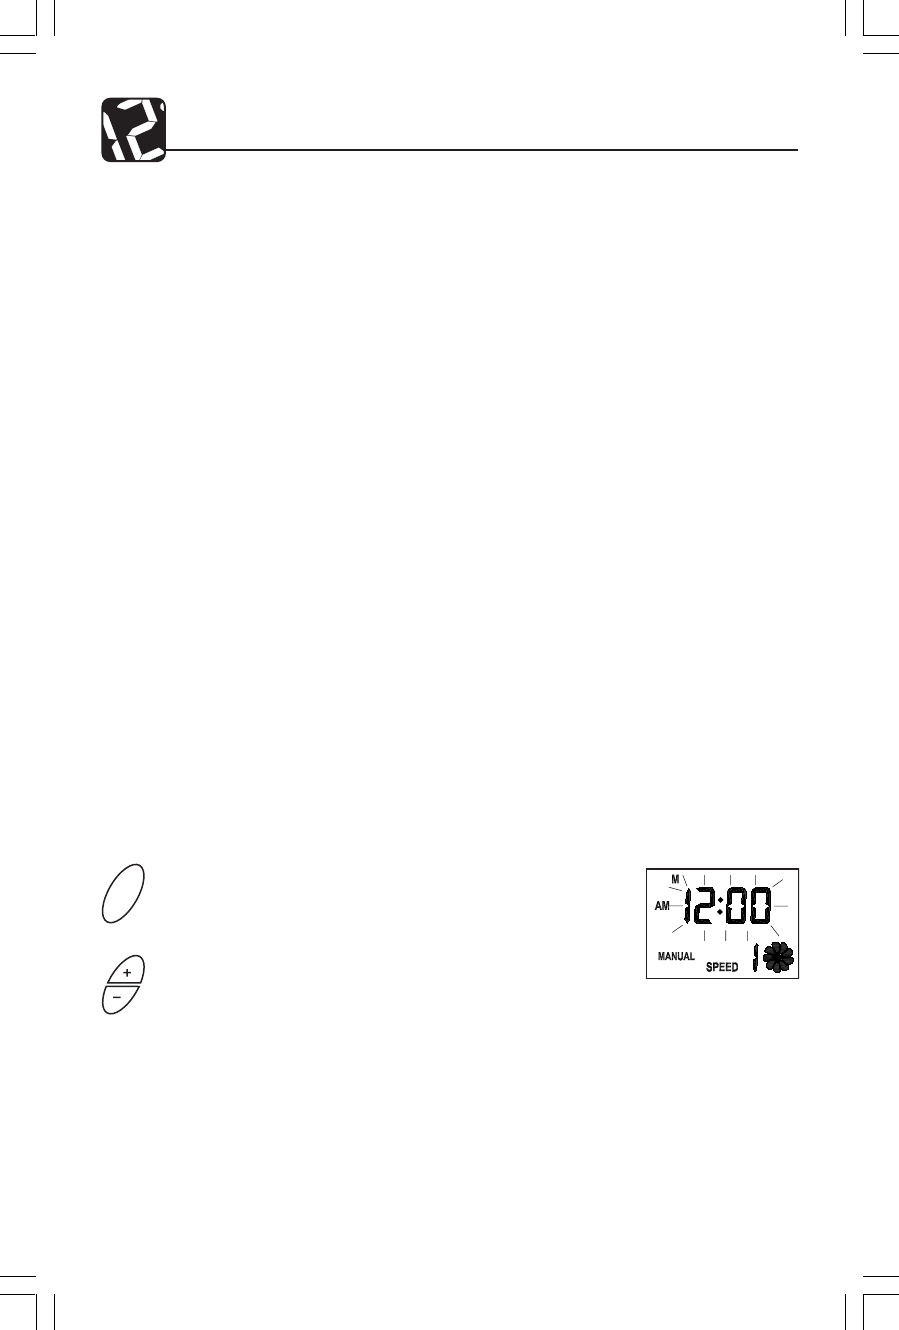
6. Plug the unit into a 120V electrical outlet and press
the ON/OFF key. The air purifier will start with a low
blower speed.
7. Use the UP/DOWN keys to adjust the blower speed to
the desired level.
If this is the first time you have used the air purifier or if the air purifier has been without
power for over 12 hours, you will need to set the day and time. The day and time will flash
to indicate that it should be set.
Fig. 6
ON/OFF
41451-01_Rev 8-6-04.pmd 8/16/04, 3:16 PM6