5
41797-01 • 07/06/10 • Hunter Fan Company
4 • Receiver Installation
4. Install the ceiling fan according to its instructions, up to the point of making
the electrical connections. Connect receiver to ceiling fan according to the
mounting types shown on the next page. Determine your ceiling fan mounting
type from the images on Pages 5-6. Most installations will be one of these
ve types.
5. If the fan is already installed, turn the power OFF at the main electrical panel.
Reverse the installation procedure according to the fan instructions, to the
point of disconnecting the fan wiring. Connect the receiver to the ceiling fan
according to the mounting type as shown on Pages 5-6.
NOTE: Some fans may have considerable excess lead wire. For easier
canopy installation, cut the excess wire leaving a minimum of 6 inches
remaining. Restrip the fan lead wires 1/2 inch. Place remaining excess wire into
the ceiling electrical box as needed.
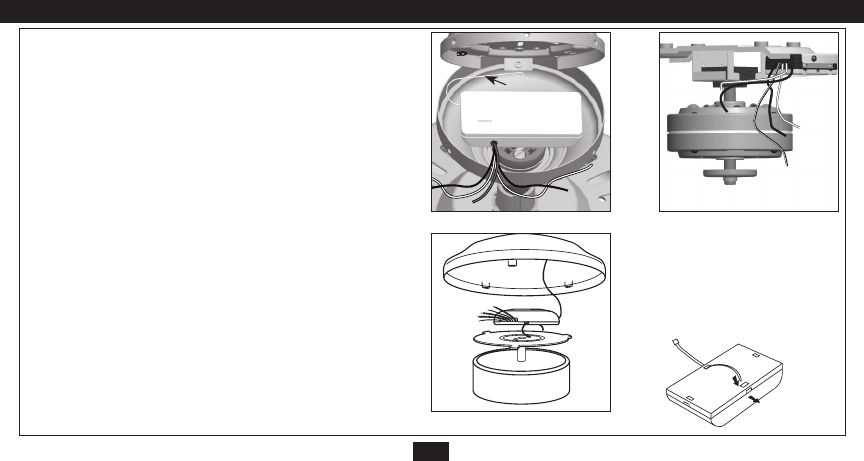
Canopy Hanger (Figure 4): Place receiver in canopy. Connect wiring as
shown in Figure 4. Extend antenna through one of the ceiling plate openings
(approximately 3–6˝).
Low Prole Style I (Figure 5): Secure receiver to the fan plate
above the motor with UL listed cable ties (not included). Connect wiring as
shown in Figure 5. Extend antenna through one of the ceiling plate openings
(approximately 3–6˝).
Low Prole Style II (Figure 6): Secure receiver to the ceiling mounting
bracket with UL listed cable ties (not included). Connect wiring as shown in
Figure 6. Extend antenna above the ceiling mounting bracket (approximately
3–6˝).
Cable Tie Routing for Low Prole
Fans (Figs.5-6): Insert cable tie through
openings as shown. DO NOT insert the cable
tie through the inside of the receiver. The
cable tie can be placed across the length or
width of the receiver to best match your fan
installation type.
Low
Prole
Style 1
Canopy
Antenna
Figure 4
Figure 5
Low
Prole
Style 2
Figure 6


