


HE120 BY-PASS DRUM HUMIDIFIER
13 69-1860EF—01
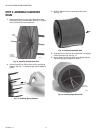
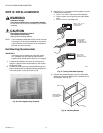
11. Snap Humidifier Cover into place.
STEP 7: INSTALL DRAIN
CAUTION
Water Hazard.
Can result in water damage to property.
Install overflow drain in applications where water
damage can result from Float Valve failure.
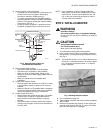
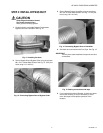
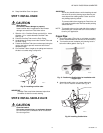
1. Slide the 1/2 in. Overflow Clamp over the 3/8 in. inside
diameter, 1/2 in. outside diameter Overflow Tube.
See Fig. 30.
2. Push the Overflow Tube over the Drain Fitting.
3. Hand-tighten the Clamp around the Overflow Tube and
the Drain Fitting.
4. Fasten the Overflow Tube (can use duct tape) along the
route to the drain to prevent movement and ensure
downward slope.
5. Cut Overflow Tube to length so the tubing terminates at
the drain or bucket using a utility knife.
Fig. 30. Installing overflow tube.
IMPORTANT
Overflow Tube must follow downward slope from
Humidifier to drain for correct draining.
STEP 8: INSTALL SADDLE VALVE
CAUTION
Chemical Hazard.
Can cause personal injury or equipment damage.
Do not use any line connected to an air conditioner.
Do not use gas line.
IMPORTANT
Do not turn handle before or while installing the sad-
dle valve. Be sure the piercing lance does not pro-
trude beyond the rubber gasket. Failure to do this
may damage piercing needle.
To prevent debris from clogging the Float Valve, do
not install the saddle valve with the handle pointing
toward the floor.
NOTE: This saddle valve can be used with either copper or
steel/brass pipe. Please refer to the correct instruc-
tions for your application.
Copper Pipe:
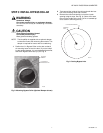
1. Shut off the water. (Either hot or cold water and either
hard or softened water can be used in the Humidifier.)
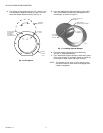
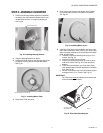
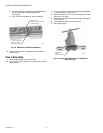
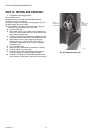
2. Turn handle counter clockwise until piercing lance is
below the rubber gasket. See Fig. 31.
Fig. 31. Positioning Saddle Valve for installation with
Copper Pipe.
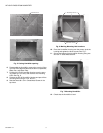
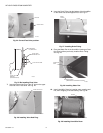
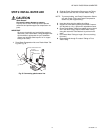
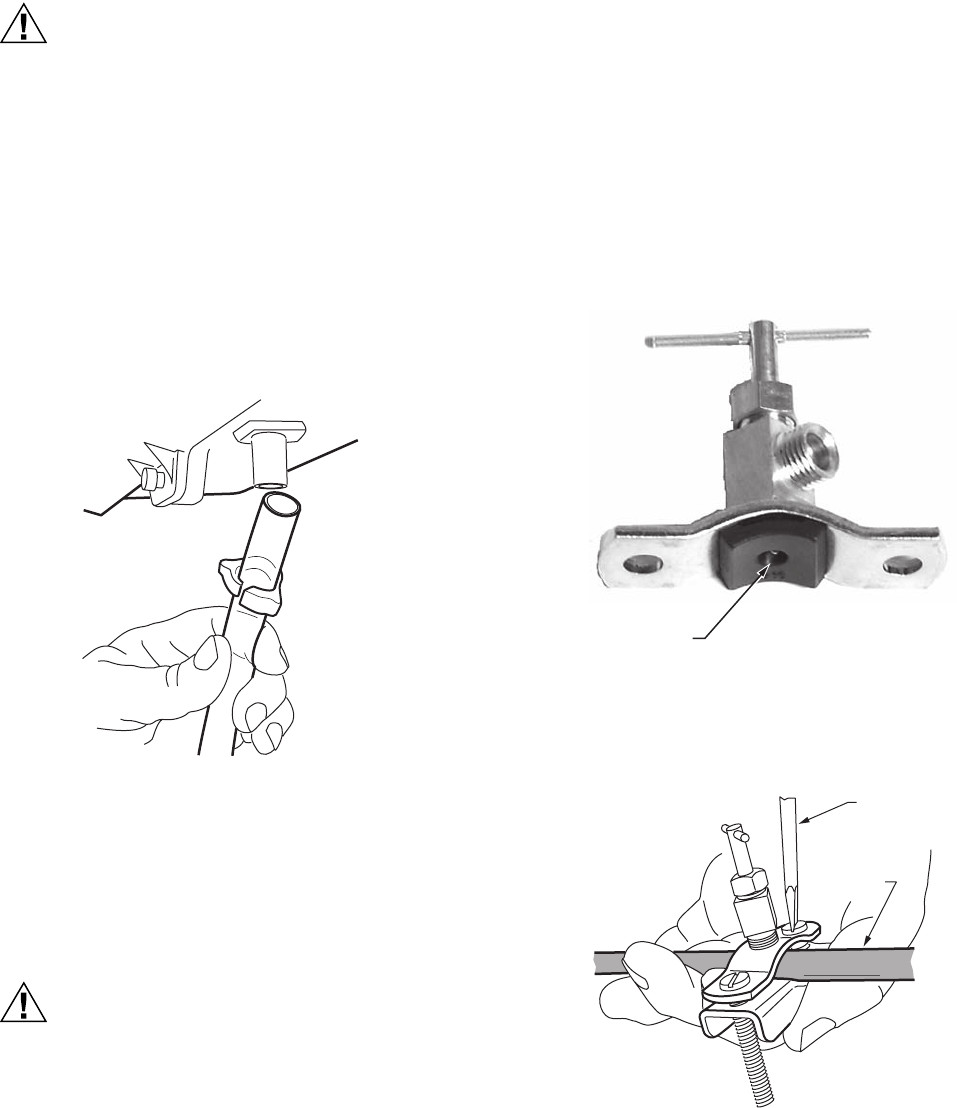
3. Assemble saddle valve over copper tube using
#10 x 1-3/4 in. machine screws. See Fig. 32.
Fig. 32. Installing Saddle Valve.
M20177
LANCE
BELOW
GASKET
M13631
M20175
SCREW DRIVER
WATER LINE