


F90A,B SELF-CONTAINED COMMERCIAL ELECTRONIC AIR CLEANER
68-0103-6 Revised 11-07
12
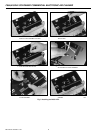
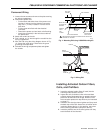
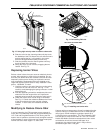
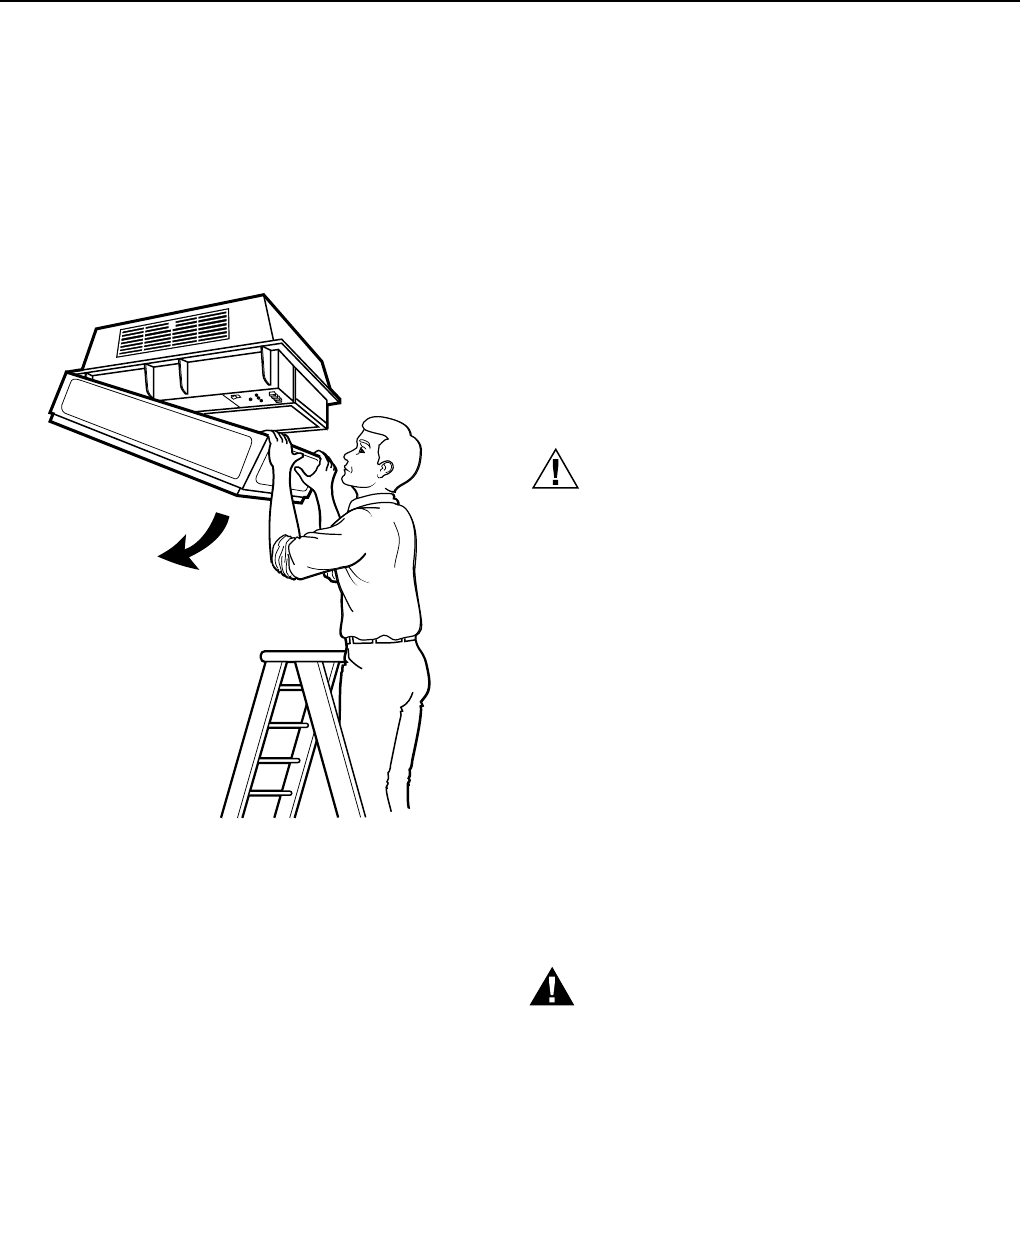
Installing Cover
1. Before installing, study the inside of the F90 cover.
One end has two latches and the other has two hinge
pins. To properly install the cover, connect the hinge
pins to the hinges.
2. Attach the hinge pins by lifting the cover above the
hinge and lowering the pins into the hinges. If the cover
is properly attached, it can hang below the F90.
3. Carefully swing the opposite end of the cover upward
and engage the latches. See Fig. 13. Assure the
latches are connected properly.
M2364
Fig. 13. Opening and closing F90 cover.
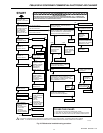
CHECKOUT
Inspect The Installation
Be sure the F90:
Is securely fastened to the ceiling or wall.
Does not interfere with normal occupant traffic.
Is properly oriented for good air circulation.
Cells are correctly oriented with air flow arrows pointing
toward the fan.
Prefilters are properly installed below the cells.
Discharge louvers are securely installed.
Cover is securely latched.
SYSTEM light turns on when fan is running.
Fan stops and ON LED turns off when the cover is
opened.
Surfaces and the installation area are wiped clean.
Marked or nicked paint is retouched.
Check F90 Operation
Turn on power.
Push the test button to assure the power supply is
functioning at all three speeds.
Use the manual switch on the F90, manual wall switch, or
remote transmitter to assure that the fan runs correctly at
all three speed settings.
Assure the ON LED lights when the fan is operating.
Assure the WASH LED (if used) lights when the cells are
removed, grille is closed, and F90 is
turned on.
ADJUSTMENTS
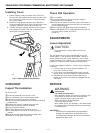
Louver Adjustment
CAUTION
Do not operate air cleaner without the louvers
installed.
The F90 plastic louvers can be repositioned to vary the
airflow pattern. Three positions are available. Position 3
directs airflow along the ceiling. Positions 2 and 1 direct
airflow downward. Use position 2 or 1 if ceiling staining is a
problem or if beams or other obstacles disrupt airflow.
Louvers are shipped in position 1. Louvers can be adjusted
as follows:
1. Loosen screw by turning counterclockwise 2-1/2
turns. Do not remove screw.
2. Push louvers up to disengage bottom tabs, and pull
bottom of the louvers out slightly to desired position.
3. Retighten the screw. Assure that the tabs on the
bottom of the louvers are positively engaged with the
F90 frame.
SERVICE
WARNING
Sharp Edges.
Can cause personal injury.
Wear protective gloves and carefully handle the cells
and prefilters to avoid cuts from the sharp metal
edges, collection plates, and ionizer wires.
Steam, Hot Water, Strong Detergent.
Can cause personal injury.
Wear rubber gloves, eye protection, and rubber apron
for protection from the strong cleaning chemicals and
hot temperatures.
IMPORTANT
The F90 and its components are susceptible to
damage. Be careful when working with them to
avoid equipment damage. Never use an acid base
detergent to wash cells.