


10
100507
PORTABLE SPACE HEATER
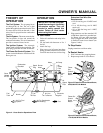
45°
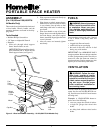
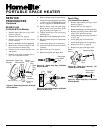
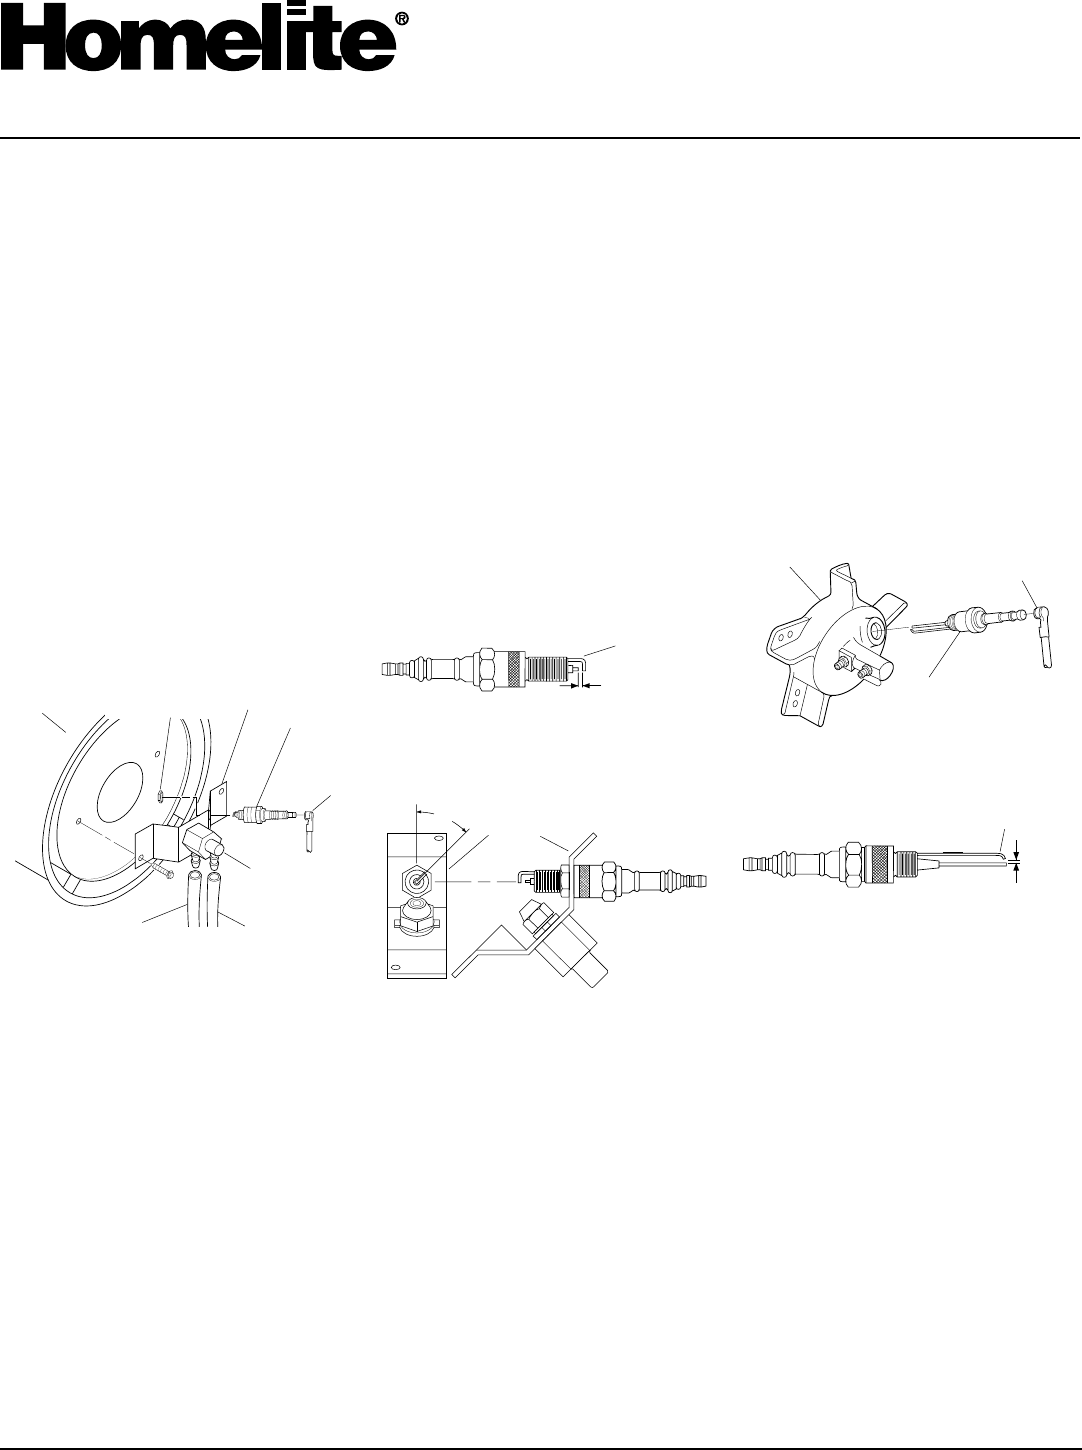
Figure 19 - Spark Plug Rotation, 35/55,000
BTU/Hr Models Only
Burner
Strap
Spark
Plug
Spark Plug Wire
Burner
Head
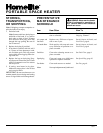
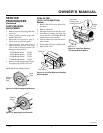
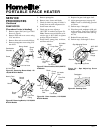
Figure 20 - Spark Plug Removal, 110/
150,000 BTU/Hr Models
Figure 21 - Spark Plug Gap, 110/150,000
BTU/Hr Models
Gap
Bend Here to
Adjust Gap
Spark Plug
(110/150,000 BTU/Hr Models)
1. Remove upper shell (see Upper Shell
Removal, page 8).
2. Remove fan (see Fan, page 8).
3. Remove spark plug wire from spark plug.
4. Remove spark plug from burner head
using 13/16" open-end wrench.
5. Clean and regap spark plug electrodes
to .075" gap.
6. Install spark plug in burner head.
7. Attach spark plug wire to spark plug.
8. Replace fan (see Fan, page 8).
9. Replace fan guard and upper shell.
SERVICE
PROCEDURES
Continued
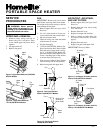
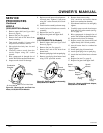
SPARK PLUG
(35/55,000 BTU/Hr Models)
1. Remove upper shell (see Upper Shell
Removal, page 8).
2. Remove fan (see Fan, page 8).
3. Remove fuel and air line hoses from
nozzle assembly.
4. Remove spark plug wire from spark plug.
5. Remove two (2) screws using 5/16" nut-
driver and remove burner strap.
6. Place hex-body of spark plug into vise
and tighten.
7. Remove spark plug mounting nut us-
ing 11/16" open-end wrench.
Air Line Hose
Burner
Strap
Spark
Plug
Wire
Nozzle
Assembly
Fuel Line
Hose
Spark
Plug
Spark Plug
Mounting Nut
Combustion
Chamber
Bend Here
to Adjust
Gap
Gap
Figure 17 - Spark Plug Removal, 35/55,000
BTU/Hr Models
Figure 18 - Spark Plug Gap, 35/55,000
BTU/Hr Models
8. Remove burner strap from spark plug.
9. Clean and regap spark plug electrodes
to .055" gap for 35,000 Btu/Hr model
and .075" gap for 55,000 Btu/Hr model.
10. Replace burner strap onto spark plug.
Rotate burner strap to position spark
plug electrodes (see Figure 19).
11. Tighten spark plug with spark plug
mounting nut.
12. Release hex-body of spark plug from vise.
13. Replace burner strap onto combustion
chamber.
14. Attach spark plug wire to spark plug.
15. Attach fuel and air line hoses to nozzle
assembly.
16. Replace fan (see Fan, page 8).
17. Replace fan guard and upper shell.