


August 1, 2008
Page 25
Heat & Glo · Tiara Petite B · 7026-101K
Any damaged valve components should not be installed.
If a valve or regulator has been dropped or appears to
have been modifi ed, the valve or regulator should not
be installed.
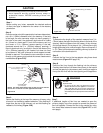
TOOLS REQUIRED: #2 Phillips head screwdriver, slot-
ted screwdriver or Torx TH20; 5/32 in. Allen wrench; 3/8
in. open end wrench.
6
Gas Information
A. Fuel Conversions
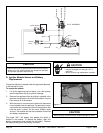
Before making gas connections ensure that the appliance
being installed is compatible with the available gas type.
Any natural or propane gas conversions necessary to meet
the appliance and locality needs must be made by a qualifi ed
technician using Hearth & Home Technologies specifi ed and
approved parts.
1. Converting to LP Gas
KIT CONTENTS: Replacement orifi ce; replacement
pilot injector; valve regulator; and conversion label.
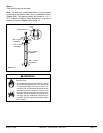
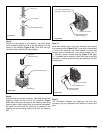
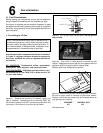
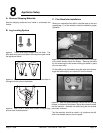
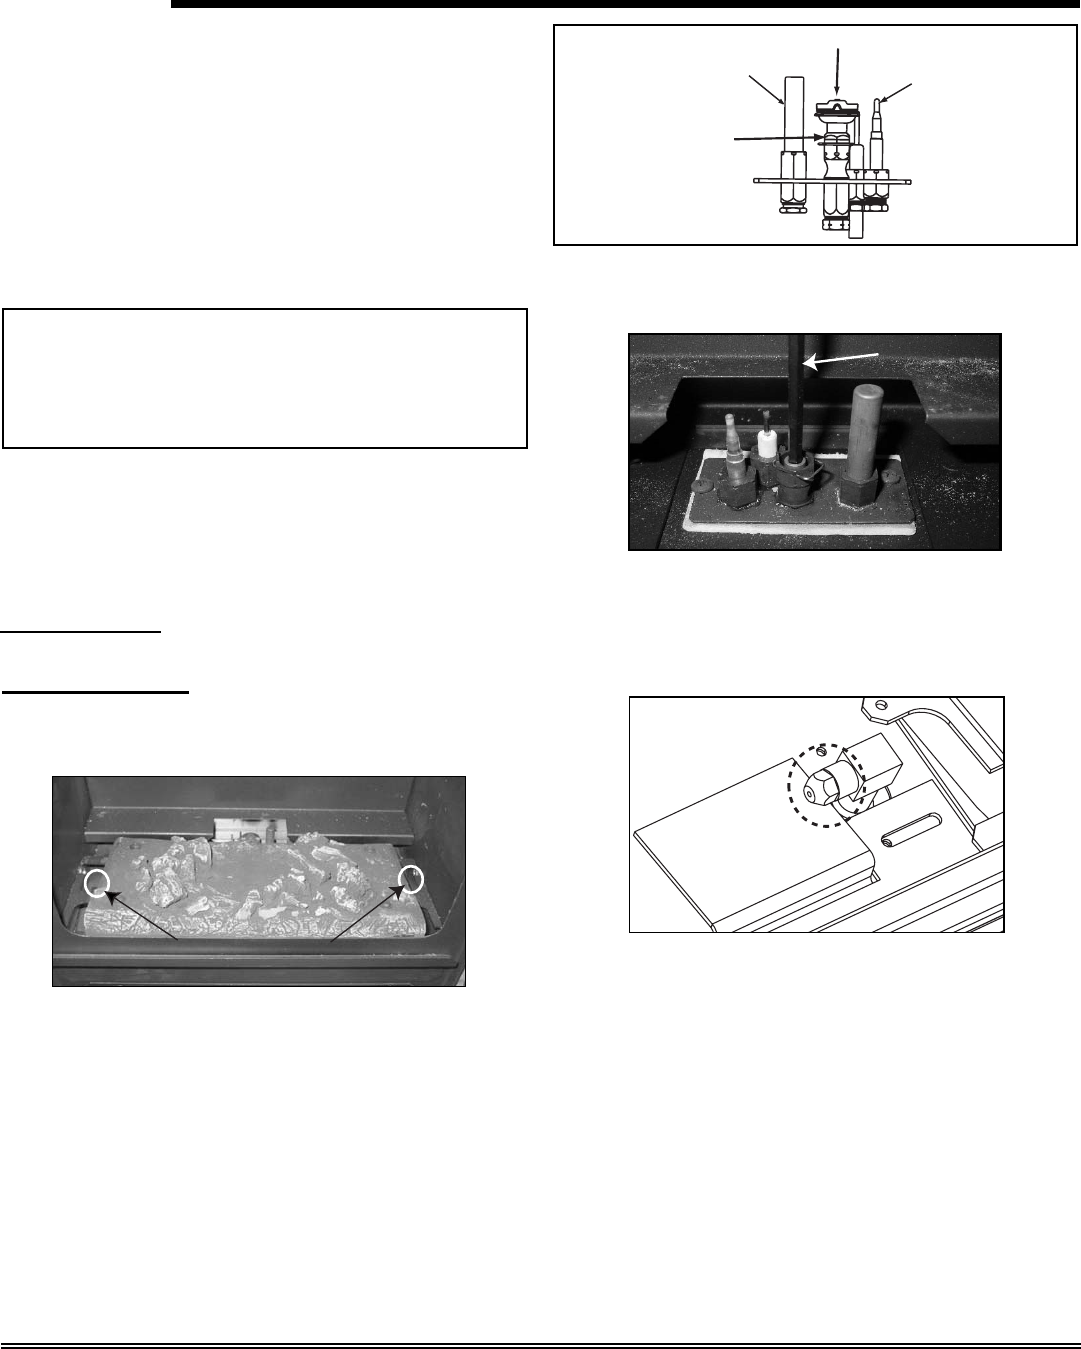
Figure 6.1 Remove top and front (if installed), glass, and
logs (if installed). Remove burner by removing ONLY the
two screws indicated. DO NOT remove the screws from the
burner top. Lift the burner up and out of the fi rebox.
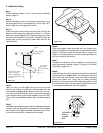
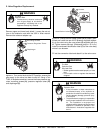
Figure 6.2 Pull off pilot hood and set aside. Do not remove
the wire clip.
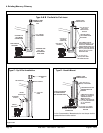
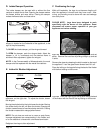
Figure 6.4 Remove main burner orifi ce using a 3/8 in. wrench.
Be sure to align notch on left side of pilot hood, shown.
Replace orifi ce with the proper size as indicated below for
your gas type and venting.
PROPANE NATURAL GAS
#56 #49
Reinstall burner.
Remove 2 screws
MILLIVOT GENERATOR
THERMOCOUPLE
PILOT HOOD
A
LIGNMENT NOTCH
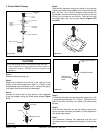
5/32 in. Allen
wrench
Figure 6.3
Use a 5/32 in. Allen wrench to remove the pilot
injector.
Replace pilot injector with the one supplied with the
appliance (#35 for Propane, #62 for Natural Gas).
Replace pilot hood, snapping into position.
NOTE: Gas conversions should only be performed by a
qualified service person, and/or where required by state
and local codes, licensed installer/service technician. In
the Commonwealth of Massachusetts, installation must
be performed by a licensed plumber or gas fitter.