


18
Super-Magnum Coal Stoker Stove
Do Not Burn Wet Coal!
3-90-02702R4_08/12
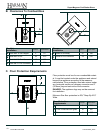
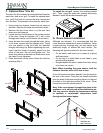
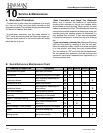
F. Optional Door Trim Kit
The door trim kit includes a brushed stainless frame for
each door, and an air grill. To install the optional door
trim, you'll rst need to remove the latch mechanism
from the door. The process is the same for each door.
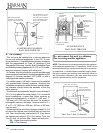
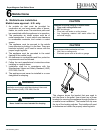
1. Using a hex key wrench, loosen the set screw at
the latch. Remove the latch pin and latch handle.
2. Remove the door from stove. Lay the door face
down on a soft material.
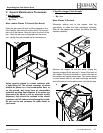
3. Locate the four drill dimples on the inside corners
of the door. Using bit supplied (1/4”), drill a hole
through each corner. (two locations on ash door)
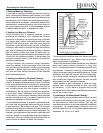
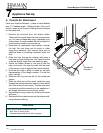
4. Insert the door trim studs through the holes. Using
a nut driver, secure with the supplied nuts. These
nuts are placed on the stud with the indented
triangle side facing up. Before tightening the nuts,
check that the frame is properly nested into the
offset of the door. Do not over-tighten nuts. The
frame may distort or the stud can break loose from
the frame if over-tightened.
5. Place door back on the stove. Attach the latch by
reversing Step 1.
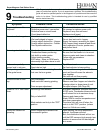
To Install the air grill, remove the existing painted
grill. Then, using the same two screws and spring
washers, install the brushed stainless grill.
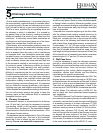
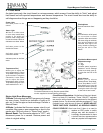
G. Room Sensor Installation
Although not required, it is recommended that the
room sensor be connected in every installation. Using
a minimum size 18 gauge wire, you may splice in an
additional length, to extend the room sensor. The
following are typical locations for the room sensor;
• On an interior wall next to or in place of a typical
wall thermostat.
• On the leg of a coffee table or end table in your
favorite sitting location.
• Dangled behind the stove, hidden from view, acting
as a return air sensor.
Note: When installing the room sensor, limit the
distance from the stove to 25 feet or less.
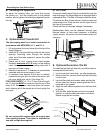
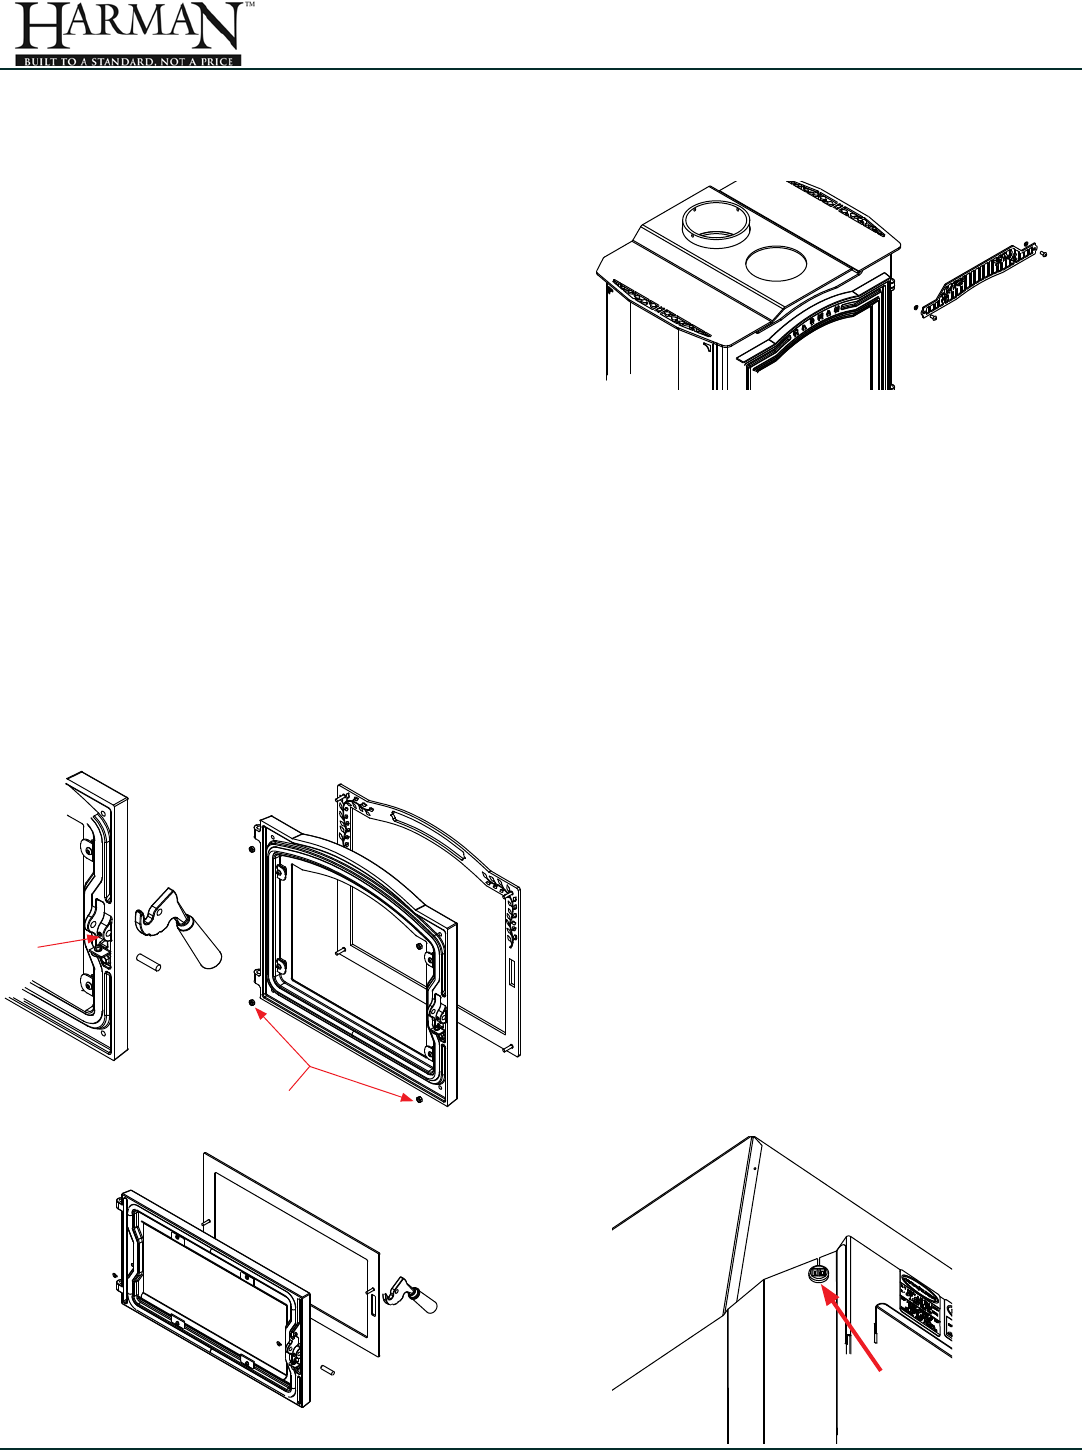
Once the location has been decided, run the wiring to
the rear of the stove. Crimp the two female terminals
onto the ends of the wires and plug them in to the port
provided on the right rear portion of the stove. These
connections are not polarity specic.
Note: If the room sensor is located too close to the
appliance, or in a direct path of the distribution air,
You may need to elevate the temperature setting
to maintain a comfortable temperature level
throughout the heated space.
Room Sensor
attaches on
rear of stove.
Set Screw
Locking nuts