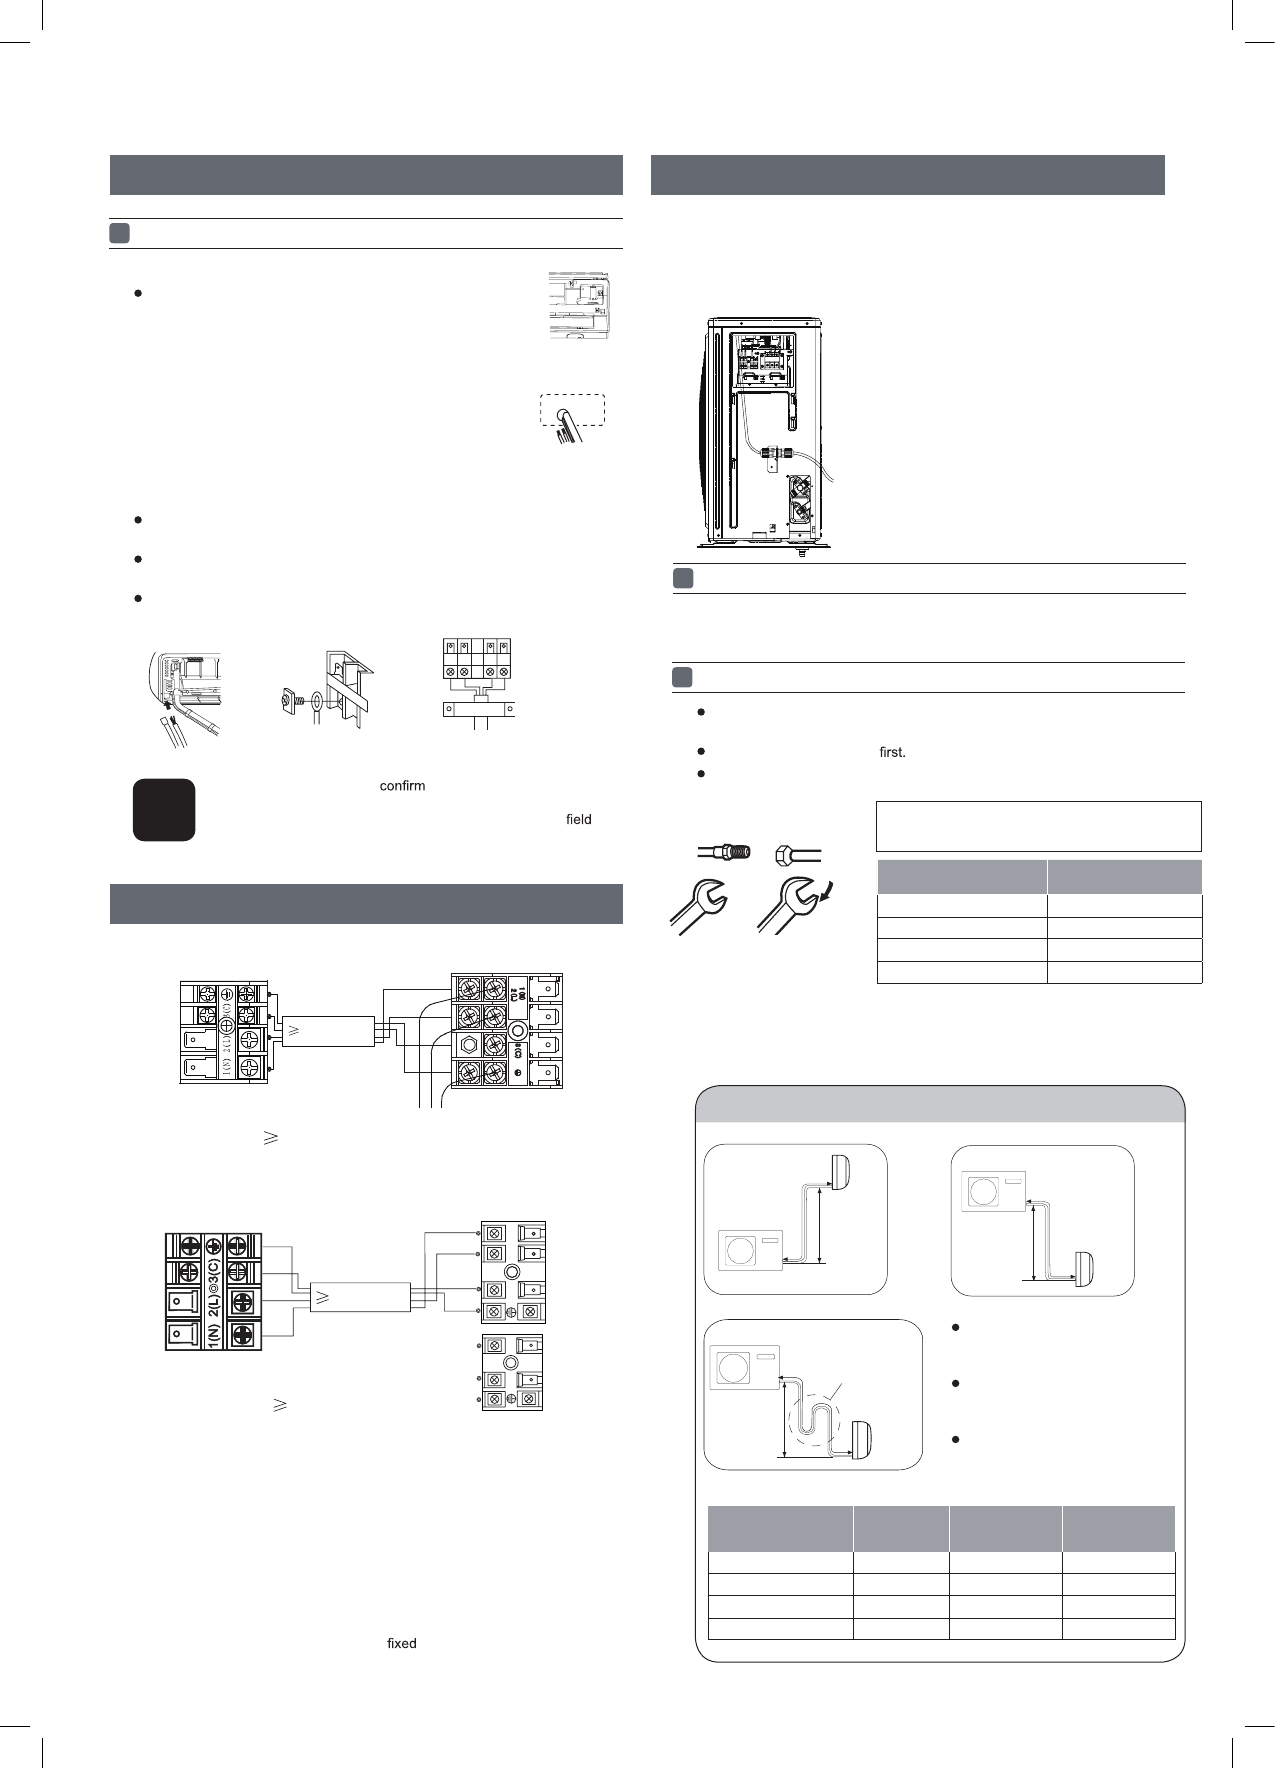
Half union
Flare nut
Torque wrench
Spanner
Forced fastening without careful centering may
damage the threads and cause a leakage of gas.
Pipe Diameter( ) Fastening torque
Liquid side6.35mm(1/4") 18N.m
Liquid/Gas side9.52mm(3/8") 42 N.m
Gas side 12.7mm(1/2") 55N.m
Gas side 15.88mm(5/8") 60 N.m
Indoor unit
4G0.75mm
2
POWER
Power cable: 3G1.5mm
2
Outdoor unit
Pipe diameter (Ø) Fastening torque
Liquid side 6.35mm (1/4") 18 N.m
Liquid/Gas side 9.52mm (3/8") 42 N.m
Gas side 12.7mm (1/2") 55 N.m
Gas side 15.88mm (5/8") 60 N.m
Forced fastening without careful centering may
damage the threads and cause a leakage of gas.
6
2. If the PC board fuse is broken replace with a T.3.15A/250VAC (Indoor)
or T.25A/250VAC (Outdoor).
3. The wiring method should be in line with the local and national wiring
standards.
4. After installation, the power isolator should be easily reached.
5. A breaker should be incorporated into
wiring. The breaker should be
all-pole switch and the distance between its two contacts should be not less
than 3mm.
To bend a pipe, use the correct bending tool, so as not to crush the
pipe, and the bending radius should be 30 to 40 mm or longer.
Connect the pipe gas side
The connection pipe is specialized for R410A.
Install according to ‘
Drawing for the installation of indoor and outdoor units’
(see page 4)
DRED FunctionIndoor unit cont.
Electrical connection
1
Installation of Outdoor Unit
2
Connection of pipes
4
Connecting the indoor/outdoor Electric Cable
Removing the wiring cover
Remove terminal cover at right bottom corner of indoor unit,
then take off wiring cover by removing its screws.
When connecting the cable after installing the indoor unit
1. Insert from outside the room cable into left side of the wall
hole, in which the pipe is fitted or installed.
2. Pull out the cable on the front side, and connect the cable
making a loop.
When connecting the cable,
the terminal number of indoor
and outdoor units carefully. If wiring is not correct, the system will
not operate correctly. Damage to the PCB due to incorrect
wiring is not covered by warranty.
When connecting the cable before installing
the indoor unit
Loosen the screws and insert the cable ends fully into terminal block,
then tighten the screws.
Pull the cable slightly to make sure the cables have been properly
inserted and tightened.
After the cable connection, always fasten the connected cable
with the wiring cover.
Note
{
POWER
3G2.5mm
2
Indoor unit
Outdoor unit
4G0.75mm
2
1
2
N
2
)
(
3
(C)
L
1
)
(
Power cable:
HSU-26HEK03/R2(DB)/O
HSU-35HEK03/R2(DB)/O
HSU-53HEK03/R2(DB)/O
HSU-71HEK03/R2(DB)/O
Outdoor unit
Indoor unit
A
B
Outdoor unit
Indoor unit
A
B
A
B
Outdoor unit
Indoor unit
Oil trap
CAUTION
Max.Elevation:Amax
= 10m (HSU –
26/35)
= 15m (HSU –
53/71)
In case the elevationA is more
than 5m, oil trap shoud be
installed every 5~7m
Max. Length: Bmax
= 15m (HSU –
26/35)
= 25m (HSU –
53/71)
Be carefulthat foreign materials such as sand, etc. do notenter thepipe.The
chargeof refrigerant must be conducted byprofessional air conditionerengineer.
Beforeadding additionalrefrigerant, perform air evacuation from the refrigerant
pipesand indoorunit using a vacuum pump, then charge additional refrigerant.
Model Base charge
Pre charge
pipe length
Additional
charge amount
HSU-26HEK03/R2(DB)/O 1000g 7m 20g/m
HSU-35HEK03/R2(DB)/O 1080g 7m 20g/m
HSU-53HEK03/R2(DB)/O 1550g 10m 20g/m
HSU-71HEK03/R2(DB)/O 2100g 10m 50g/m
6.Please consult your reseller and/or installer to determine if you have a DRED appliance.
Connect output from your home's electricity power meter (where available) to the RJ45
connector on the outdoor unit, as shown.
(This function is unavailable on some models.)
1. If the supply cord is damaged, it must be replaced by the manufacturer or its
service agent or a similar qualified person. The type of connecting wire
and power cable is
H05RN-F
or H07RN-F.


