


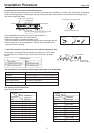


(1)Pressurize for more than 3 minutes under 0.3MPa(3.0kg/cm
2
g)
(2)Pressurize for more than 3 minutes under 1.5MPa(15kg/cm
2
g). Serious leakage may be found.
(3)Pressurize for more than 24 hours under 3.0MPa(3.0kg/cm
2
g). Small leakage may be found.
Check if the pressure decrease
If the pressure does not decrease, then the test passes.
If the pressure decrease, check for leakage.
There will be a 0.01MPa(0.1kg/cm
2
g) pressure change for every 1 C ambient temperature change during the 24-hour
pressure charge. It should be corrected during the test.
In the case of pressure decrease during steps (1) to (3), check the joints with the ear, hand or soapsuds for leakage. Repair
it by welding or tighten the connecting nut up.
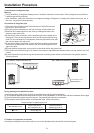
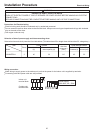
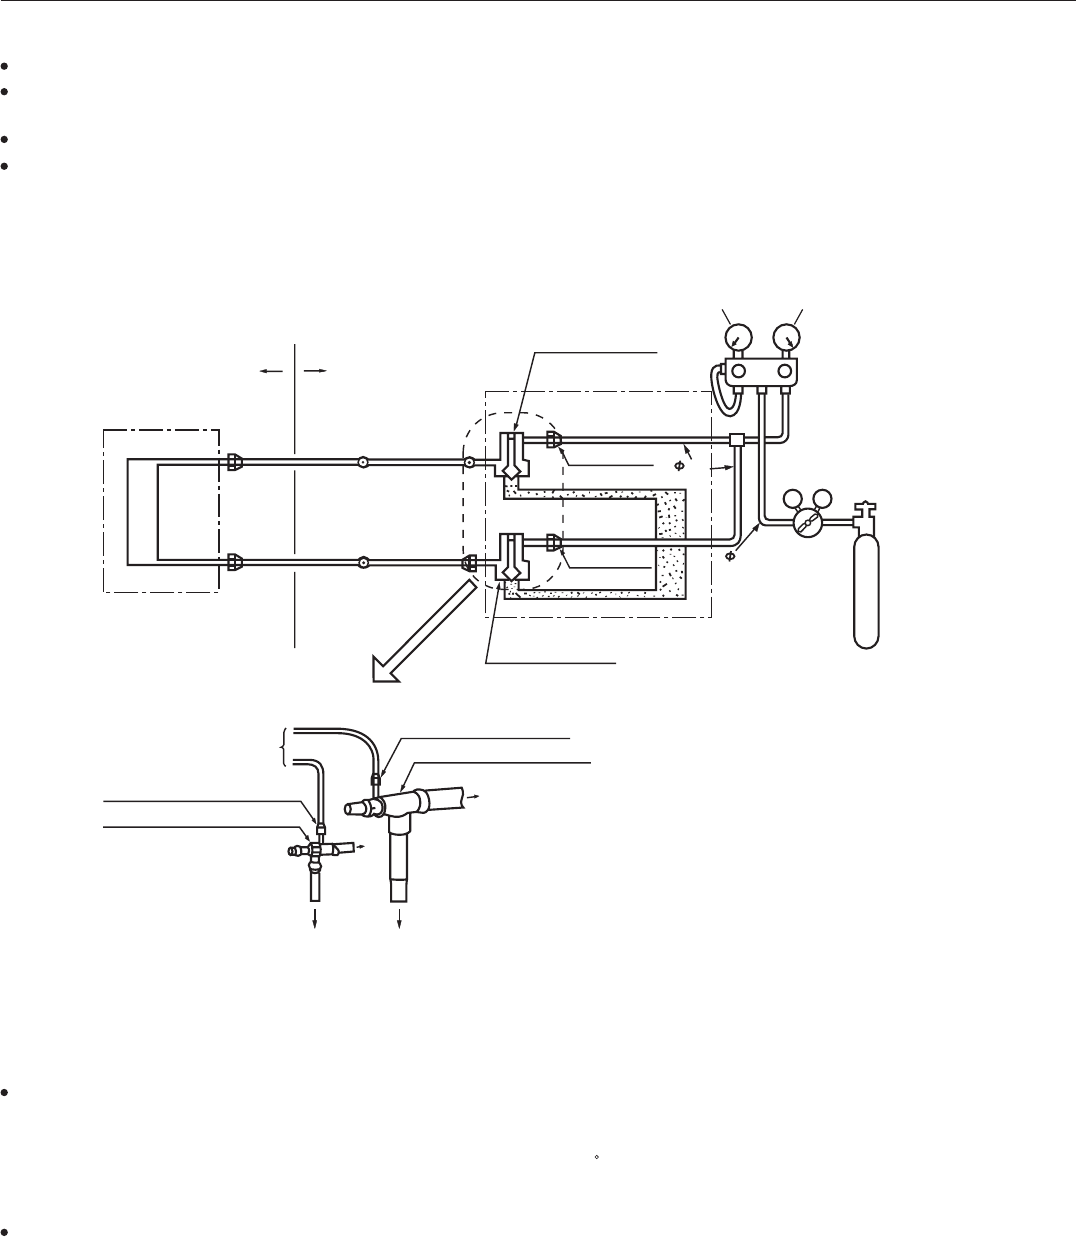
Check for leakage
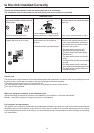
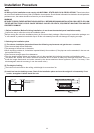
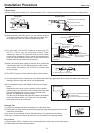
Leak test must be made after connection of the refrigerant pipe according to the following diagram.
Close all the gas and liquid valves.To prevent nitrogen gas from invading the outdoor circulating system, close the valve
tightly before pressure increase,(Both the gas and liquid valves must be tightly closed.)
Every cooling system must be charged slowly from the gas and liquid valves.
It must be charged from the gas and liquid valves.
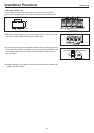
Installation Precedure
22
6. Leak Test
Note:
Never use oxygen, flamable and poisonous gases for the leak test.
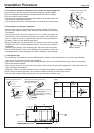
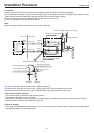
Detailed diagram of the three-way valve
Three-way valve fully closed
liquid side
6.4
6.4
Copper pipe
Relief valve
Nitrogen bottle
V
L
V
H
Gauge distributor
High-pressure gaugeLow-pressure gauge
Three-way valve fully closed
(gas side)
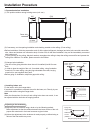
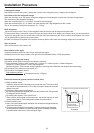
Solder
joint
Solder joint
Tightly
closed
Indoor unit
Indoor Outdoor
Access hole
Copper pipe
Solder joint
Tightly
closed
Tightly
closed
Access hole
Outdoor unit
Field tube
installation
Field tube
installation
T
o the unit
To the unit
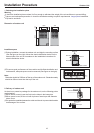
(Gas side)three-way valve
(Gas side )access hole
To the gauge distributor
(Liquid side)access hole
(Liquid side)three-way valve
Outdoor Unit