


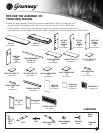
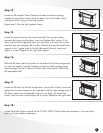
Step 19
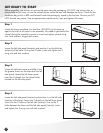
Take your electric firebox out of its packaging and position it between
the 2 legs of the mantel. Once you are close to the wall, plug the firebox
into the nearest outlet.
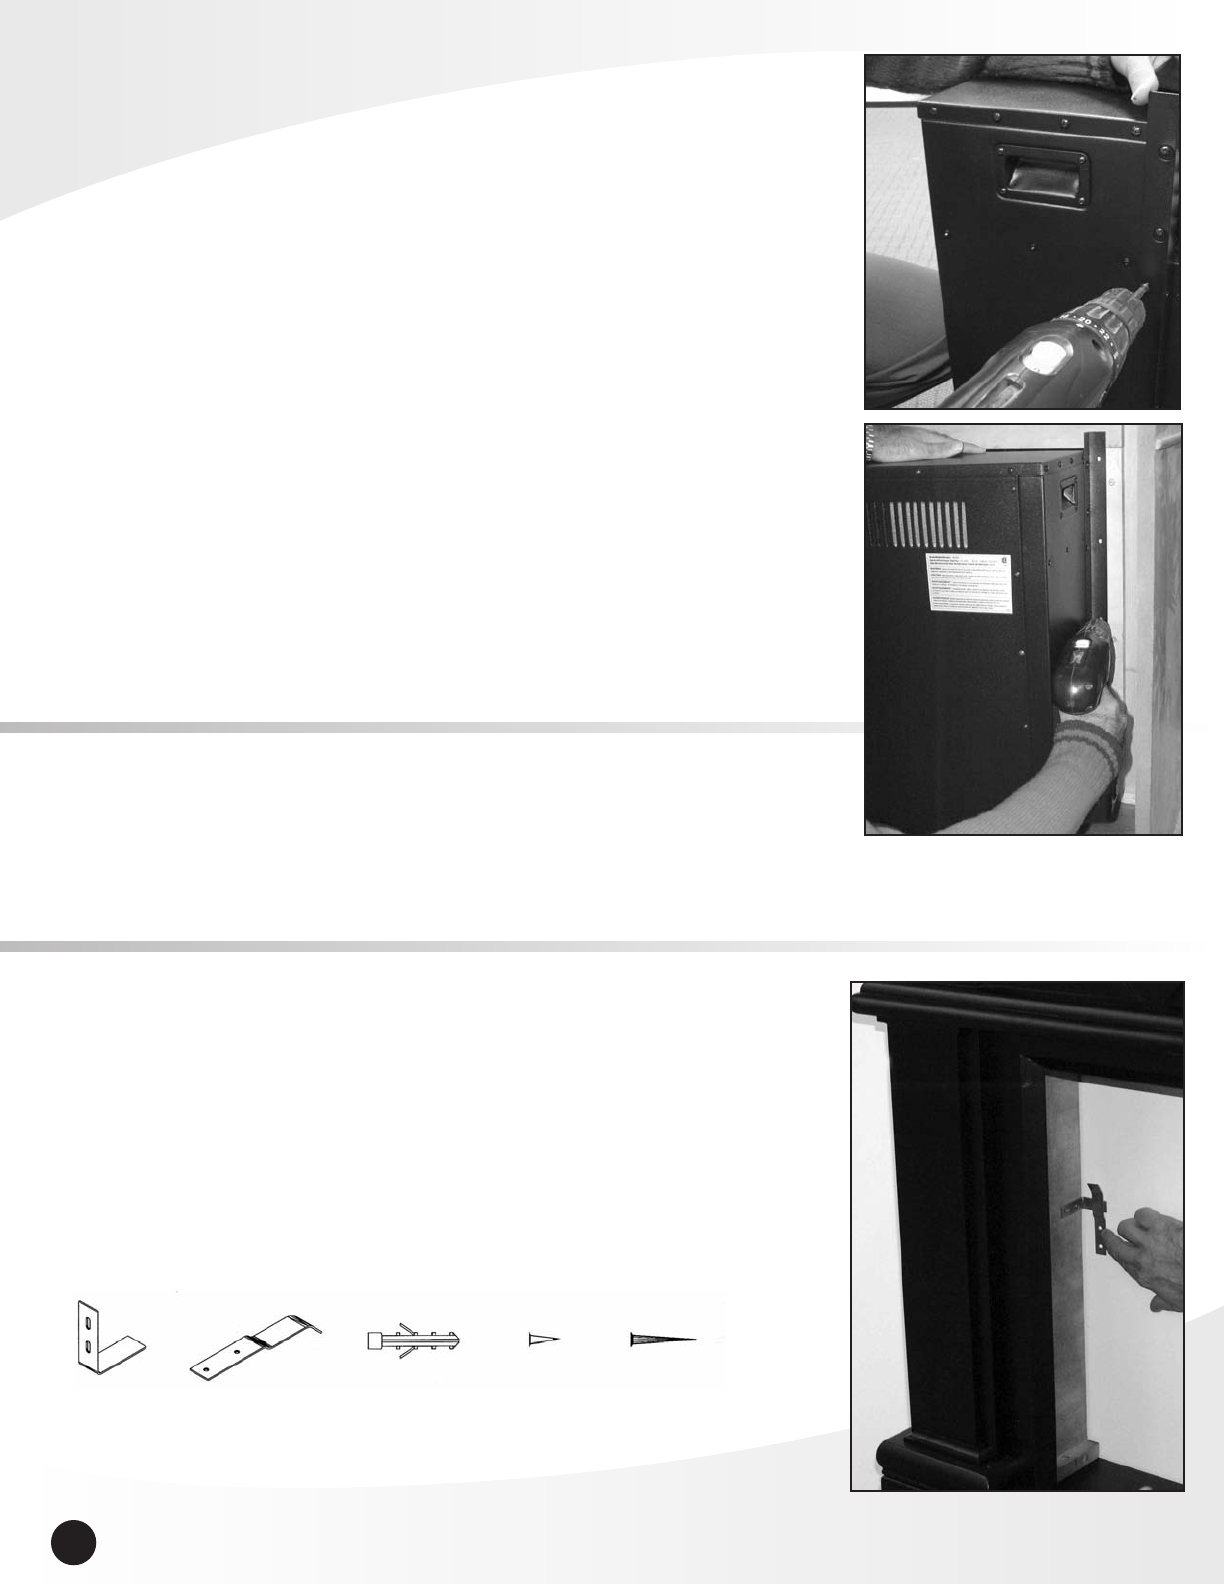
The firebox comes with 3 metal brackets and 20 black screws. These
metal brackets must be attached to both the sides of the firebox and
the mantel to ensure that your firebox does not move around as you
use it. 2 of the brackets have 2 large holes on one side. These large
holes line up with 2 screws on the side of the firebox. The other
screws provided must be inserted into the holes at the other end of the
bracket and into the firebox. The other side of each bracket attaches
to the mantel.
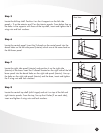
The 3
rd
bracket has no holes on 1 side. That side should go up against
the firebox top but should not be attached as the heater sits right
underneath the bracket. Only the mantel side should be attached.
If you have any questions about the firebox please reference the
installation instructions that come with the firebox. Please reference
the Quick Tips section of that instruction manual.
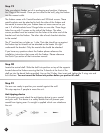
Step 20
Locate the central shelf. Slide the shelf into position on top of the supports
located above the firebox ensuring that the 2 dowels at the front of the
shelf go into the dowel holes provided. Line up the 2 holes, then insert and tighten the 2 wing nuts and
lock washers.
You must secure the firebox into position before you position this shelf.
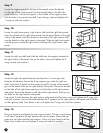
Step 21
You are now ready to position your mantel against the wall.
This step requires 2 people to move the unit.
Anti-tipping device
At this point you must attach the anti-tipping device to your mantel
and your wall. This device is a safety feature that will prevent your
mantel from tipping over if a weight is applied which can unbalance
the unit.
6