


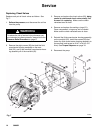

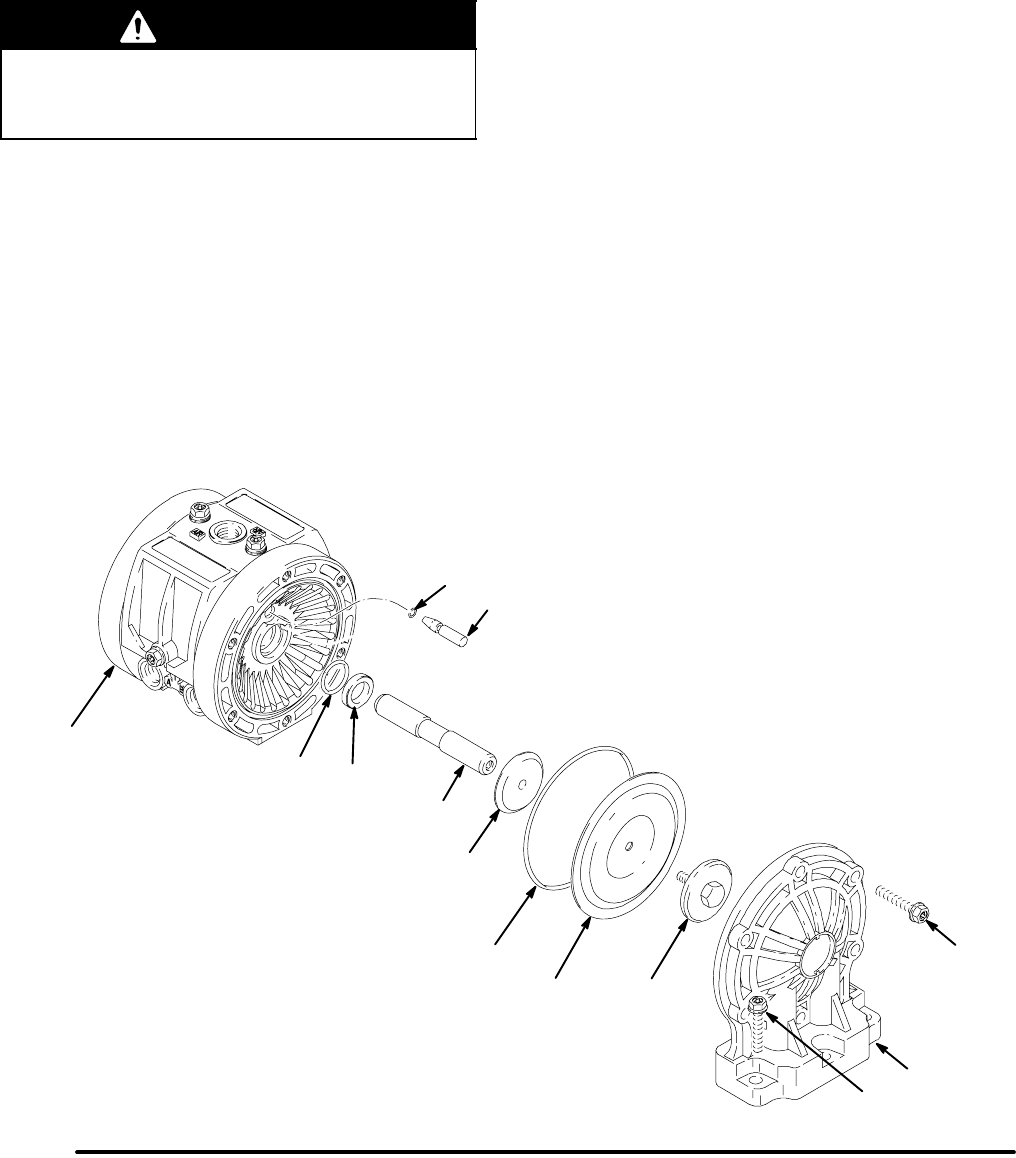
Fig. 6
50
30
57
8
06180D
58
58
51
1
10
11
9
12
13
13308652
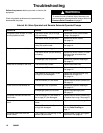
Service
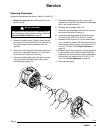
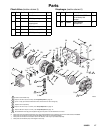
Replacing Diaphragms
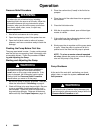
Replace the diaphragms as follows. See Fig. 6 and Fig 7.
1. Relieve the pressure, and disconnect the air line
from the pump.
WARNING
To reduce the risk of serious injury whenever you
are instructed to relieve pressure, always follow the
Pressure Relief Procedure on page 8.
2. Remove the eight screws (58) that fasten the two
fluid covers (51) to manifold (52), and remove the
fluid cover/center housing assembly from the
manifold.
3. Remove the six screws (58) that fasten each fluid
cover (51) to the center housing (1), and pull the
fluid covers off of the center housing.
4. Remove the diaphragm plates (50) from the shaft
(10), and remove the diaphragms (30), and air-
side diaphragm plates (11).
5. Remove the diaphragm pins (8), remove and
replace the o-rings (9), and reinstall the diaphragm
pins in the center housing (1).
6. Reinstall the diaphragm shaft (10).
7. Install the new diaphragms (30) with the concave
side toward the center housing (1).
8. Screw the diaphragm plates (50) onto the shaft
(10), and torque to 28–33 in-lb (3.2–3.7 NSm).
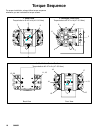
9. Reinstall the fluid covers (51) on the center hous-
ing (1), install the screws (58) that fasten the fluid
covers to the center housing, and torque to 42–47
in-lb (4.7–5.3 NSm). See Torque Sequence on
page 18.
10. Reinstall the fluid covers/center housing assembly
on the manifold (52), install the screws (58) that
fasten the fluid covers/center housing assembly to
the manifold, and torque to 42–47 in-lb (4.7–5.3
NSm). See Torque Sequence on page 18.
11. Reconnect the pump.