


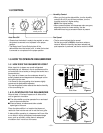
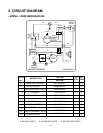
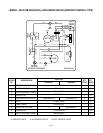
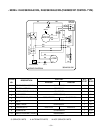
3.2 CONTROL PARTS
3.2.1 ROTARY SWITCH, HUMIDISAT AND
NEON LAMP
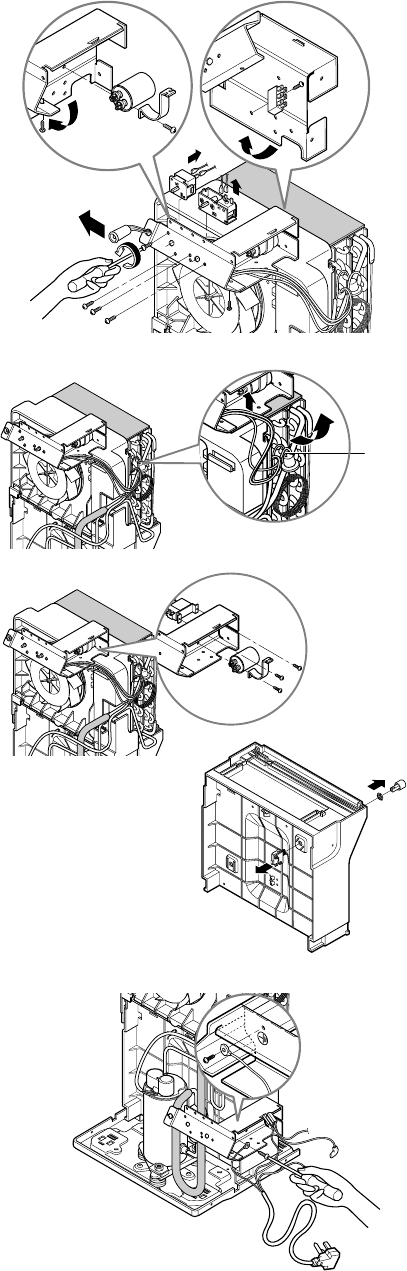
1.
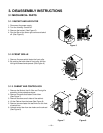
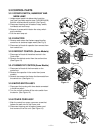
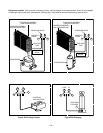
Unfasten screws located in the bottom side of control box
(see Figure 9) and fasten capacitor clamp. (DH5010B/DH4010B)
And then unfold two sides of control box. (See Figure 9)
2. Disconnect housing and all leads of rotary switch,
humidistat and neon lamp.
3. Remove 4 screws which fasten the rotary switch
and humidistat.
4. Pull the neon lamp out.
3.2.2 CAPACITOR
1. Remove each screw that fastens capacitor after
control box is stretched upper wand.(See Fig. 9)
2. Disconnect all leads of capacitor then remove them
from control box.
3.2.3 DEFROST CONTROL (Some Models)
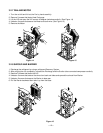
1. Disconnect all leads of the defrost control in the
Control Box.
2. Remove the defrost control from the suction tube.
(See Figure 10)
3.2.4
THERMOSTAT CONTROL(Some Models)
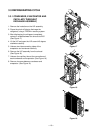
1. Disconnect all leads of the thermostat on the
control box.
2. Remove the capacitor in the control box.(some
models)
3. Remove two screws that fasten the thermostat from
the control box. (See figure 11)
3.2.5 MICRO SWITCH ASSY
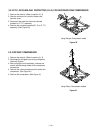
1. Disconnect the housing with three leads connected
in the Micro switch.
2. Turn the nut left and take off the micro switch from
the barrier. (See Figure 12)
3.2.6 POWER CORD ASSY
1. After the control box opens, remove a screw that
fastens the earth wire of the Power cord.
2. Disconnect housing and all leads of power cord
then remove it from the unit. (See Figure 13)
—11—
DH3010BDH5010B
DH4010B
Defrost
control
Figure 9
Figure 10
Figure 12
Figure 11
Figure 13