


9
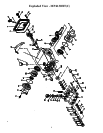
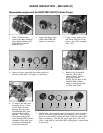
29. Replace any shims (#20A) and position the bearing cover (#14) as before. Tighten the bearing cover bolts (#17)
evenly to position the bearing race. Torque the bolts to 125 inch-pounds. Once the crankshaft reassembly is
complete, oil the crankshaft
races freely before replacing the connecting rod (#24) end caps.
30. Reassemble the connecting rods (#24), matching the numbered (or colored) halves. Torque the connecting rod
bolts (#24A) to 250 inch-pounds.
31. To replace the oil seal (#31) apply locktite to the outside edges of the seal and install from the front of the
crankcase (#1). The side of the seal with the spring must face the oil. Make sure that the face of the seal is flush
with the crankcase.
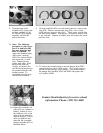
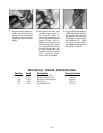
32. Inspect the ceramic plungers (#29B) and replace them if
necessary. Clean the ends of the ceramic and remount onto the
crosshead/plunger assembly. Make certain that the end of the
plunger which is not counter-bored is facing the discharge
side of the pump. Install the seal washer (#29D) on the bolt
assembly.
33. Clean the bolt threads (#29C), apply
locktite, and remount.
29B 29D 29C
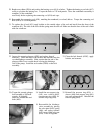
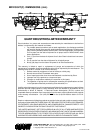
36. Reassemble the discharge
valve assembly by placing
the valve plate (#45), spring
(#46), and spring retainer
(#47) on top of the valve seat
(#44). Press fit together.
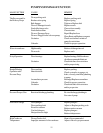
33a.Torque the ceramic plunger
bolt assembly to 300 inch-
pounds. If originally
removed, reinstall the stud
bolts (#49).
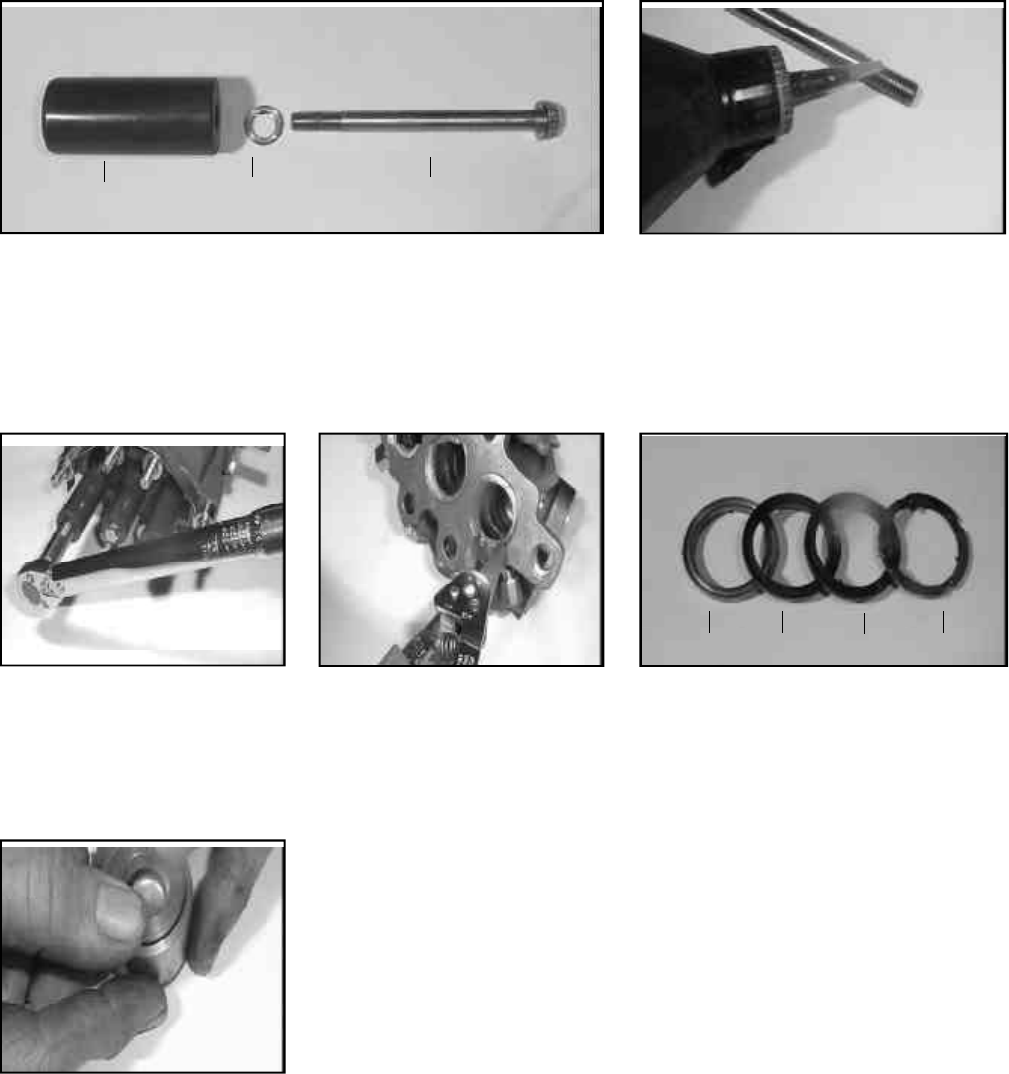
34. Install the rear support ring
(#41), rear v-sleeve (#40),
rear pressure ring (#39). In-
stall the snap ring (#36).
35. Reinstall the pressure ring (#39), v-
sleeves (#40) and support ring (#41)
into each plunger bore. Reinstall the
tension spring (#42).
39 40 40 41