


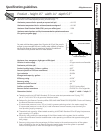

Installation Instructions
11
Remove cap from RO cartridge housing. Install
RO cartridge, O-ring end first. Lubricate cover O-
ring with food-grade silicone grease, if necessary.
(DO NOT use petroleum jelly.) Tighten cap
securely.
12
If you only replaced the prefilter and postfilter,
allow faucet to run 5 minutes to remove
harmless carbon particles. If you replaced the
RO cartridge, fill and empty the storage tank
three times, until taste and odor from food-grade
membrane preservative is gone.
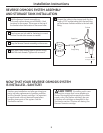
16
Once storage tank is full, turn on icemaker.
17
Turn on water supply. Allow to fill. (May take up to
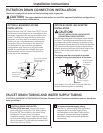
four hours.) Check for leaks.
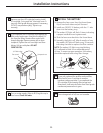
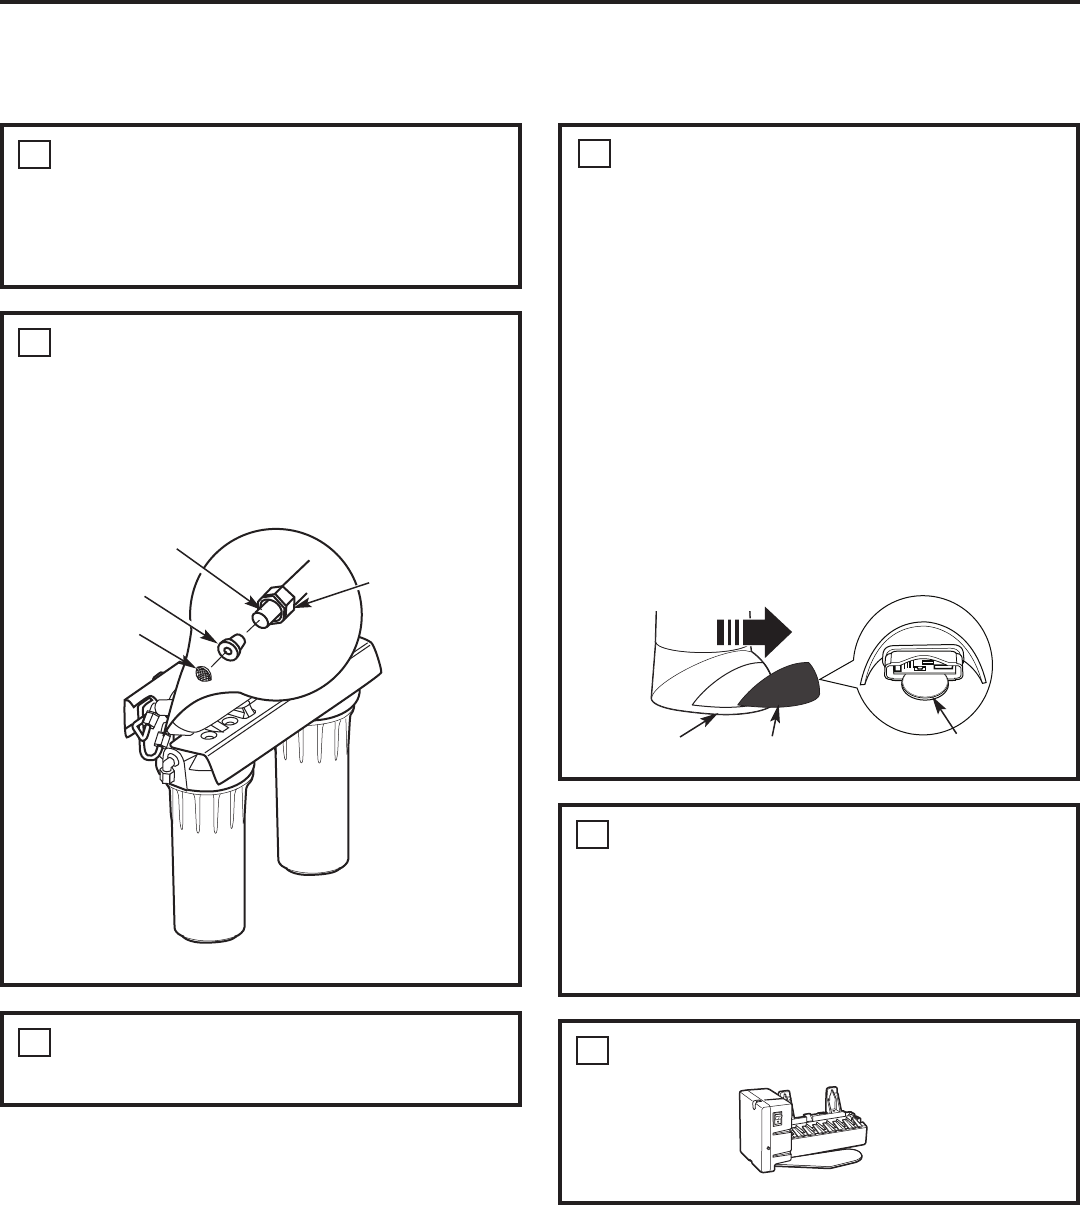
14
If you replaced the RO cartridge, also replace the
flow control and screen. (Unscrew the black 1/4″
line from the fitting. Remove flow control with
clean knife edge. Remove screen with a clean
toothpick.) Tighten the nut hand-tight and then
tighten 1/4 turn with pliers. DO NOT
OVERTIGHTEN.
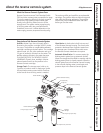
13
Flow control
Screen
Compression nut
1/4″ Black tubing
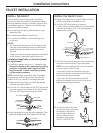
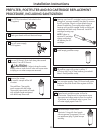
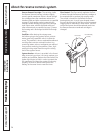
INSTALL THE BATTERY
1. Remove the lens cover from the faucet base.
Grip it from both sides and pull forward.
2. Install one CR2032 3V battery with the “+” side
down into the battery tray.
3. The amber LED light will flash 5 times, indicating
a proper installation and system reset.
4. Slide the lens cover back into the faucet base.
5. Normally, the light is off. After 6 months of use,
the amber LED light will flash every 30 seconds,
indicating the time to replace the filter canister.
NOTE: The amber LED light may stop blinking
if it is allowed to blink for an extended period
of time. To ensure proper operation, the battery
should be replaced with every filter change.
Faucet base
Lens cover
Battery “+”side down
15