


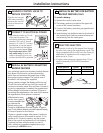
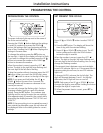
OPERATION
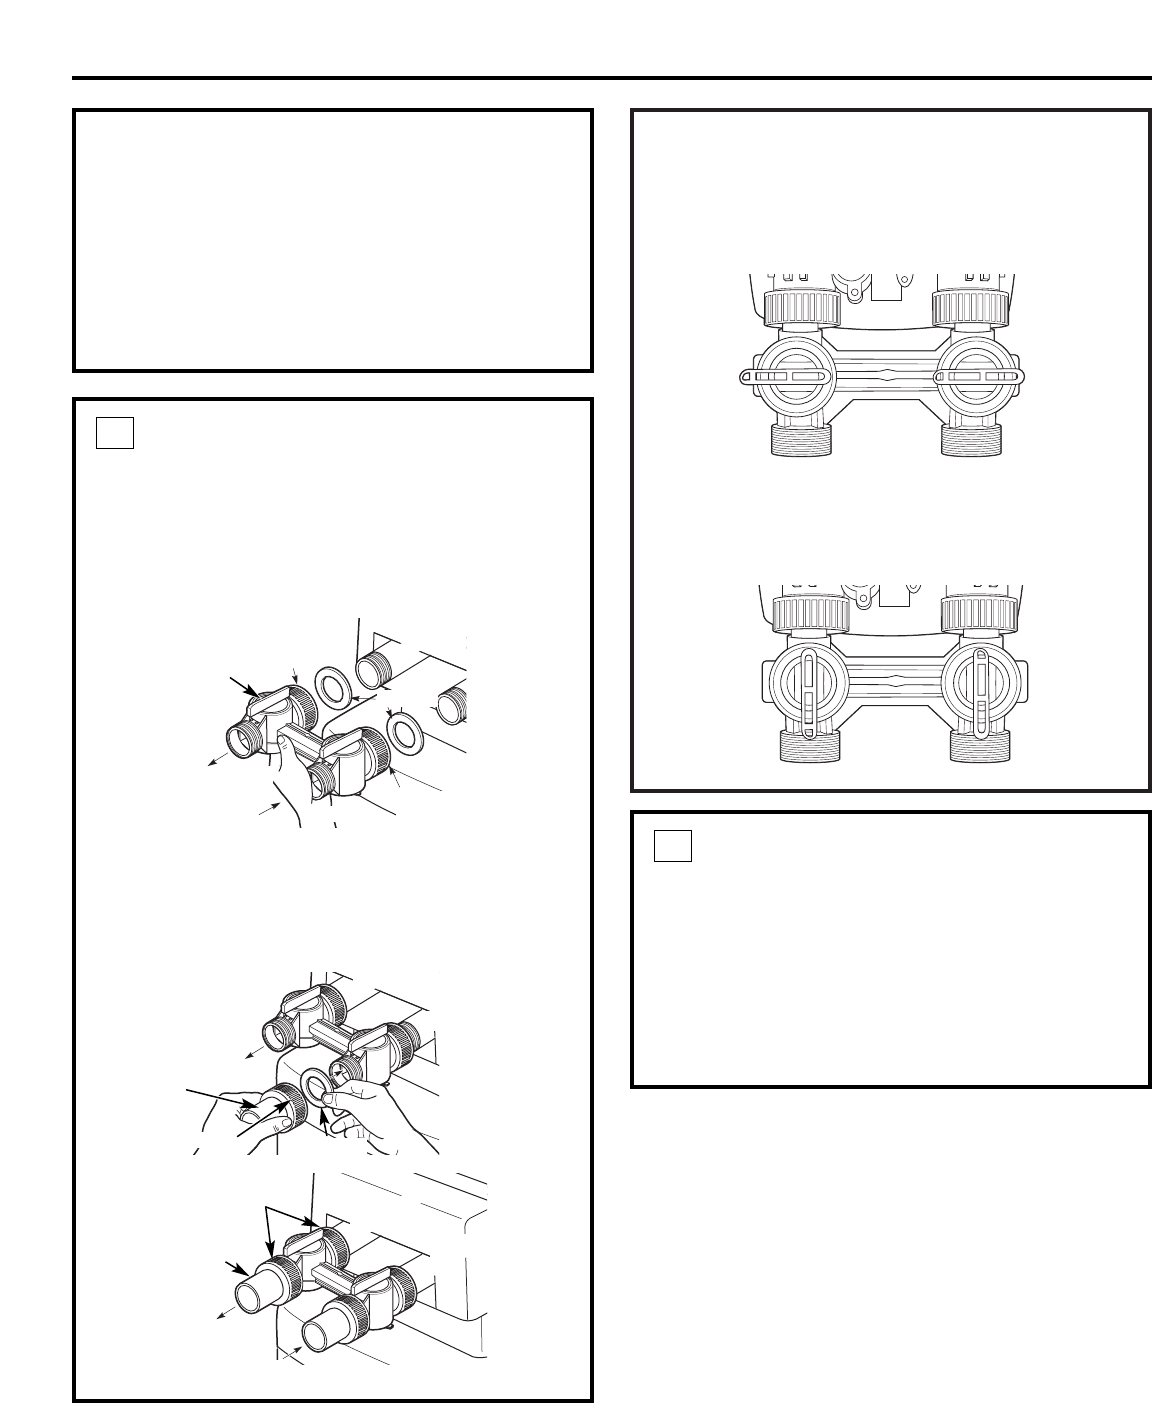
To bypass the Water Softener with the bypass
valve, rotate the handles clockwise so they are both
perpendicular to the flow path of the inlet and
outlet water stream, as shown below.
To return to the conditioned water or service
position, rotate the handles counterclockwise so
they are parallel to the flow path of the inlet and
outlet water stream, as shown below.
Installation Instructions
6
BEFORE YOU BEGIN
• Turn off the gas or electric supply to the water
heater, in the possibility that the water heater
may be drained while draining pipes.
• Turn off the water supply to pipes to be cut and
drain the house water pipes.
• Open both hot and cold faucets at the lowest
location possible.
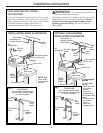
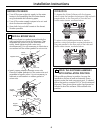
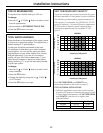
INSTALL BYPASS VALVE
• Make sure there is a gasket secured inside the
inlet and outlet union nuts of the bypass. Then
assemble the union nut to the valve inlet and
outlet, hand-tightening both union nuts
simultaneously. It is not necessary to lubricate or
use sealant on the rubber gaskets or union nuts.
• Insert copper adapters through union nuts.
Place the rubber gaskets into the union nuts and
assemble to bypass valve. It is not necessary to
lubricate or use sealant on rubber gasket or
union nuts.
1
Valve outlet
Valve inlet
Inlet
union nut
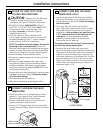
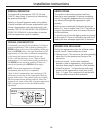
MOVE THE SOFTENER ASSEMBLY
INTO INSTALLATION POSITION
Before sliding softener in position, be sure the
installation surface is level and smooth. Sharp
objects under the tank may puncture it. If needed,
place the tank on a section of 3/4″ thick (minimum)
plywood. Then, place shims under the plywood as
needed to level the softener. Slide softener into
position.
2
Outlet
union nut
Gaskets
Outlet
Inlet
Gasket
Outlet
Inlet
Outlet
Inlet
Copper
adapters
Valve outlet
Valve outlet
Valve inlet
Valve inlet
Bypass valve
Copper
adapters
Union nut
Union nut