


9
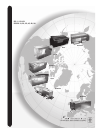
www.retroaire.com
The Right Fit For Comfort
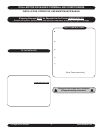
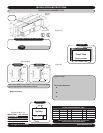
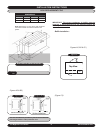
AIR INTAKE FILTER
5 1/2”
8 1/2”
35 15/16”
4”
3”
2”
REMOVEABLE
WEATHER SEAL
ANGLES
22” CONDENSER COIL
14 13/16”
A
18 1/8”
8 1/4”
26” AIR OUTLETS
B
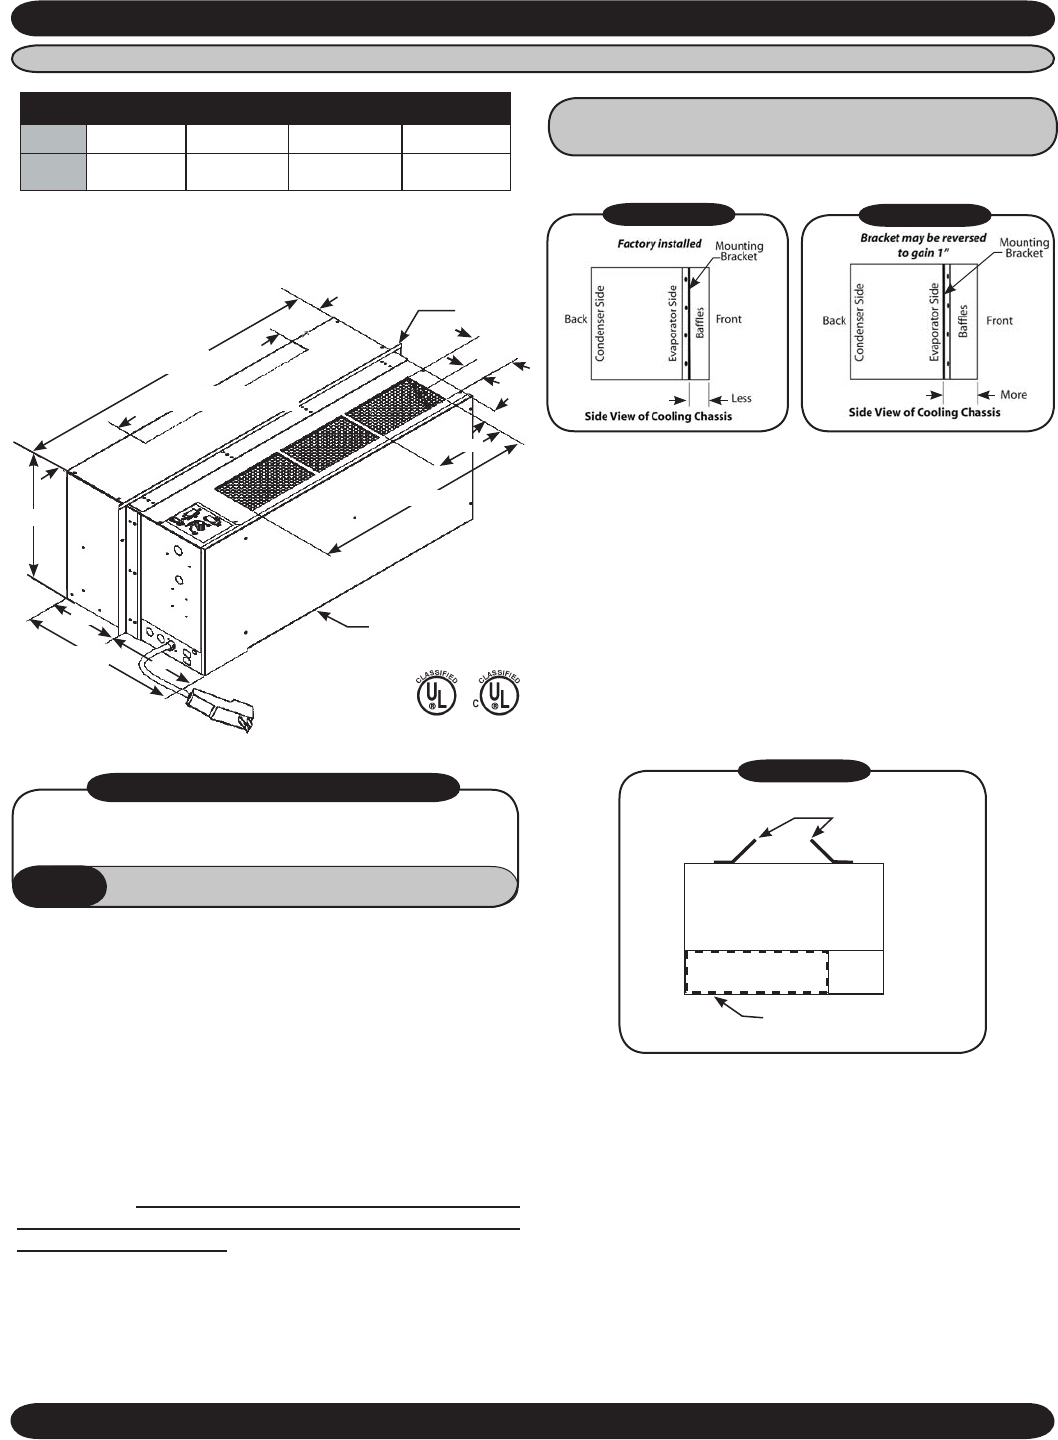
RC/RH20 REPLACEMENT PTAC
ADJUSTABLE WEATHER SEAL ANGLE POSITIONS
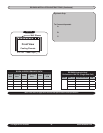
A 8 5/8” 7 7/8” 9 11/16”
(1)
8”
(2)
B 9 1/2” 10 1/4” 8 7/16”
(1)
10 1/8”
(2)
NOTE: Dimensions calculated without foam gaskets
(1) Standard position-Factory installed
(2) Position for Climate Master 702 and 703.
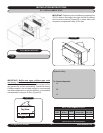
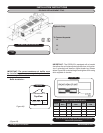
1. Take unit out of packaging.
2. Slide unit into wall sleeve. If supply duct on cooling
chassis does not line up with supply vent on room
cabinet it is possible that factory instlled angle brackets
on the top and sides will have to be reversed. This will
allow approximately 1” in or out of the wall sleeve
(See
figures A4 & B4)
.
3. Slide unit out of wallsleeve.
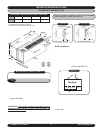
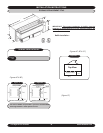
IMPORTANT: The correct condenser air baffles must be
installed or performances may be impaired and/or the
war
ranty will be voided.
4. Baffle Installation - Remove baffles from kit bag sup-
plied with unit. Install left and right side baffles on the
condenser coil in existing holes:
• Choose the proper fitting baffles for your applica-
tion.
• Baffles must come in contact with the outdoor
louver.
• Make sure baffles are directed inward toward the
center of coil.
• Secure baffles tightly to the condenser coil using the
screws provided. (Figures A4,B4 & C4 )
5. Apply 1/2” x 1/2” open cell foam strips around supply
air duct to ensure that all the conditioned air is delivered
into the room. Failure to do so results in recirculation of
the conditioned air around the wall sleeve and through
the unit causing the unit to short cycle, thus raising
operating costs through improper heating and cooling
(Figure C4).
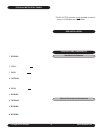
Two sets of baffles are provided in your kit to accommodate
mounting brackets in either position A or B.
INSTALLATION INSTRUCTIONS
• 1 Installation Manual
• 1 Lt. & Rt. Baffles (size 1)
• 1 Lt. & Rt. Baffles (size 2)
HYDRONIC
ONLY
• 1ea. 2-Position Connector & Pin Mate
• 14AWG Black Wire
• Screws
• 1” x 1” Open Cell Foam Tape
• 1/2” x 1/2” Open Cell Foam Tape
RC/RH20 BAFFLE INSTALLATION KIT
Figure C4
1/2” X 1/2” Supply Air
Duct Foam Tape
Baffles-Directed Inward
Toward Coil
Figure A4
Figure B4