


4
Model VF160 Owner's Manual Supplement
Press the [EXIT/NO] key (or the [STOP] key) repeatedly
until exiting the Setup mode.
<Note>
When using a CD-RW or CD-R disc on which program
data is recorded, pressing the [ENTER/YES] key while
"BkUp" is flashing brings up the warning message,
followed by the screen for erasing the existing file, as
shown below.
To erase the existing file, select "ERASE" and press
the [ENTER/YES] key.
If you do not want to erase the file, select "Eject" and
press the [ENTER/YES] key. The disc is ejected and
you can replace the disc with another one.
Use the [JOG] dial (or the [REWIND]/[F FWD] keys) to
select "ERASE" or "Eject".
11
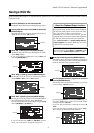
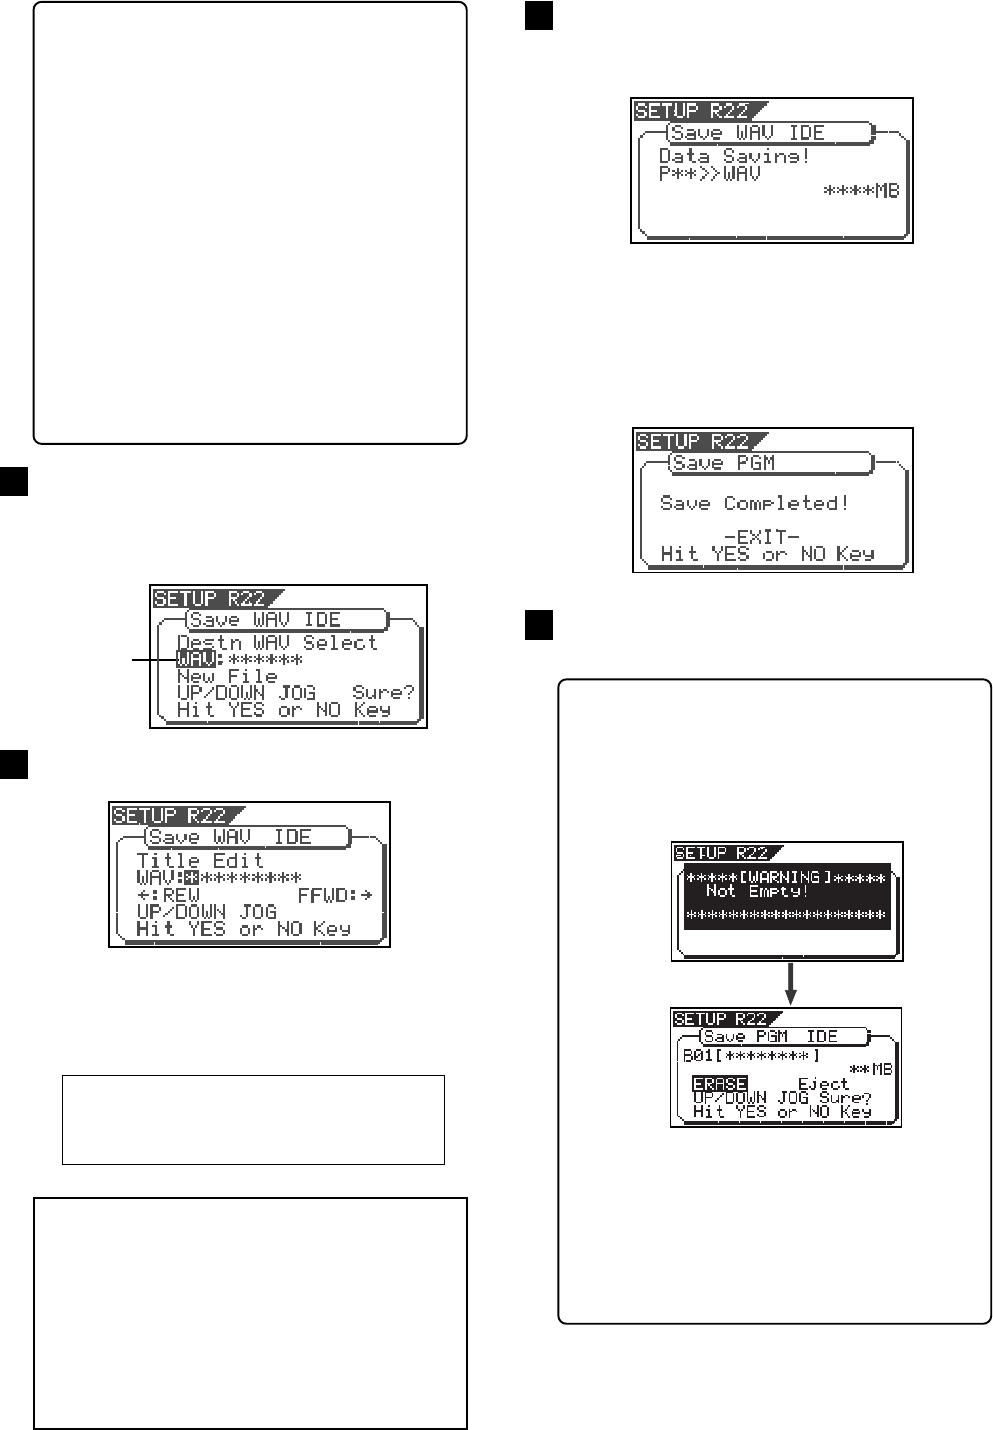
After entering the file name, press the [ENTER/YES] key.
The save operation is executed and the display shows
something like the one as below. As the file save goes on,
the remaining data size shown on the screen counts down.
<Note>
You can use up to 6 characters for a file name.
Some characters entered are converted as shown be-
low.
• Upper-case alphabetical characters (A to Z): not
converted.
• Lower-case alphabetical characters (a to z):
converted to the corresponding upper-case.
• Numerals (! # $ % & ' ( ) @ ^ _ -.): not converted.
• Other symbols: converted to "_".
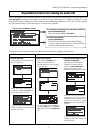
By rotating the [JOG] dial, you can set the desired numeric,
symbolic or alphabetical character to the flashing point.
You can move the flashing point by using the [F FWD]
key or [REWIND] key. See the following table for the
available characters.
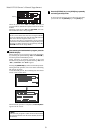
After selecting a file, press the [ENTER/YES] key.
The display shows the screen for editing the WAV file.
Upper-case alphabetical characters (A to Z)
Numerals (0 to 9)
Symbols (! # $ % & ' ( ) @ ^ _ -)
Immediately after the data save to each disc is completed,
the disc is automatically ejected, and "Insert Disk" flashes
on the screen, prompting you to insert the next disc.
Inserting the next disc resumes the save operation.
After the save operation is completed, "Save Completed!"
appears on the screen.
9
10
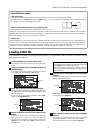
After selecting the track(s), press the [ENTER/YES] key.
The display shows the screen for selecting a WAV file on
the disc.
You can select "Eject" by rotating the [JOG] dial.
To remove the disc, select "Eject" and press the [ENTER/
YES] key.
8
<To specify the desired tracks to "From ** To **">
By rotating the [JOG] dial while the left ("From")
field is flashing, you can select the track number
from 01 through 24.
The number in the right ("To") field automatically
follows the number in the left field (i.e. numbers
in the left and right fields are always the same.)
Therefore, if you want to save a single track, you
just have to set the right ("From") field and do not
have to set the right ("To") field. For example, "From
02 To 02" will save only track 2.
To specify tracks 5 through 12:
• Enter "05" to the left field while the left field is
flashing.
• Press the [F FWD] key to make the right field
flashing.
• Enter "12". (Note that the number for the right
field must be equal to or larger than the left
field.)
Finally, the screen shows "From 05 To 12" to save
tracks 5 through 12.
Flashing