


25
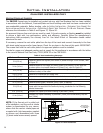
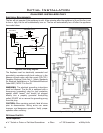
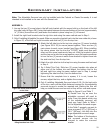
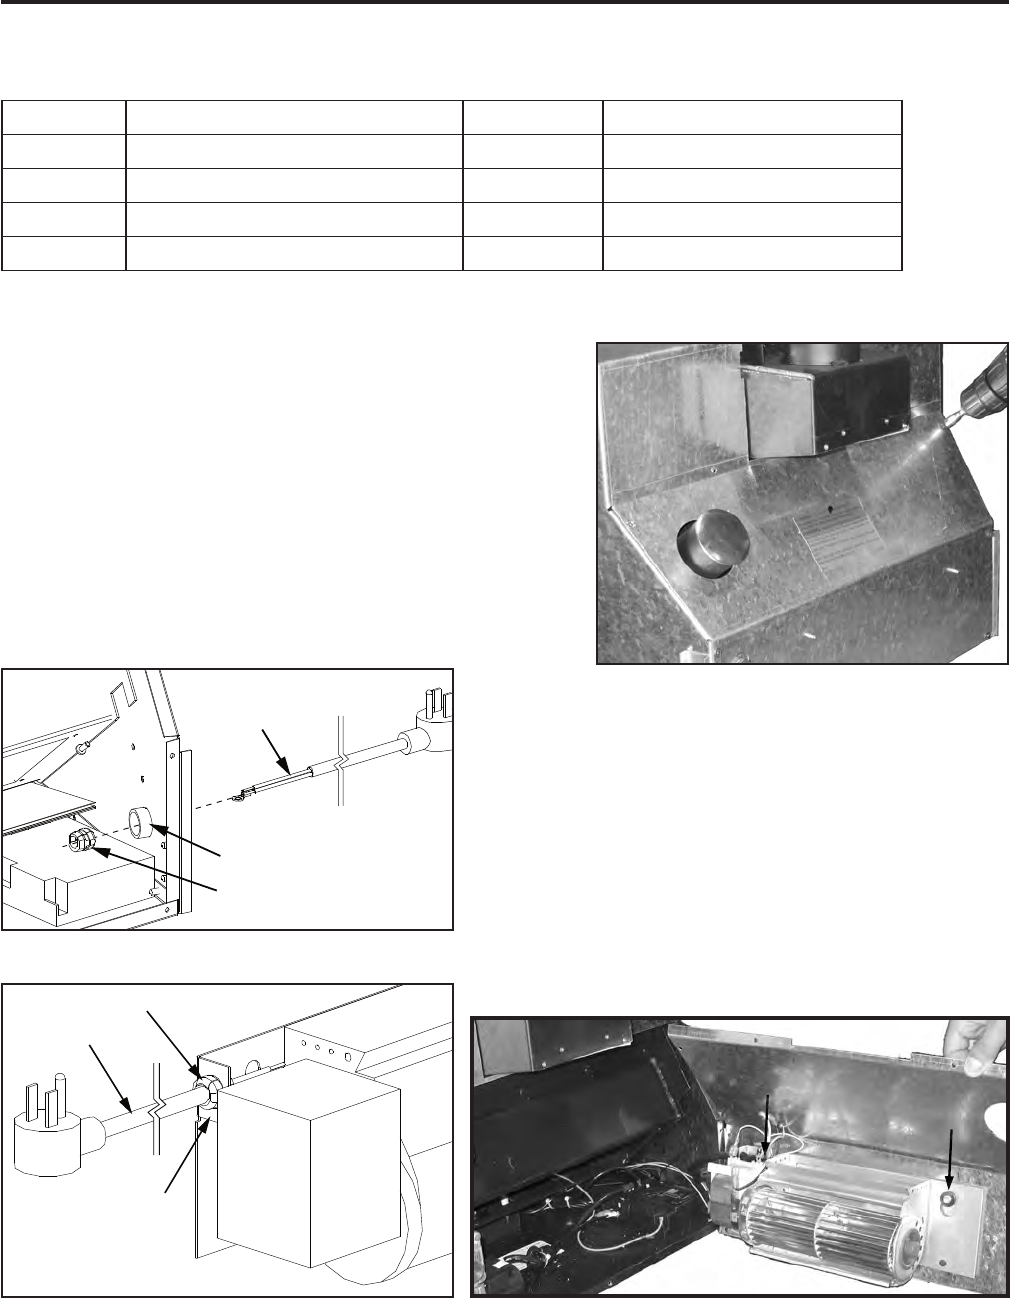
4. Hold the back panel close to the left side of the unit
and hook the two (2) slots on the fan bracket over
the rubber grommets found on the inside of the back
panel (see Figure 50).
5. Ground the power cord to the unit using a star
washer and T-20 screw (see Figure 51).
6. Slide the fan switch and temperature sensor part of
the wiring harness under the rebox to the front of
the unit.
7. Re-install the screws for the back cover.
Figure 50: Installing Fan onto Back Panel.
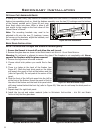
Power Cord
Strain Relief
Fan Mounting
Bracket
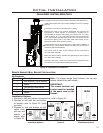
Figure 49: Installing Power Cord & Strain Relief.
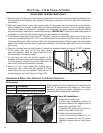
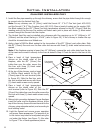
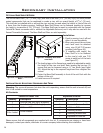
Figure 47: Removing Back Plate From Sonnet.
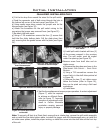
Figure 48: Installing Power Cord.
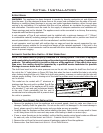
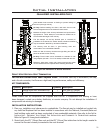
Kit Contents:
Quantity Description Quantity Description
1 Fan Assembly 1 Power Cord - 6ft (1.8m)
1 Wiring Harness 1 Star Washer
1 Temperature Sensor 1 #8-32 X ” T-20 Screw
1 Fan Control; 3 Position Switch
Please ensure that all components are supplied with this kit. If components are missing or have been
damaged, contact your dealer, distributor or courier company before starting this installation.
Fan Kit Installation:
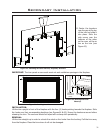
Power Cord
Strain Relief
Plastic Bushing
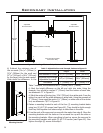
1. Use a at head screwdriver or ” socket to remove the
nine (9) screws holding the back cover on (see Figure
47).
2. Insert the power cord through the plastic bushing in the
left cabinet side (refer to Figure 48), place the strain
around the cord approximately 3” (76 mm) from the end,
and insert into the fan mounting bracket with pliers (refer
to Figure 49).
3. Ensure the wiring harness assembled according to Figure
45 and is attached to the fan.
Initial Installation
QUALIFIED INSTALLERS ONLY