Page | 18
FIREPLACE INSERT INSTALLATION
Insert Assembly Continued
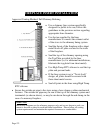
6. Use the included self-drilling sheet metal screws to screw the Rear Hopper
Cover Plate to the hopper of the stove while carefully holding the lid in
place to be certain in remains centered on the stove. A set of clamps or an
extra set of hands is very useful at this point of the conversion, but not
required.
7. Using a 5/16” socket or open end wrench, remove one of the hopper lid
latches from the original hopper lid. Install this hopper lid latch on the new
hopper lid and check to be certain the hopper lid is closing tightly. If not,
adjust the latch until a proper seal is made.
8. Next, install the insert side panels; these panels install much the same way as
the original side panels. Do not screw the side panels to the stove using the
rear screws at this time.
9. Install the surround side panels, one side at a time, and install the two self-
tapping sheet metal screws into the pre-drilled holes in the stove body.
These screws should pass through the surround side panel, the insert side
panel and then into the stove body.
10. Next, slide the top surround panel onto the pre-installed sheet metal screws
on the top of the Rear Hopper Cover Plate. Install two ¼” bolts through the
pre-drilled holes on either side of the surround top panel where it meets the
two side panels of the surround.
11. Tighten the 1/4” bolts first, and then, using a 5/16” socket or open end
wrench, tighten the sheet metal screws on the top of the Rear Hopper Cover
Plate.
12. Using a 5/16” socket or open end wrench, remove the two sheet metal
screws which hold the control panel mounting box to the stove body. The
wires which connect the control board to the stove components have been
made intentionally long, so that the control board can simply be remounted
to the right surround panel without any additional wiring.
13. Loosen the four bolts that secure the pedestal to the unit. These bolts are
located on the underside of the unit and can be loosened and removed using
a ½” socket on a socket wrench. ONCE THESE BOLTS ARE
LOOSENED AND REMOVED, THE UNIT IS FREE FROM THE
PEDESTAL AND CAN FALL, CAUSING INJURY. BE CAREFUL
WHEN REMOVING THESE BOLTS AND HAVE A HELPER WHEN
LIFTING THE STOVE FROM THE PEDESTAL.


