


Page | 7
INSTALLATION
Insert Assembly
Instruction
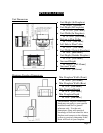
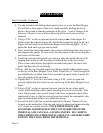
1. Begin the insert conversion by loosening and removing the six sheet metal
screws on the rear of the unit which hold the side panels and rear panel to
the stove. These screws can be loosened using a 5/16” socket or open end
wrench.
2. Once these screws are removed, the side panels and back panel of the unit
can be removed and set aside; these panels will not be used on the insert
version of this stove.
3. Next, unlatch the two hopper lid latches near the front of the hopper lid.
Loosen and remove the hopper lid hinge retaining screws on the rear of the
unit; once these screws have been removed, the freestanding hopper lid can
be lifted off of the unit and set aside. This component will not be used on
the insert version of this stove.
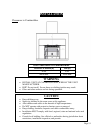
4. Locate the Rear Hopper Cover Plate Assembly, which was included in the
insert conversion kit. This part comes preassembled with the rear hopper
cover plate, new hopper lid and hopper lid hinges. It also comes predrilled
for the required fasteners.
5. Lay the Rear Hopper Cover Plate Assembly on the top of the hopper lid; be
certain the assembly is centered on the stove and that all edges line up. Use
the predrilled holes as a drilling template. Without removing the hopper lid
gasket material, use a 1/8” drill bit in an electric or battery powered drill to
drill a hole at every predrilled location of the rear hopper cover plate.
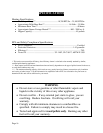
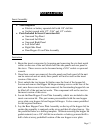
• Tools Required
o Electric or battery operated drill with 1/8” drill bit.
o Socket wrench with 1/2”, 5/16” and 1/4” sockets.
• Parts Included In Insert Conversion Kit
o Surround Top Panel
o Surround Left Panel
o Surround Right Panel
o Left Side Panel
o Right Side Panel
o Rear Hopper Cover Plate Assembly