


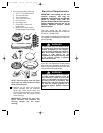
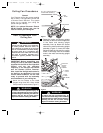
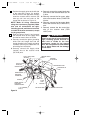
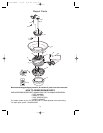
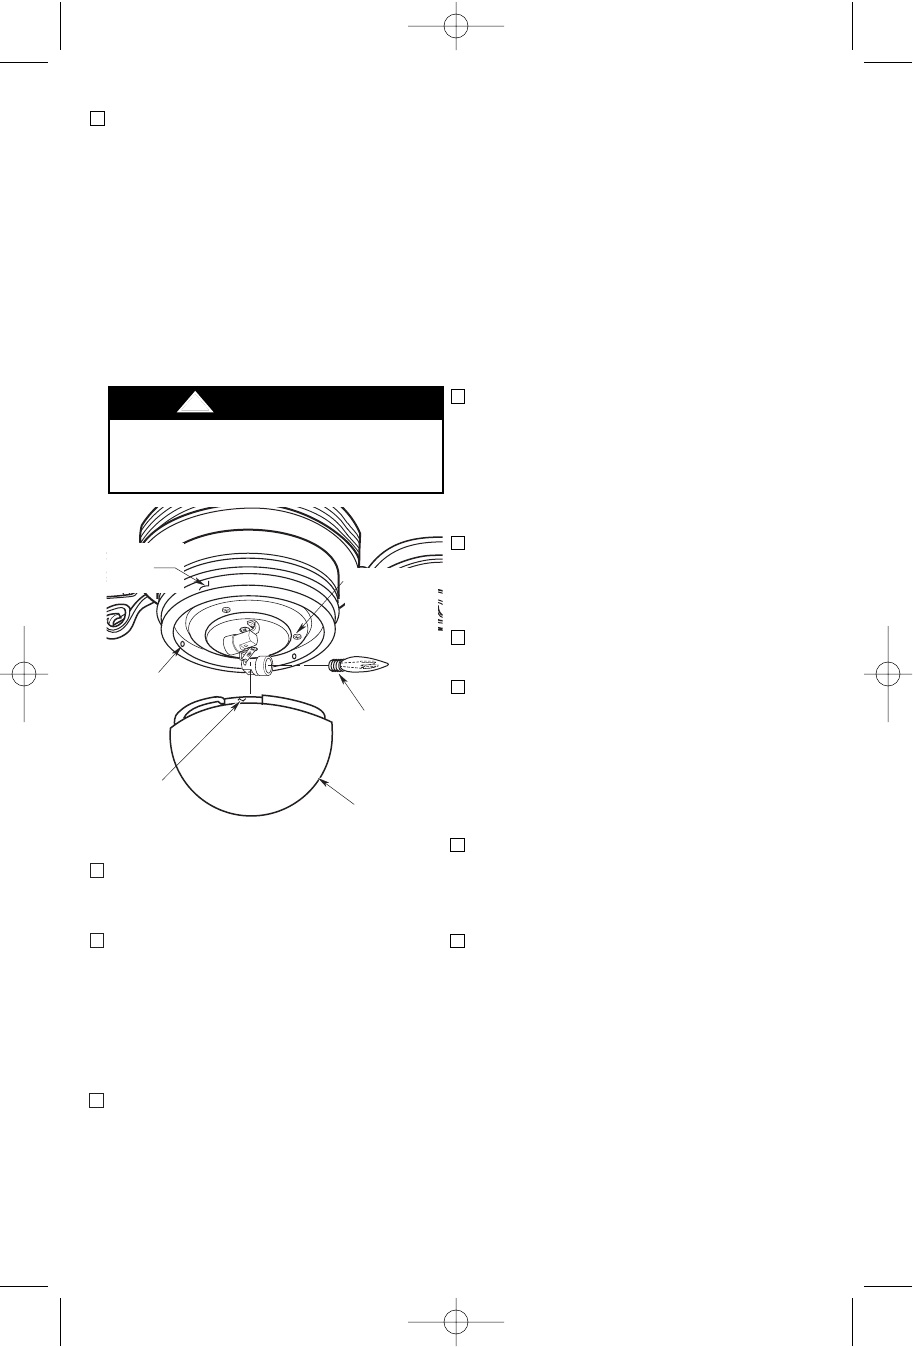
10. Screw in two 60-watt (maximum)
candelabra bulbs (not supplied) in the
light fitter sockets (Figure 14).
11. Place the lower glass bowl into the
downlight fitter, aligning the three flat
areas on the glass bowl flange with
the three tabs on the downlight fitter
(Figure 14). Then turn the lower glass
bowl clockwise until the glass bowl
stops turning.
12. Your ceiling fan is now installed and
wired to be controlled by your SW101
Fan/Light Wall Control.
60-WATT (MAX.)
CANDELABRA
BULB (2)
LOWER
GLASS
BOWL
FLAT
AREA
TAB
DOWNLIGHT
FITTER
ASSEMBLY
INSTALL THREE
M4 x 8mm OVAL
HEAD SCREWS
AND
LOCKWASHERS
Figure 14
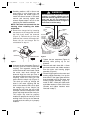
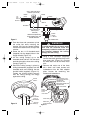
Make sure there are no wires pinched
between the light fitter and the fitter
adapter plate.
!
WARNING
9. Position the downlight fitter assembly
on the light fitter adapter plate so that
the two screws and lockwashers mate
with the keyhole slots in the downlight
fitter assembly. Make sure that all wires
and wire connectors are positioned
within the downlight fitter assembly.
Rotate the downlight fitter assembly
clockwise and tighten the two screws.
Install the other M4 x 8mm oval head
screw and lockwasher in the remaining
hole in the downlight fitter assembly.
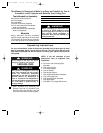
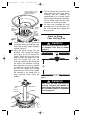
Operating Your
Ceiling Fan
IMPORTANT
Fan installation must be completed,
including the installation of the fan
blades, before testing of the remote
control.
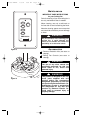
Your Fan/Light Wall Control (Figure 15)
has full control of your fan and lights.
However, airflow direction is controlled by
a slide switch on the switch housing.
1. Restore electrical power to the outlet
box by turning the electricity on at the
service panel.
NOTE: Make sure that the ON/OFF slide
switch on the Fan/Light Wall Control is
in the ON position.
2. To set the desired fan speed, press the
HI, MED, or LOW buttons to operate
your fan on high, medium, or low speed
(Figure 15).
3. To turn your fan off, press the OFF
button.
4. To set the level of light brightness,
press and hold the LIGHT button. The
light brightness will continue to
increase then decrease while the
button is held down. When the lights
are at the desired brightness, release
the button.
5. To turn the lights on and off, press and
release the LIGHT button. The lights
will turn on at the light level previously
set (see step 4).
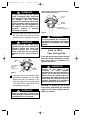
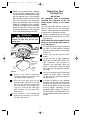
6. If airflow is desired in the opposite
direction, turn the fan off and wait for
the blades to stop turning. Then slide
the reversing switch (on the motor and
housing uplight assembly) to the
opposite position (Figure 16) and turn
the fan on again. The blades will turn in
the opposite direction and reverse the
airflow.
11
BP7309 BANFF 1/5/06 9:59 AM Page 11