


INSTALLATION
PAGE 8
INSTALLATION STEPS
1. Remove all ashes from the fireplace.
2. Remove all materials inside the insert and set them
aside.
3. Remove the surround panel (face shield) and at-
tach insulation material provided using a nonflam-
mable adhesive (i.e. RTV High Temperature Sili-
cone).
4. Use a large piece of cardboard or other protective
material and place it in front of the fireplace to pro-
tect floor or carpet during installation.
5. Remove the insert from its wood pallet by removing
the screws.
6. Prepare chimney connection system as specified
for masonry or zero clearance fireplaces.
7. Set the insert on the protective cardboard laid out in
front of the fireplace centered in front of the fire-
place opening.
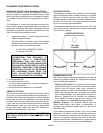
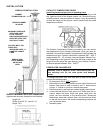
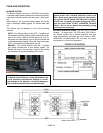
8. (Masonry Fireplace) Slide insert into the fireplace
far enough to attach the starter pipe or positive flue
connection (a minimum of a 8” diameter starter pipe
extending past the header is required). See * Note
on page 9.
9. (Factory Built Fireplace) Slide insert into the fire-
place far enough to attach connector to flue outlet.
See * Note on page 9.
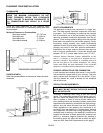
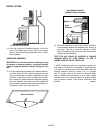
10. Offsets can be handled using an offset adapter (it
aligns starter pipe with flue. See Offset Adapter,
page 24 for ordering information). Do not push in-
sert in completely until surround assembly is in-
stalled. Care should be used to ensure that this ad-
justable connector is oriented so it does not angle
downhill when positioned on the flue outlet on top of
insert.
Offset Adaptors comes in two sizes. See page 24.
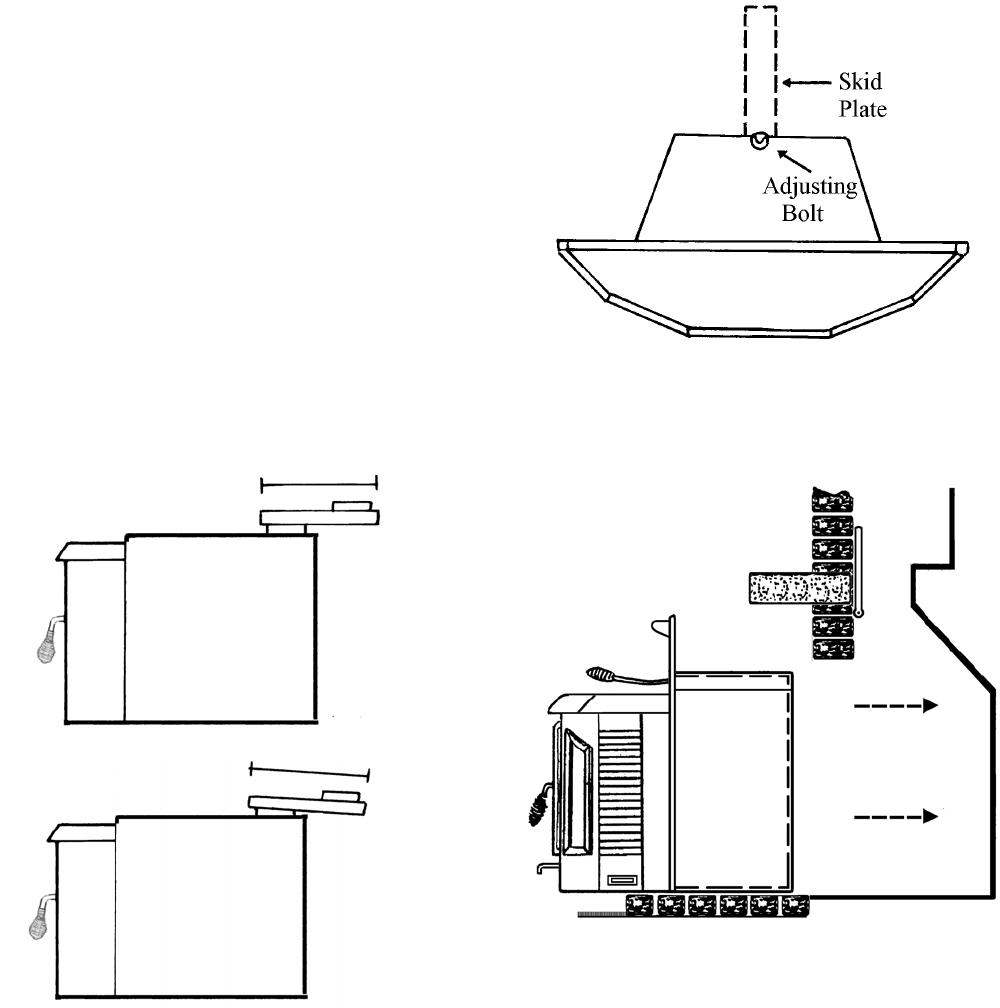
11. The floor of the fireplace is lower then the hearth,
turn the adjusting bolt (located at the bottom of the
groove in the rear of the insert firebox) clockwise
until insert is level. An extension socket wrench
will allow you to level the insert once it is com-
pletely installed by reaching over the top.
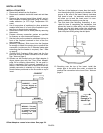
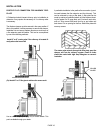
12. The skid plate (see following illustration) is pro-
vided for ease in completing the installation, and
allows the insert to slide easily into the fireplace.
Simply slip the skid plate under the adjustment
(leveling) bolt, slightly lift the front of the insert, and
push into place sliding along the skid plate
13. Reaching over the top of the insert, install the
starter pipe in the stove flue outlet, or attach the
positive flue connection to the insert. See * Note on
page 9.
Slide Far
Enough In To
Attach Pipe
CORRECT
WRONG
CORRECT – Level
or even. Slightly up
at the outbound
end is better.
WRONG – This may
produce a problem
of smoking during
refueling, or poo
r
chimney draw.