ULTRA FLAME DIRECT VENT GAS STOVE 9
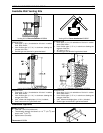
Installation of Wall Venting Kits
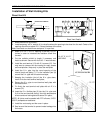
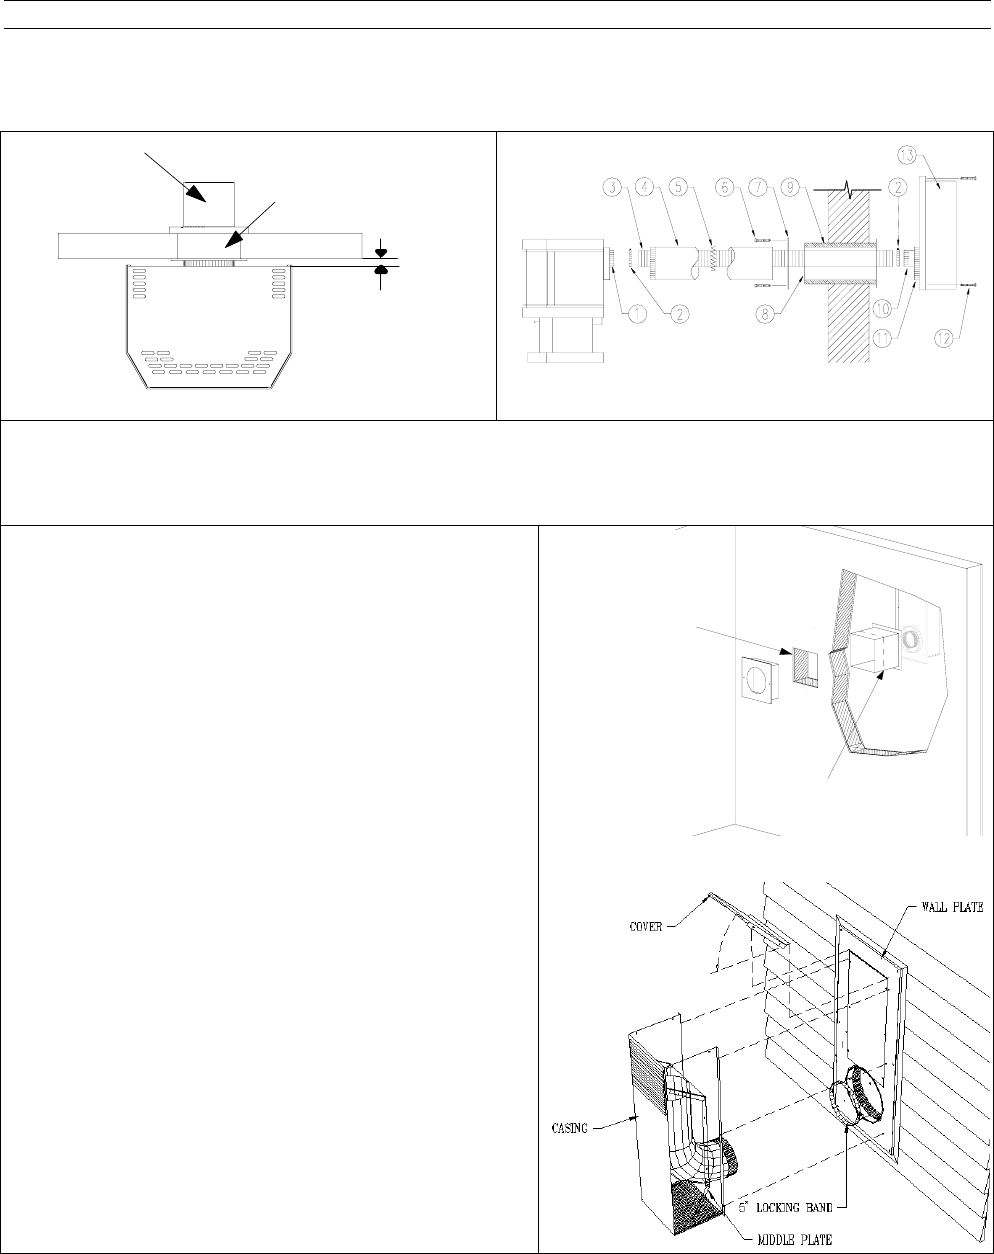
Direct Vent Kit
VENT TERMINAL
RADIATION SHIELD
-min 1"
-max 60"
Direct Vent Direct Vent Details
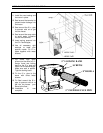
1. Move the stove to its position;
2. Install temporary a 8 in. section (4) to visualize where the opening to be done thru the wall. Center of the
opening should be at about 23 ½ “above the base of the stove;
Note: Horizontal run should have a slope of ¼ in per foot.
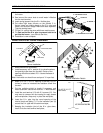
3. Make a 10-1/2" x 10-1/2" opening in the wall, 23-1/2"
inches in order to introduce the radiation shield thru
the wall;
4. Cut the radiation shield to length if necessary and
install as shown. Secure with four #10 1” wood screws;
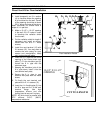
5. Install the vent terminal (13) with 2 ½ screws (12). You
may want to remove the vent casing for easy access
and manipulation, Keep only in place the wall plate
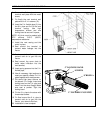
6. Insert the 8 in. pipe into the round opening of the
interior black wall plate (7). Fix the insulation pad (9)
around the 8 in. pipe with the aluminum tape;
7. Keeping the insulation joint of the 8 in. pipe down,
insert it into the vent terminal wall plate;
8. Secure the 8 in. pipe to vent terminal wall plate with
the metal screw;
9. Fix finally the vent terminal wall plate with six 2 ½ in
screws (12).
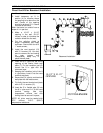
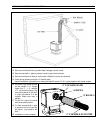
10. Insert the 5 in. flexible pipe (3) into the 8 in. pipe and
fix it to the vent terminal casing. Use high temperature
silicone and one locking band to secure it in pace;
NOTE: All joints must be sealed with RTV silicone, 315°C.
(600°F) temperature resistance.
11. Install the vent casing and the cover in place
12. Seal around the terminal to prevent water leakage into
the house
CUT TO LENGTH
10-1/2" X 10-1/2"
OPENING


