


www.desatech.com
112108-01C16
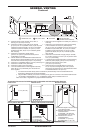
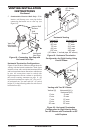
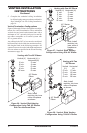
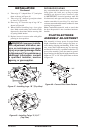
Vertical Horizontal
(V
1
) (H)
5' min. 6' max.
6' min. 12' max.
7' min. 18' max.
8' min. 20' max.
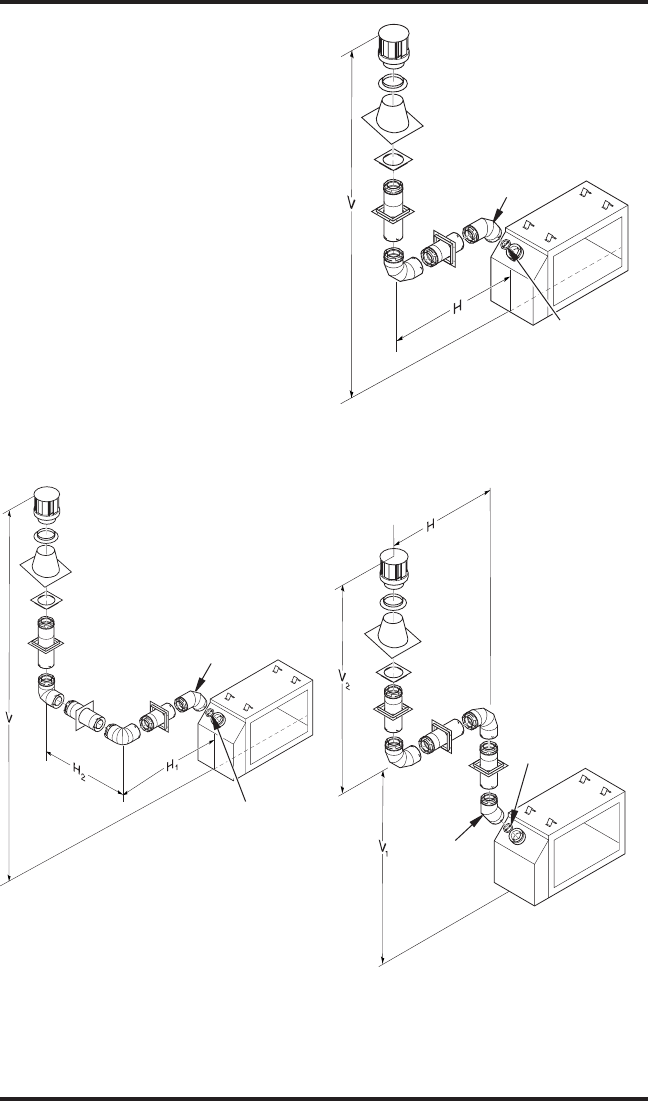
Figure 28 - Vertical Rigid Venting
Conguration Using Two 90° Elbows
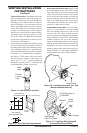
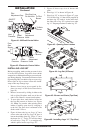
Vertical (V) Horizontal (H)
5' min. 2' max.
6' min. 4' max.
7' min. 6' max.
8' min. 8' max.
20' max. 8' max.
Figure 27 - Vertical Rigid Venting
Conguration Using One 90° Elbow
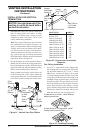
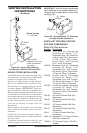
Vertical (V) Horizontal (H
1
) +
Horizontal (H
2
)
5' min. 2' max.
6' min. 4' max.
7' min. 6' max.
8' min. 8' max.
20' max. 8' max.
Figure 26 - Vertical Rigid Venting
Conguration Using Two 90° Elbows
with Two Horizontal Runs
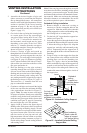
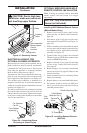
5. Complete the cathedral ceiling installation
by following the same procedures outlined in
steps 2 through 7 for Flat Ceiling Installation,
page 14.
Figures 26 through 29 show four different congu-
rations for vertical termination. These minimum
vertical rises are based on horizontal runs with a
minimum of 1/4" upwards pitch per foot and do
not reect constraints on a vertical system with
45° or greater offset.
Any offset pitch of 45° or less must be considered
horizontal and sized within the maximum allow-
able lengths listed in the following examples. All
connections must be sealed with high temperature
silicone sealant as specied in the second warning
statement on page 10.
VENTING INSTALLATION
INSTRUCTIONS
Continued
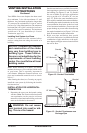
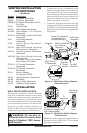
45° Starter
Elbow
Note: Install
restrictor into inner
collar of replace
as shown.
45° Starter
Elbow
Note: Install
restrictor into
inner collar of
replace as
shown.
45° Starter
Elbow
Note: Install
restrictor into inner
collar of replace
as shown.