


www.desatech.com
122527-01B4
SAFETY
Continued
Clothing or other flammable mate-
rials should not be hung from the
heater or placed on or near heater.
Installation and repair should be
done by a qualified service per-
son. Heater should be inspected
before use and at least annually by
a qualified service person. More
frequent cleaning may be required
as necessary. It is imperative that
control compartments, burners, and
circulating air passageways of the
heater be kept clean.
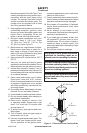
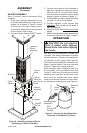
CAUTION: The gas pressure
regulator provided with this
appliance must be used. This
regulator is set for an output
pressure of 28" W.C. (1 P.S.I.).
22. If replacement is required, use only regula-
tor with same setting. See Parts page 13.
23. Use correct pressure specications, see
page 9.
24.
Propane/LP gas cylinder is not provided. Use
a 20 lb. propane/LP gas cylinder marked
propane. The cylinder supply system must
be arranged for vapor withdrawal. The cyl-
inder used must include a collar to protect
the cylinder valve. The cylinder must be
provided with a shutoff valve terminating in a
propane/LP gas supply cylinder valve outlet
specified, as applicable, for connection no.
600 in the Compressed Gas Association’s
Limited Standard Cylinder Valve Outlet Con-
nection for Propane Small Valve Series.
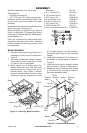
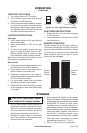
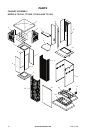
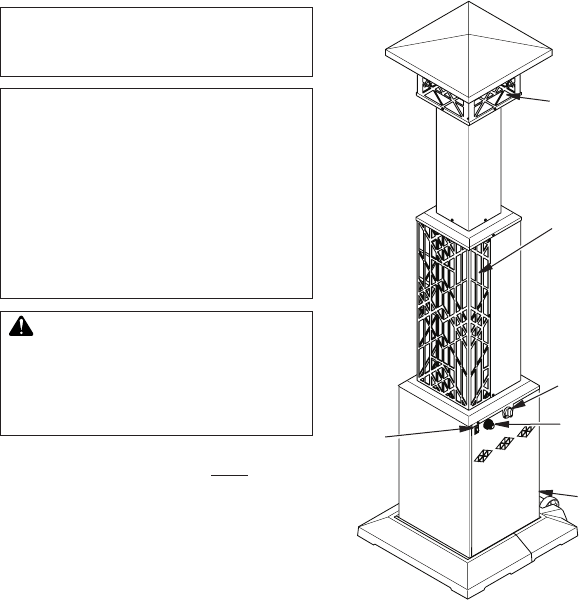
PRODUCT
IDENTIFICATION
Figure 2 - Outdoor Patio Heater with Light
Gas Light
(Inside Deco
Shroud)
Burner
(Behind Grill)
Electronic
Ignitor
Cabinet
Base
Assembly
Control
Knob
On/Off
Switch
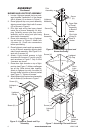
UNPACKING HEATER
Check all items for shipping damage. If heater
is damaged, promptly inform dealer where you
bought heater.
1. Remove first base half from box.
2. Remove top cap, 2 deco light shrouds,
top and packaging materials from box.
Set parts aside in a safe location.
3. Remove burner assembly from box, leav-
ing packaging materials on bottom of as-
sembly. Set aside in the upright position.
4. Remove lightpost pieces, cabinet base
and tank door from box. Set aside.
5. Remove 6 screws securing grill to burner
assembly. Remove second base half from
inside burner assembly. Reattach grill to
burner assembly.
You should have the following assembly parts:
Top Cap (1), Burner Assembly (1), Cabinet
Base (1), Front Base (1), Rear Base (1), Wheel
(2), Base Cabinet Door (1), Lightpost Panel
(4), Deco Light Shroud (2), Upper Screen (4),
Lightpost Top (1), Propane Tank Retention
Chain (1), Retention Hook (2), Hardware Pack-
age (1) (see pages 10 thru 13).