


www.desatech.com
9116307-01C
INSTALLATION
Continued
Decide which method better suits your needs. Either
method will provide a secure hold for the heater.
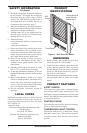
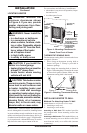
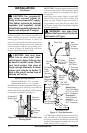
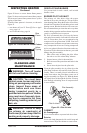
Marking Screw Locations
WARNING: Maintain mini-
mum clearances shown in
Figure 4. If you can, provide
greater clearances from oor
and joining wall.
Mark three screw locations on wall as shown
in Figure 6).
Figure 6 - Wall Mounting Clearances
18
3
/4"
Min.
7"
Min.
9"
Min.
20,000 Btu Heaters
16
7
/
8
"
30,000 Btu Heaters
24
5
/16"
Adjoining Wall
Insert
Mounting
Screws
Floor
Locate hardware packet behind left side door
of heater.
Attaching To Wall Stud Method
For attaching heater to wall studs
1. Drill holes at marked locations using 9/64"
drill bit. Holes must be level to prevent com-
plications with front panel.
2. Tighten screws until screw head is 1/8" away
from wall.
Attaching To Wall Anchor Method
For attaching heater to hollow walls (wall areas be-
tween studs) or solid walls (concrete or masonry).
1. Drill holes at marked locations using 5/16"
drill bit. Holes must be level to prevent com-
plications with front panel. For solid walls
(concrete or masonry), drill at least 1" deep.
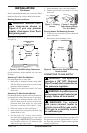
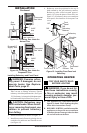
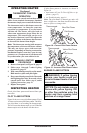
2. Fold wall anchor as shown in Figure 7.
3. Insert wall anchor (wings rst) into hole. Tap
anchor ush to wall.
4. For thin walls (1/2" or less), insert red key
into wall anchor. Push red key to “pop” open
anchor wings. IMPORTANT: Do not hammer
key! For thick walls (over 1/2" thick) or solid
walls, do not pop open wings.
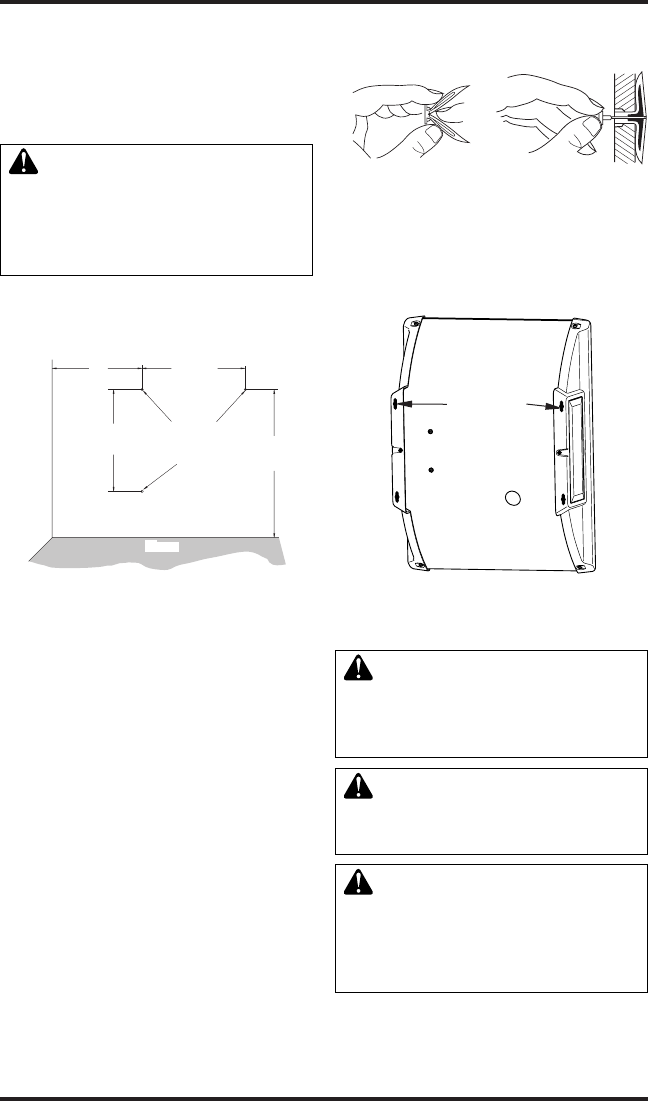
Placing Heater On Mounting Screws
1. Locate two top vertical key slots on back end
panels of heater.
2. Place heater onto mounting screws.
Figure 7 - Folding
Anchor
Figure 8 - Popping
Open Anchor Wings
For Thin Walls
Figure 9 - Vertical Key Slots for Mounting
Heater to Wall
Vertical
Key Slots
5. Insert mounting screws into wall anchors.
6. Tighten screws until screw head is 1/8" away
from wall.
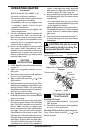
CONNECTING TO GAS SUPPLY
WARNING: This appliance
requires a 3/8" NPT (National
Pipe Thread) inlet connection to
the pressure regulator.
WARNING: A qualied service
person must connect heater to gas
supply. Follow all local codes.
WARNING: For natural
gas, never connect heater to
private (non-utility) gas wells.
This gas is commonly known
as wellhead gas.
IMPORTANT: For natural gas, check gas line
pressure before connecting heater to gas line. Gas
line pressure must be no greater than 10.5" of wa-
ter. If gas line pressure is higher, heater regulator
damage could occur.