


www.desatech.com
116307-01C12
INSTALLATION
Continued
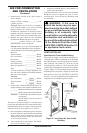
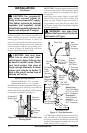
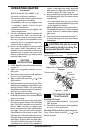
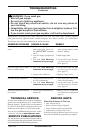
Figure 14 - Checking Gas Joints for
Propane/LP Gas
Propane/LP
Supply Tank
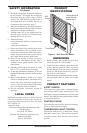
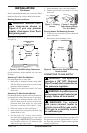
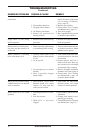
Figure 13 - Checking Gas Joints for
Natural Gas
Gas
Meter
Thermostat
Gas Valve
Equipment
Shutoff
Valve
Thermostat
Gas Valve
Equipment
Shutoff
Valve
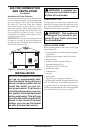
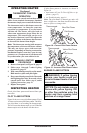
OPERATING HEATER
FOR YOUR SAFETY READ
BEFORE LIGHTING
WARNING: If you do not fol-
low these instructions exactly,
a re or explosion may result
causing property damage, per-
sonal injury or loss of life.
A. This appliance has a pilot which must be
lighted by hand. When lighting the pilot,
follow these instructions exactly.
B. BEFORE LIGHTING smell all around the
appliance area for gas. Be sure to smell next
to the oor because some gas is heavier than
air and will settle on the oor.
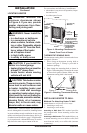
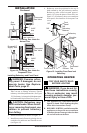
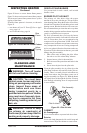
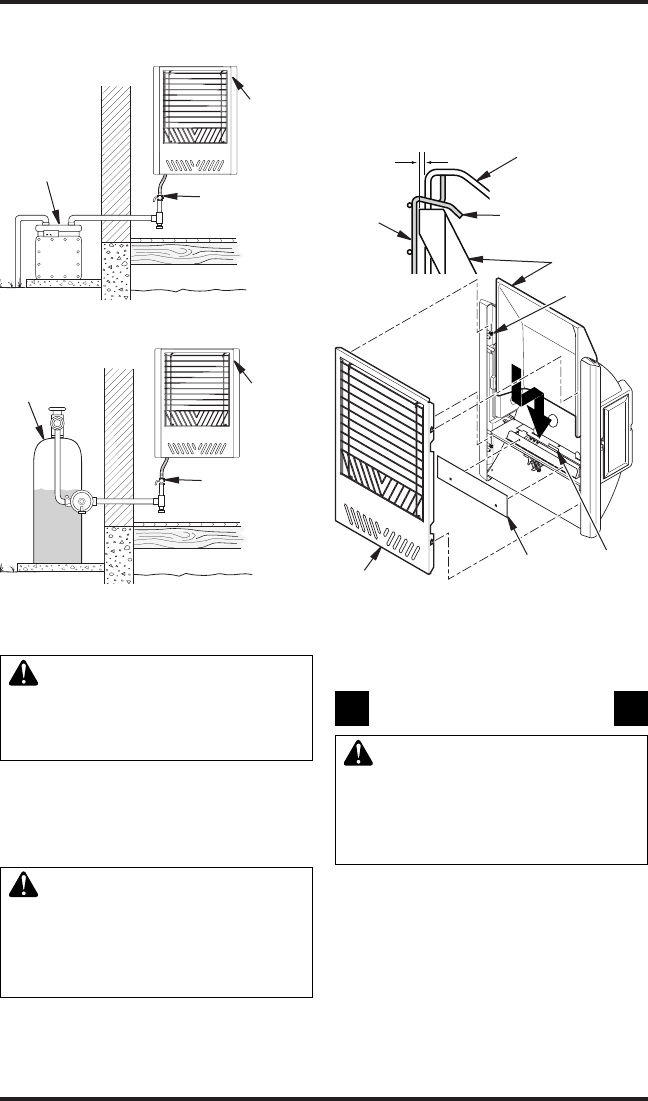
Figure 15 - Installing Front Panel and
Refractory
Refractory
Front Panel
Shoulder
Screw
Installing Refractory and Front Panel
WARNING: Examine refrac-
tory panel. If damaged, do not
operate heater. See Replace-
ment Parts, page 21.
1.
Gently lift refractory and position into heater.
Take care not to damage refractory. Ensure
refractory sits behind preforated tab. (see Figure
15). If refractory is damaged call the phone num-
ber found under Replacement Parts, page 21.
CAUTION: Refractory may
shift inside heater. When install-
ing or removing front panel, use
caution to prevent refractory
from falling.
2. Install front diffuser as shown in Figure 15.
3. Install front panel of heater by placing slots on
each side over and down onto shoulder screws
(see Figure 15).
Front
Diffuser
Perforated
Tab
4. Refractory must be positioned so the top is
held outward by the grill refractory retainer.
Refractory must extend outward approxi-
mately 1/8" from the plane of front face (see
Figure 15). If refractory does not extend past
front panel, discoloration of front panel can
occur.
1/8"
Grill
Front
Panel
Grill
Refractory
Retainer