www.desatech.com
109005-01C6
STORAGE
CAUTION: Disconnect heater
from propane supply tank(s).
1. Store propane tank(s) in safe manner. See
Chapter 5 of Standard for Storage and Han
-
dling of Liquefied Petroleum Gases, ANSI/
NFPA 58 and/or CAN/CGA B149.2. Follow
all local codes.
2. Place plastic cover caps over brass fittings on
inlet connector and hose/regulator assembly.
3. Store in dry, clean and safe place. Do not
store hose/regulator assembly inside heater
combustion chamber.
4. When taking heater out of storage, always
check inside of heater. Insects and small
animals may place foreign objects in heater.
Keep inside of heater free from combustible
and foreign objects.
MAINTENANCE
WARNING: Never service
heater while it is plugged in,
connected to propane supply,
operating or hot. Severe burns
and electrical shock can occur.
1. Keep heater clean. Clean heater annually or
as needed to remove dust and debris. If heater
is dirty or dusty, clean heater with a damp
cloth.
2. Inspect heater before each use. Check connec
-
tions for leaks. Apply mixture of liquid soap
and water to connections. Bubbles forming
show a leak. Correct all leaks at once.
3. Inspect hose/regulator assembly before each
use. If hose is highly worn or cut, replace.
4. Have heater inspected yearly by a qualified
service agency.
5. Keep inside of heater free from combustible
and foreign objects.
6. Clean fan blades each season or as needed (see
Fan).
PREVENTATIVE MAINTENANCE
SCHEDULE
Item How Often How To
Fan See Fan
SERVICE PROCEDURES
WARNING: Never service
heater while it is plugged in,
connected to propane supply,
operating or hot. Severe burns
and electrical shock can occur.
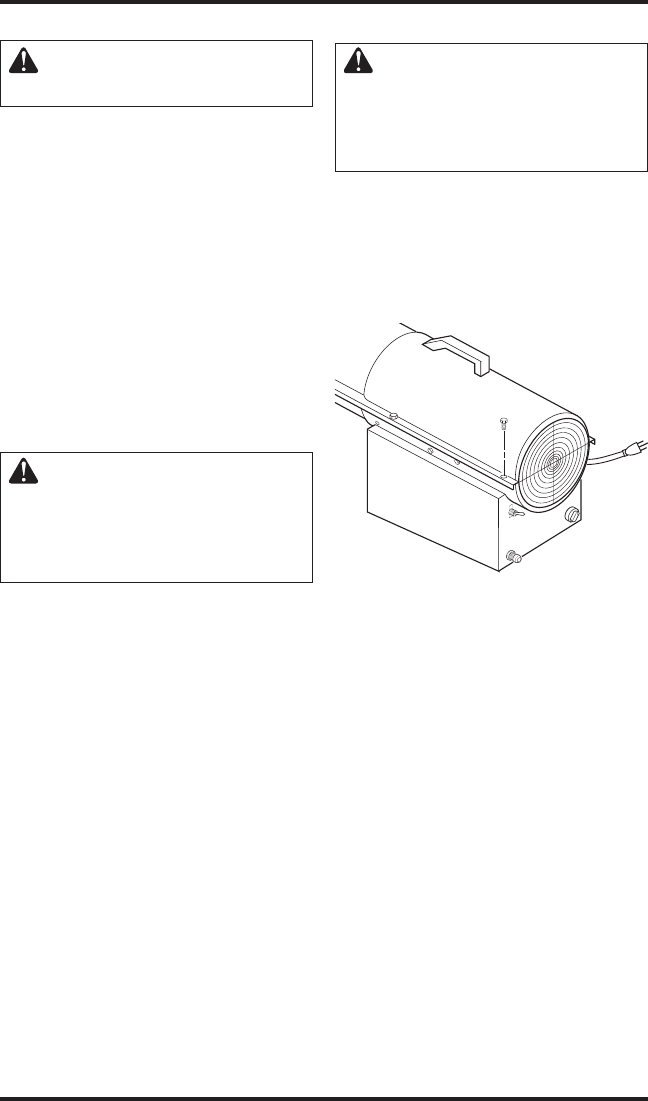
UPPER SHELL REMOVAL
1. Remove screws along each side of heater using
5/16" nut-driver. These screws attach upper
and lower shells together.
2. Lift or slide upper shell off.
3. Remove fan guard.
Figure 5 - Upper Shell Removal
FAN
IMPORTANT: Remove fan from motor shaft
before removing motor from heater. The weight
of the motor resting on the fan could damage the
fan pitch.
1. Remove upper shell (see above).
2. Use 1/8" hex wrench to loosen setscrew which
holds fan to motor shaft.
3. Slip fan off motor shaft.
4. Clean fan using soft cloth moistened with
kerosene or solvent.
5. Dry fan thoroughly.
6. Replace fan on motor shaft. Make sure set
-
screw is touching back of flat surface on motor
shaft (see Figure 8, page 7).
7. Place setscrew on flat of shaft. Tighten set
-
screw firmly 4.5 to 5.6 N-lb (40-50 in-lb).
8. Replace fan guard and upper shell.
Clean every 500 hours of
operation or as needed


