www.desatech.com
109005-01C 5
INSTALLATION
Continued
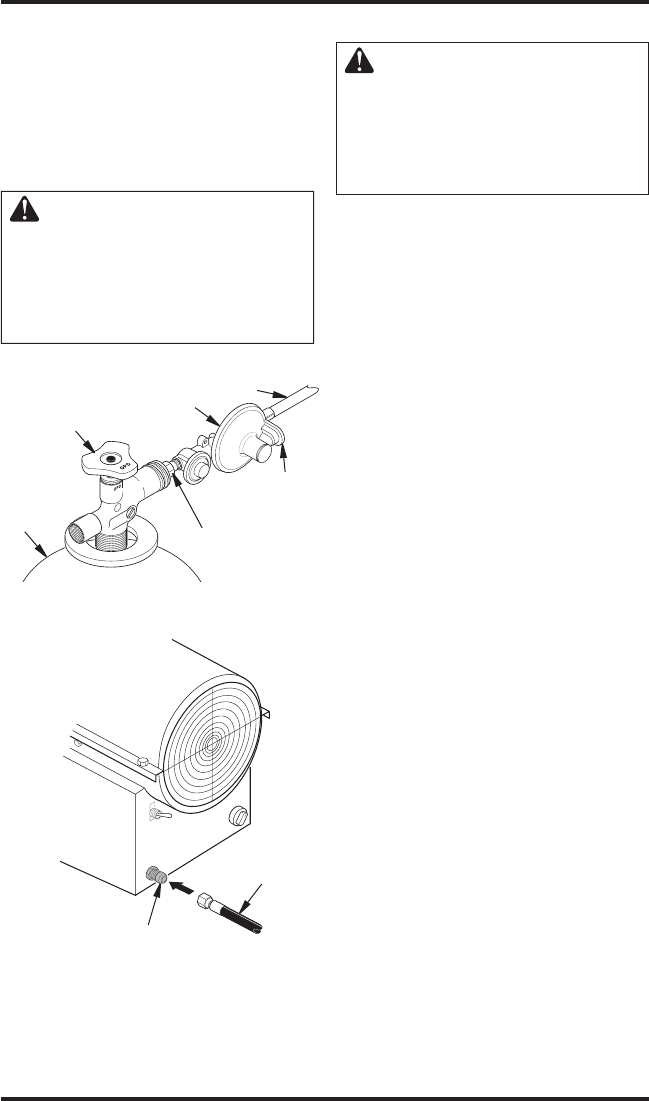
Figure 3 - Regulator With Vent Pointing
Over Hose
Hose
Regulator
Vent
(pointing
over hose)
Fuel Gas
Connector
Supply Valve
Propane
Tank
OPERATION
WARNING: Review and un-
derstand the warnings in the
Safety Information section, page
2. They are needed to safely op
-
erate this heater. Follow all local
codes when using this heater.
TO START HEATER
1. Follow all installation, ventilation and safety
information.
2. Locate heater on stable and level surface.
Make sure strong drafts do not blow into front
or rear of heater.
3. Plug power cord of heater into a three-prong,
grounded extension cord. Extension cord must
be at least 6 ft (2 m) long. Extension cord must
be UL/CGA listed.
Extension Cord Size Requirement
Up to 50 ft (15 m) long, use 18 AWG rated
cord.
51 to 100 ft (16 to 30 m) long, use 16 AWG
rated cord.
101 to 200 ft (31 to 60 m) long, use 14 AWG
rated cord.
4. Plug extension cord into a 120 volt/60 hertz,
three-hole, grounded outlet.
5. Open propane supply valve on propane tank(s)
slowly. Note: If not opened slowly, excess-
flow check valve on propane tank may stop
gas flow. If this happens, close propane supply
valve and open again slowly.
6. Turn on/off switch to the ON position. Adjust
thermostat to desired setting. If heater does
not start, thermostat setting may be too low.
Turn thermostat knob to higher position to start
heater. Note: If heater does not start, turn on/off
switch to the OFF position. Wait ten seconds
for safety control to reset, then try again.
Note: If heater still does not start after turning
thermostat knob to a higher position, the high
temperature switch may have opened during
thermostat shut down. Allow high temperature
switch to reset. This usually takes 10-15 minutes.
Try starting heater again after switch resets.
TO STOP HEATER
1. Tightly close propane supply valve on propane
tank(s). Allow heater to burn remaining fuel
in hose.
2. Wait a few seconds. Heater will burn gas left
in supply hoses.
3. Turn on/off switch to the OFF position.
4. Unplug heater.
4. Open propane supply valve on propane tank(s)
slowly.
Note: If not opened slowly, excess-
flow check valve on propane tank may stop
gas flow. If this happens, close propane supply
valve and open again slowly.
5. Check all connections for leaks.
WARNING: Never use an
open flame to check for a leak.
Apply a mixture of liquid soap
and water to all joints. Bubbles
forming show a leak. Correct all
leaks at once.
6. Close propane supply valve.
Figure 4 - Hose and Inlet Connector
Hose
Inlet Connector


