


4
104782
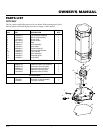
PROPANE CONSTRUCTION HEATER
RCCP200V
AT
PUSH
TO START
LO
HI
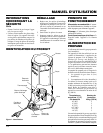
WARNING: Review and un-
derstand the warnings in the
Safety Information
section. They
are needed to safely operate this
heater. Follow all local codes
when using this heater.
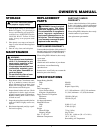
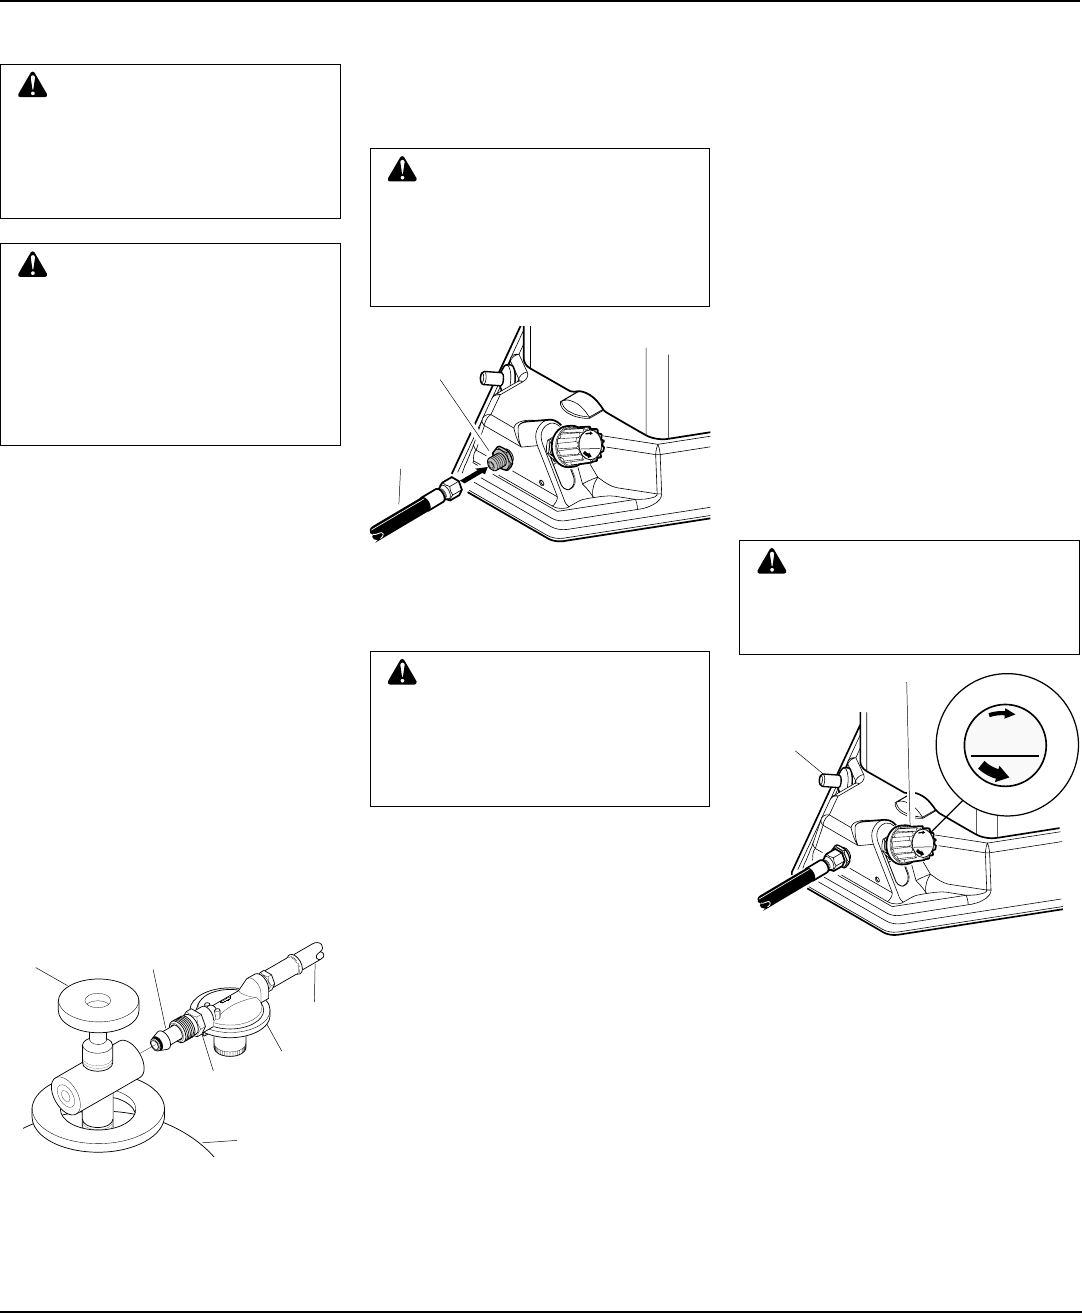
Figure 4 - Control Knob, and Piezo Ignitor
Button Locations
OPERATION
TO START HEATER
1. Follow all installation, ventilation, and
safety information.
2. Locate heater on stable and level sur-
face. Make sure strong drafts do not
blow on heater.
3. Open propane supply valve on propane
tank(s) slowly.
Note:
If not opened
slowly, excess-flow check valve on pro-
pane tank may stop gas flow. If this hap-
pens, you may hear a click inside the
regulator assembly. This is the check
valve closing. To reset the excess-flow
check valve, close propane supply
valve and open it again slowly.
4. Turn control knob counterclockwise to
the lowest position and push in (see Fig-
ure 4).
TO STOP HEATER
1. Tightly close propane supply valve on
propane tank(s). Allow heater to burn
remaining fuel in hose.
2. Shut off main burner valve. Do this by
turning control knob fully clockwise
until it stops.
TO RESTART HEATER
1. Wait five minutes after stopping heater.
2. Repeat steps under To Start Heater.
CAUTION: Do not operate
heater at extremely low input pres-
sures (100% yellow flame). This
may cause sooting inside heater.
INSTALLATION
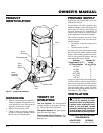
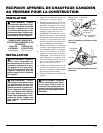
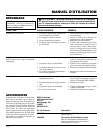
Figure 3 - Hose and Valve Inlet
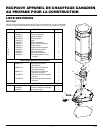
Figure 2 - Regulator With Vent Pointing
Down
1. Provide propane supply system (see
Propane Supply, page 3).
2. Connect fuel gas fitting on hose/regu-
lator assembly to propane tank(s). Turn
fuel gas fitting counterclockwise into
threads on tank. Tighten firmly using a
wrench.
IMPORTANT:
Tighten regula-
tor with vent pointing down (see Fig-
ure 2). Pointing vent down protects
regulator from weather damage.
3. Connect hose to the valve inlet. Tighten
firmly using wrench. You must use the
regulator supplied with heater.
4. Open propane supply valve on propane
tank(s) slowly.
Note:
If not opened
slowly, excess-flow check valve on pro-
pane tank may stop gas flow. If this hap-
pens, close propane supply valve and
open again slowly.
5. Check all connections for leaks. Apply
mixture of liquid soap and water to gas
joints. Bubbles forming show a leak
that must be corrected.
6. Close propane supply valve.
WARNING: Never use an open
flame to check for a leak. Apply a
mixture of liquid soap and water
to all joints. Bubbles forming
show a leak that must be cor-
rected. Correct all leaks at once.
WARNING: Test all gas pip-
ing and connections for leaks
after installation or servicing.
Never use an open flame to check
for a leak. Apply a mixture of
liquid soap and water to all joints.
Bubbles forming show a leak.
Correct all leaks at once.
WARNING: Review and un-
derstand the warnings in the
Safety Information
section, page
2. They are needed to safely op-
erate this heater. Follow all local
codes when using this heater.
Propane
Tank
Propane
Supply Valve
Fuel Gas
Fitting
Hose
Regulator
Vent
(pointing down)
Hose
Valve
Inlet
AT
PUSH
TO START
LO
HI
AT
PUSH
TO START
LO
HI
Piezo
Ignitor
Button
Control Knob
5. With the control knob pushed all the
way in, press and release the piezo ig-
nitor button (see Figure 4). Keep press-
ing piezo ignitor button until the burner
lights. Hold control knob down for a
maximum of 10 seconds while attempt-
ing ignition. If heater does not ignite,
release control knob and wait 3 min-
utes before attempting reignition.
Note:
Keep hands and face away from outlet
(around top of shell) of heater while
attempting to start heater.
6. After ignition, hold control knob down
for approximately 30 seconds. This
activates the automatic control system.
7. When main burner remains lit, set heater
at the desired heat level by turning the con-
trol valve counterclockwise. If burner goes
out, turn off gas. Turn control knob fully
clockwise to the lowest position. Check
fuel supply. If adequate fuel is available,
restart heater beginning at step #1.