


www.desatech.com
113109-01G 17
INSTALLATION
Continued
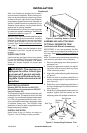
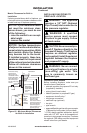
5. Correct all leaks at once.
6. Light replace (see Operation, page 19.
Check all other internal joints for leaks.
7. Turn off replace (see To Turn Off Gas to
Appliance, page 20).
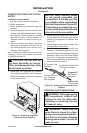
INSTALLING LOGS
CAUTION: Do not remove the
-
WARNING: After installa-
-
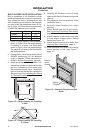
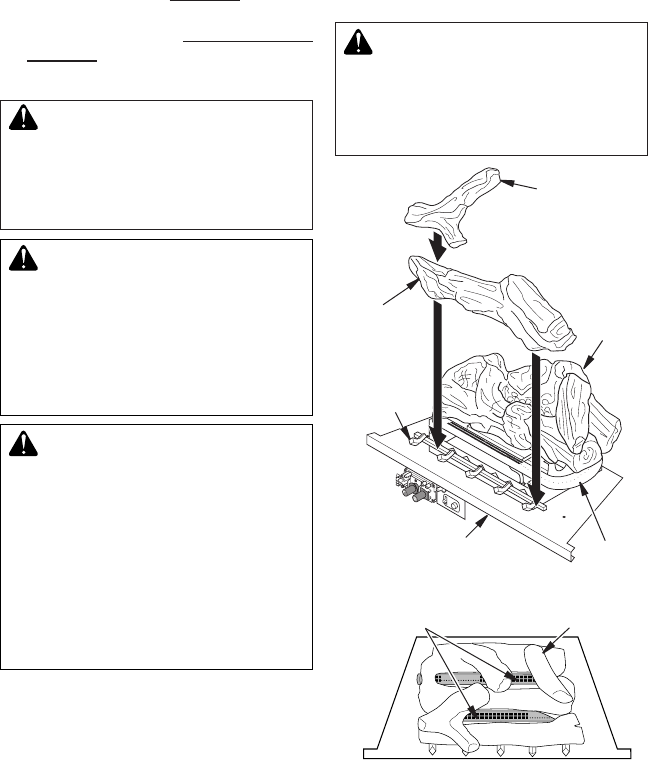
It is very important to install the logs exactly
as instructed. Do not modify logs. Only use
logs supplied with replace.
1. Place back log #1 on grate to t as il-
lustrated in Figure 24. Make sure middle
section at bottom of log set is seated into
“U”-shaped cutout in center of chassis
(see Figure 24). IMPORTANT: Make sure
log does not cover any burner ports (see
Figure 25).
2. Place front log #2 against front grate
prongs as shown in Figure 24.
3. Place crossover log #3 on top of front and
back logs as shown in Figure 24.
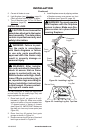
Figure 24 - Installing Log Set
Chassis
Crossover
Log #3
Burner
Front
Log #2
Back
Log #1
Grate
Prongs
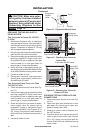
Figure 25 - Installing Log Set, Top View
Log Set
Burner Ports
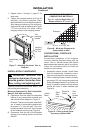
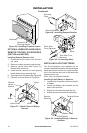
4. Install replace screen by slipping notches
of replace screen over screws on front
of replace (see Figure 26, page 18).
-