


www.desatech.com
111076-01F 9
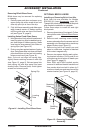
Removing Bifold Glass Doors
Bifold doors may be removed for replacing
or cleaning.
1. Partially open each door and press up on
upper spring clip with a screw driver until
outer top pivot pin is free of the clip.
2. Fully fold frame assembly and slide upper
edge towards center of rebox opening
until the guide pins are free of the frame
rail (see Figure 12, page 8).
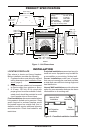
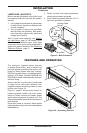
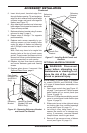
Installing Series Fixed Glass Doors
1. Hold glass door rmly at both handles and
insert top pins into clips located below up-
per facial edge of rebox opening. Make
sure top pins snap securely into holes on
spring clips (see Figure 14).
2. Push up on glass against tension of spring
clips. Swing lower door into face until lower
pins clear bottom rail and set into locating
holes on each end (see Figure 14).
Note: If pins do not align into spring clips,
slightly loosen retaining screws on each clip
(see Figure 13, page 8). Reinsert panel into
each spring clip and align panel into lower
locating holes. Remove panel, nish tighten
screws and reinsert panel.
ACCESSORY INSTALLATION
Continued
Figure 14 - Installing Fixed Glass Doors
Spring Clip
Locating
Hole
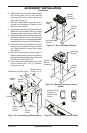
OPTIONAL BRICK LINERS
Installing or Removing Brick Liner Kits
Brick liner kits are available for Models
E36/32(L)(H) (see Accessories, page 25).
These brick panels may be installed anytime
after replace installation is complete.
Follow these steps to install left and right
brick panels:
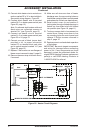
1. Remove glass doors (if equipped). Follow
instructions under Optional Glass Doors,
page 8.
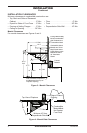
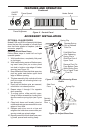
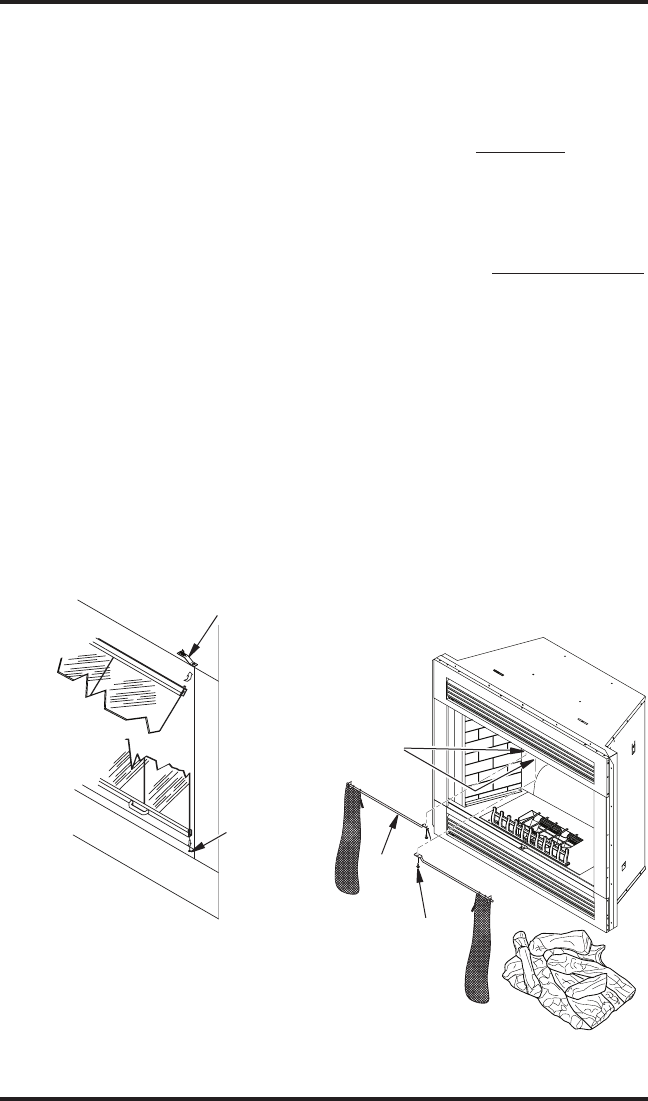
2. Remove each retaining screw holding
screen rods and pull entire screen and rod
assembly out of locating hole on inside top
edge of rebox (see Figure 15).
3. Remove log bed from hearth pan and
place in a safe area. Log bed is attached
with contact magnets only.
4. Remove two screws holding each refrac-
tory bracket to rebox. Pull up and lift out
of positioning slot at bottom of hearth pan
(see Figure 16, page 10).
Note: E36L and E36LH models require
removal of additional hearth brackets and
face panels which are held in place by 2
screws on hearth pan and one screw at top
retainer bracket (see Figure 16, page 10).
Figure 15 - Removing Screen/Rod
Assembly
Screen
Rod
Retaining
Screw
Mounting
Holes