


- 18 - For more information, visit www.desatech.com
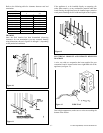
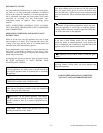
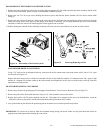
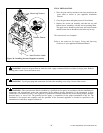
DISASSEMBLING THE HEARTH AND BURNER SYSTEM
1. Remove the grate with the logs left in place, by lifting the grate portion off of its stands and place the entire assembly outside of the
unit for ease of reassembly. (Refer to figure 34 Disassembly of Hearth System)
2. Remove the two 5/16" hex type screws holding the burner in place and slide the burner forward off of the orifice mount while
lifting up.
3. Remove the two side brick panels by lifting up the inner edge above the hearth pan and sliding the brick inward into the grate
stand, then lifting out the outer edge over the flange of the facing. If necessary you can push the hearth pan over to one extreme
side then re-center it to remove the remaining brick on the opposite side of firebox.
4. With the hearth pan centered lift the end flange of the pan off of the rear brick stand and raise it up and out of the firebox.
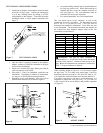
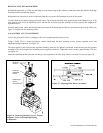
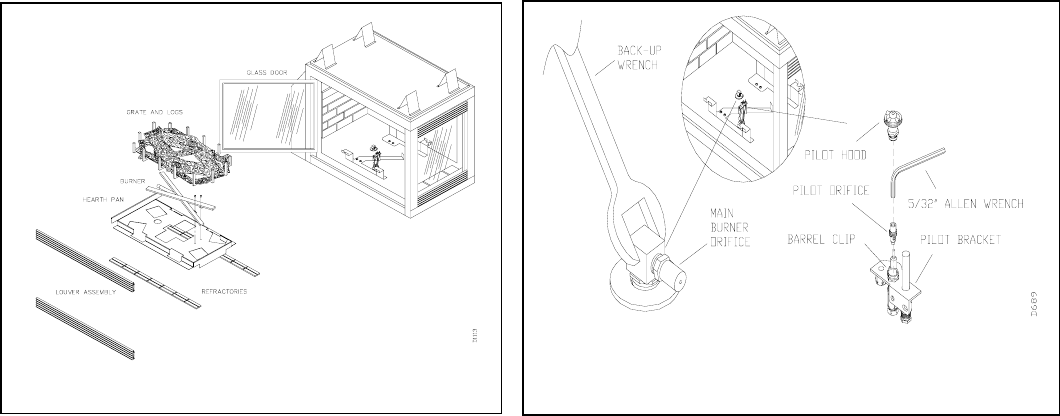
MAIN BURNER ORIFICE CONVERSION
Using a 7/8" open end or an adjustable back-up, wrench on the orifice mount remove the main burner orifice with a 11/16" open
end wrench. (See figure 35).
Replace the main burner orifice with the one included with the kit and identified with the #51 stamped on the side. Apply a light
amount of a Propane/LP resistant sealant to the male threads and retighten the orifice into its mount using a back-up wrench to
maintain its centered position.
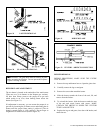
PILOT BURNER ORIFICE CONVERSION
1. Remove the pilot hood by pulling up until it disengages from the barrel. Do not remove the barrel clip (see figure 35).
2. Remove the pilot orifice from inside the barrel using a 5/32” allen wrench to unscrew the orifice.
3. Replace pilot orifice with LP orifice supplied with this kit. The number 30 is stamped on the sleeve for identification. Insert the
small end of the new pilot orifice into the barrel and thread until tight with the allen wrench.
4. Line up the notch on pilot hood to the positioning tab on the barrel receiver and snap back into position.
IMPORTANT: Be careful not to bend or kink the aluminum tubing during conversion. Make sure the pilot hood and orifice are
properly mated and aligned after finishing this conversion.
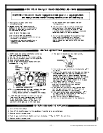
Figure 34 Disassembly of the Hearth System
Figure 35 Removing/Replacing Orifices