


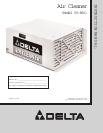

12
MAINTENANCE
CHANGING AN D
CLEANING FILTERS
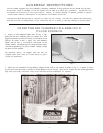
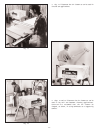
1. To remove the outer first stage filter (H) Figs. 18 and
19, lif t and pull out the bottom of the filter as shown.
2. Remove inner bag filter (J) Fig. 19, in the same
manner.
3. The first st age filter (H) Figs. 18 and 19, can be re-
placed or cleaned depending on its condition. This filter
can be cleaned in one of two methods: a shop-vac can
be used to remove the dust, or compressed air can be
used to blow the dust out of the filter.
Fig. 18
H
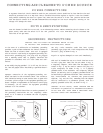
Fig. 21
H
J
W ARNING: COMPRESSEDAIRCANBEDANGEROUS. FOROPERATORSAFETY,D O NOT EXCEEDANAIR PRES-
SURE OF 30 PSIO RPOINTAIR NOZZLE TO WARD ANYONEORAIMAIRNOZZLEAT YOURO WNBODY. ALWAYS
WEARSAFETY GLASSES ANDDUST MASKWHENPERFORMING THIS PROCEDURE.
4. The inner bag filter (J) Fig. 19, cannot be cleaned; it is disposable and must be replaced.
5.Install both filters in the reverse order in which they were removed. NOTE: Make certain the A IR FLOWARROW
on each filter is pointing inward toward the rear of the air cleaner, as illustrated in Fig. 19 .
Fig. 19 Fig. 20
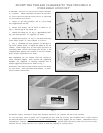
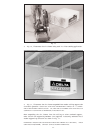
IDENTIFICATION PL ATE
LOCATION
The identification plate (K) Fig. 20, showing the serial
number and model of the air cleaner, is located at the
rear of the air cleaner, directly below power cord. Please
write these numbers on the front cover of this manual for
future reference.
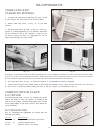
ACCESSORIES
Fig. 21, illustrates the replacement air filters that are
available from Delta.
PARTNO. DESCRIPTION
50-858 (H) Disposable Pleated Filter (pre-filter)
50-859 (J) 3-pocket Internal Filter
50-857 Charcoal Filter (not shown)
H
J
Air Flow
K