


Dayton Operating Instructions and Parts Manual
8
Dayton Portable
Oil-Fired Heaters
®
101421
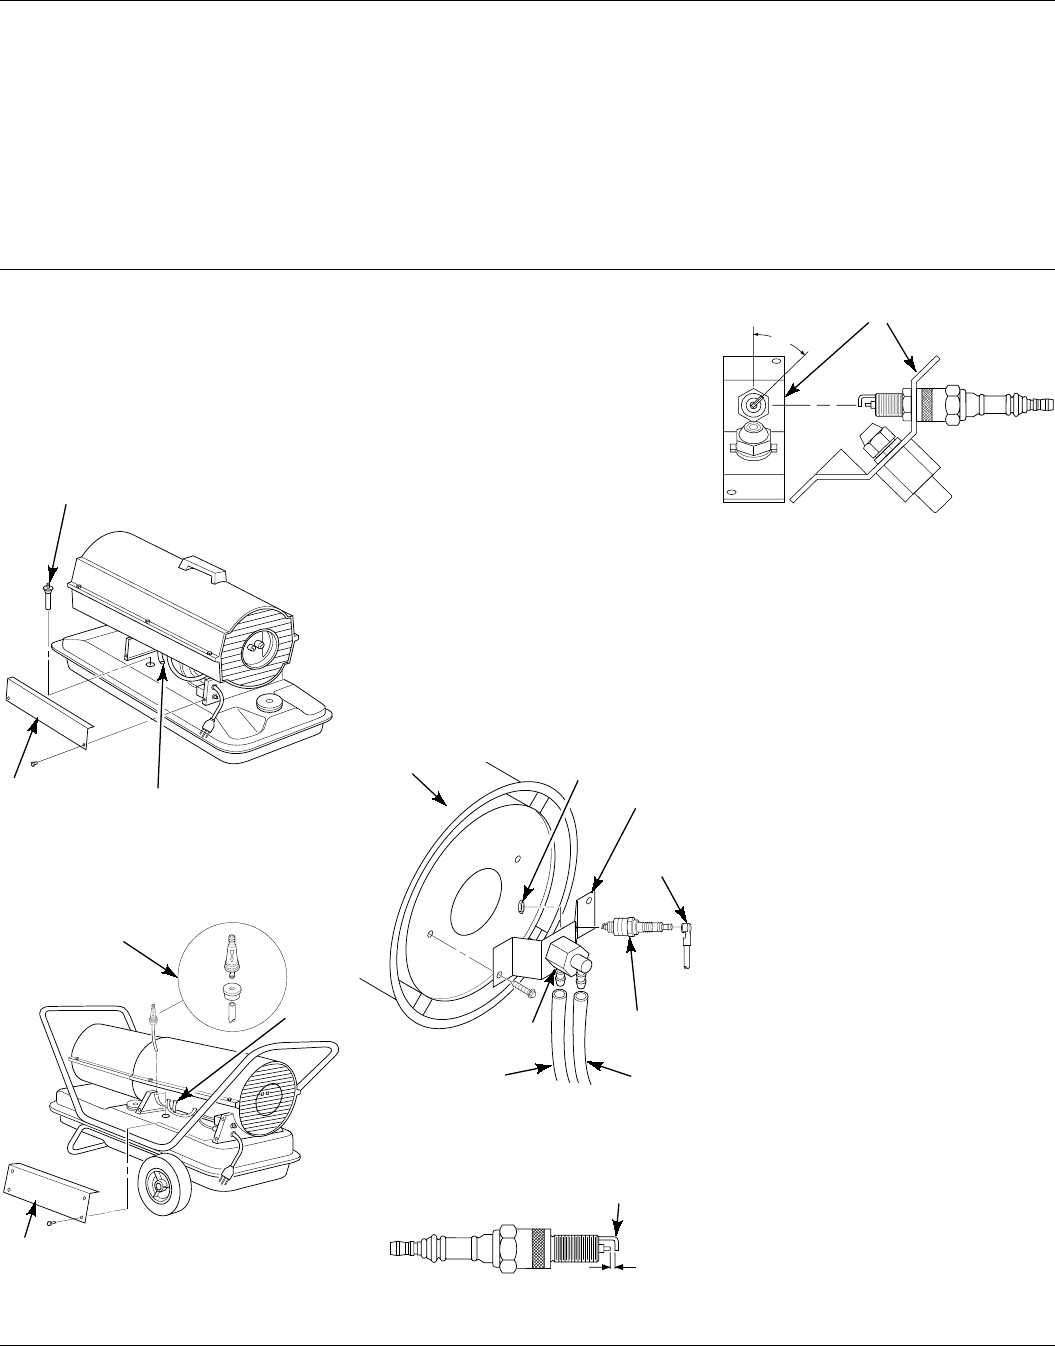
Maintenance (Continued)
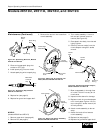
Side
Cover
Upper Fuel Line
Fuel Filter
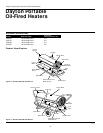
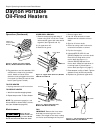
Figure 17 - Fuel Filter Removal, Models
2E510D and 2E511D
Side
Cover
Upper
Fuel
Line
Figure 18 - Fuel Filter Removal, Models
3E218D and 3E219C
SPARK PLUG
(Models 2E510D and 2E511D)
1. Remove upper shell (see page 6).
2. Remove fan (see page 6).
3. Remove fuel and air line hoses from
nozzle assembly.
4. Remove spark plug wire from spark
plug.
5. Remove two screws using 5/16" nut-
driver and remove burner strap.
6. Place hex-body of spark plug into
vise and tighten.
7. Remove spark plug mounting nut
using 11/16" open-end wrench.
8. Remove burner strap from spark plug.
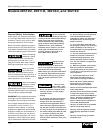
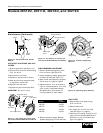
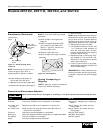
Figure 20 - Spark Plug Gap, Models
2E510D and 2E511D
Gap
Bend Here to
Adjust Gap
Fuel Line
Hose
Figure 19 - Spark Plug Removal, Models
2E510D and 2E511D
Burner Strap
Spark Plug
Combustion
Chamber
Spark Plug
Mounting Nut
9. Clean and regap spark plug elec-
trodes to .055" 2E510D and .075"
2E511D gap.
10. Replace burner strap onto spark
plug. Rotate burner strap to position
spark plug electrodes (see Figure 21).
11. Tighten spark plug with spark plug
mounting nut.
12. Release hex-body of spark plug
from vise.
13. Replace burner strap onto combus-
tion chamber.
14. Attach spark plug wire to spark plug.
15. Attach fuel and air line hoses to
nozzle assembly.
16. Replace fan (see page 6).
17. Replace fan guard and upper shell.
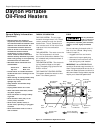
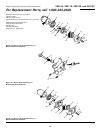
45°
Figure 21 - Spark Plug Rotation, Models
2E510D and 2E511D
Burner Strap
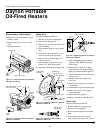
SPARK PLUG
(Models 3E218D and 3E219C)
1. Remove upper shell (see page 6).
2. Remove fan (see page 6).
3. Remove spark plug wire from spark
plug.
4. Remove spark plug from burner
head using 13/16" open-end wrench.
5. Wash fuel filter with clean fuel and
replace in tank.
6. Attach upper fuel line to fuel filter
neck.
7. Replace side cover.
Fuel Filter, Bushing, and
Lower Fuel Line
Spark Plug
Wire
Nozzle
Assembly
Air Line
Hose