


0nstatUation
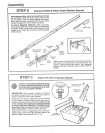
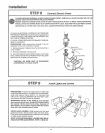
STEP 8 ConnectElectricPower
I
TO AVOID SERIOUS PERSONAL INJURY FROM ENTANGLEMENT, REMOVE ALL ROPES CON NECTEDTO THE I
GARAGE DOOR BEFORE OPERATING DOOR OPENER_
REMOVE EXISTING GARAGE DOOR LOCKS OR USE AWOOD SCREW OR NAIL TO MAKE THE_,_ INOPERATIVE,
INSTALLATION AND WIRING MUST BE IN COMPLIANCE WITH LOCAL BUILDING AND ELECTRICAL CODES.
OPERATION AT OTHER THAN !2OV 6OHz WILL CAUSE OPENER MALFUNCTION AND DAMAGE,
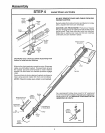
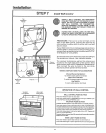
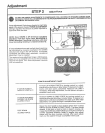
IF LOCAL ELECTRICAL CODES DO NOT REQUI RE
PER MAN ENT WIRING: Insert the 3-prong plug into a
3-hole receptacle. UNIT MUST BE GROUNDED DO
NOT USE A 2-WIRE ADAPTER,
IF LOCAL CODES REQUIRE PERMANENTWIRING:
Refer to illustration,
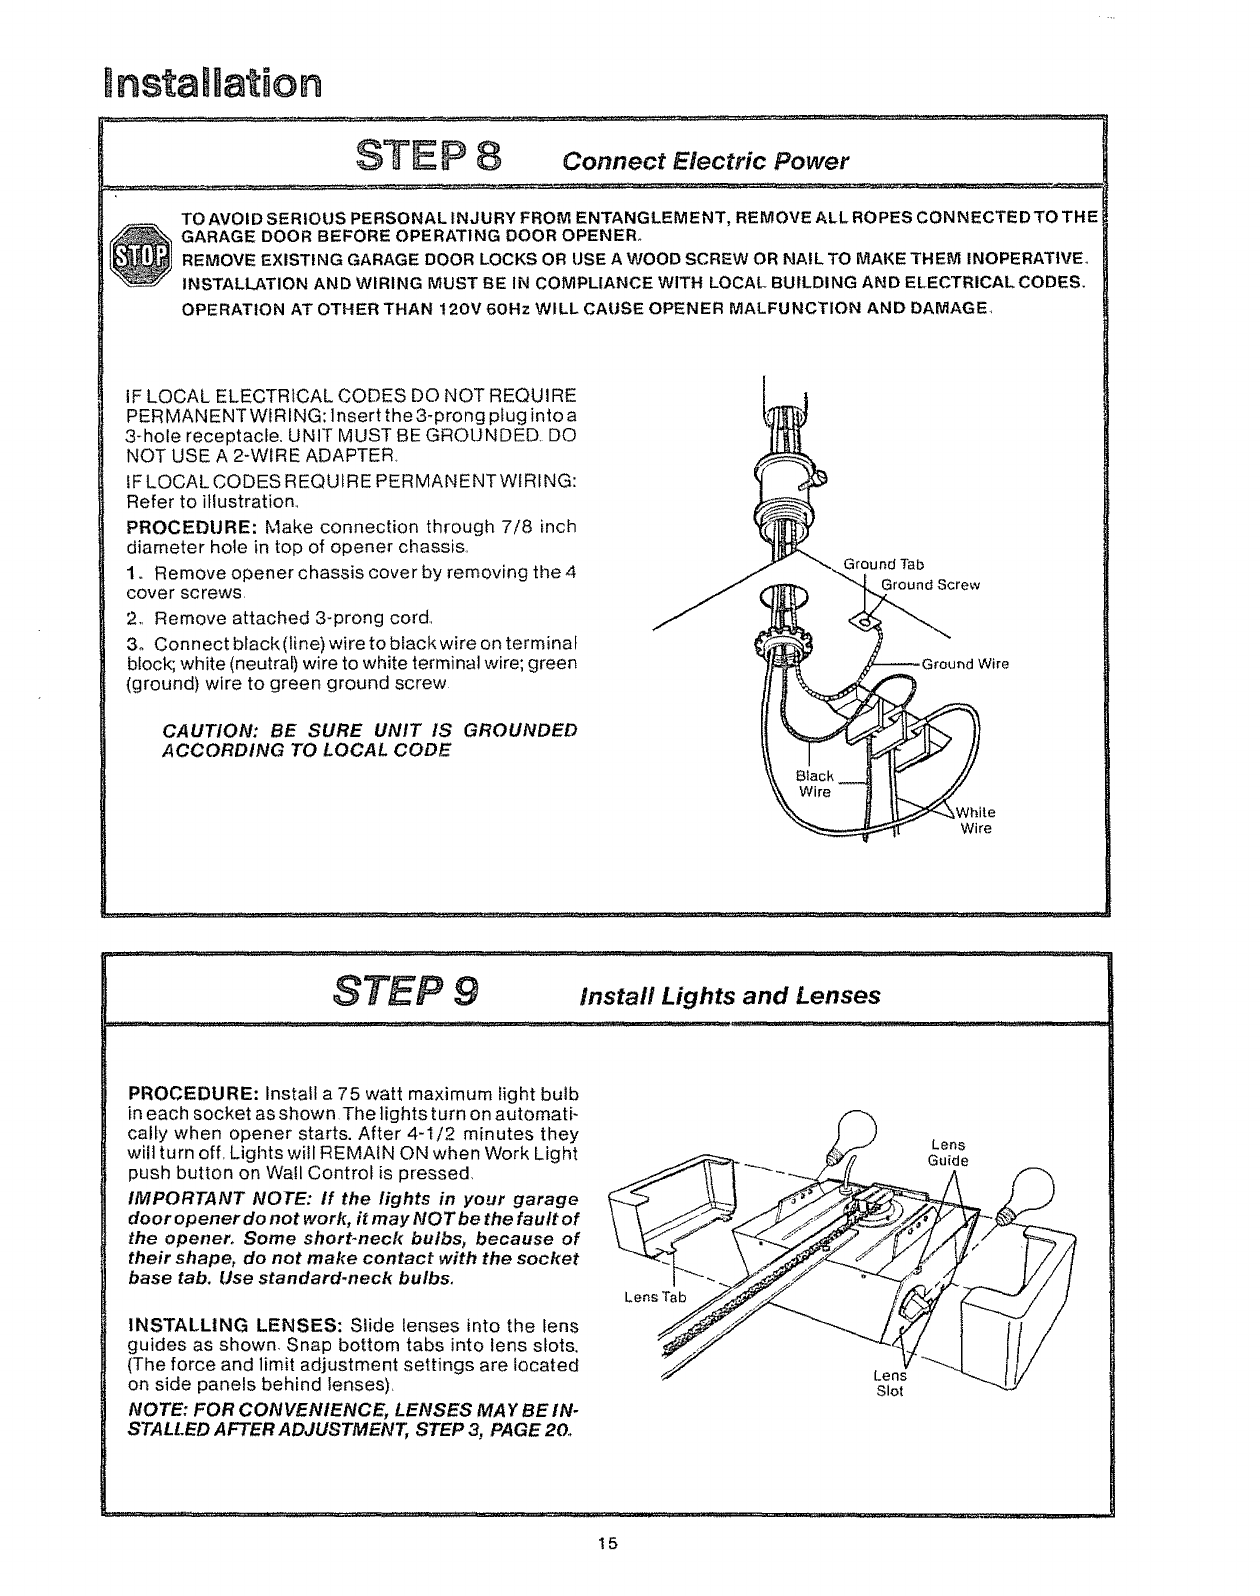
PROCEDURE: Make connection through 7/8 inch
diameter hole in top of opener chassis,
1o Remove opener chassis cover by removing the 4
cover screws,
2,, Remove attached 3-prong cord,
3. Connect black (line) wire to black wire on terminal
block; white (neutral) wire to white terminal wire; green
(ground) wire to green ground screw
CAUTION: BE SURE UNIT IS GROUNDED
ACCORDING TO LOCAL CODE
Ground Tab
Ground Screw
IWire
_,White
Wire
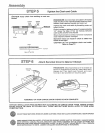
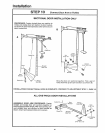
STEP 9 i. to, Lights andLenses
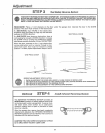
PROCEDURE: Install a 75 watt maximum light bulb
in each socket as shown The lights turn on automatF
calty when opener starts. After 4-I/2 minutes they
will turn off, Lights will REMAIN ON when Work Light
push button on Wail Control is pressed,
IMPORTANT NOTE: If the lights in your garage
door opener do not work, it may NOT be the fault of
the opener° Some short-neck butbs_ because of
their shape, do not make contact with the socket
base tab. Use standard.neck bulbs°
INSTALLING LENSES: Slide lenses into the fens
guides as shown. Snap bottom tabs into lens slots.
(The force and limit adjustment settings are located
on side panels behind lenses),
NOTE: FOR CONVENIENCE, LENSES MAY BE IN-
STALLED AFTER ADJUSTMENT, STEP 3, PAGE 20_
Lens Tab
Lens
Slot
Lens
Guide
15