


EMPTYING TANK COMPLETELY
Your Craftsman Wet/Dry VacuUm can be emptied of liquid
waste by removing the drain cap. To empty, turn unit off
and remove plug from wall receptacle. Remove the drain
cap and deposit the liquid waste contents into a suitable
drain. After the tank is empty, return the drain cap to its
original position. To continue use, plug the cord into the
wall receptacle and turn unit on.
AUTOMATIC SHUT-OFF
This vacuum cleaner is equipped with an automatic shut
off feature when picking up liquids. As the level of liquid
rises an internal float electronically shuts the unit off when
liquid reaches tank capacity. At this point, the liquid must
be emptied to altlow vacuuming to continue. Refer to sec-
tions above.
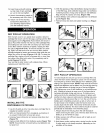
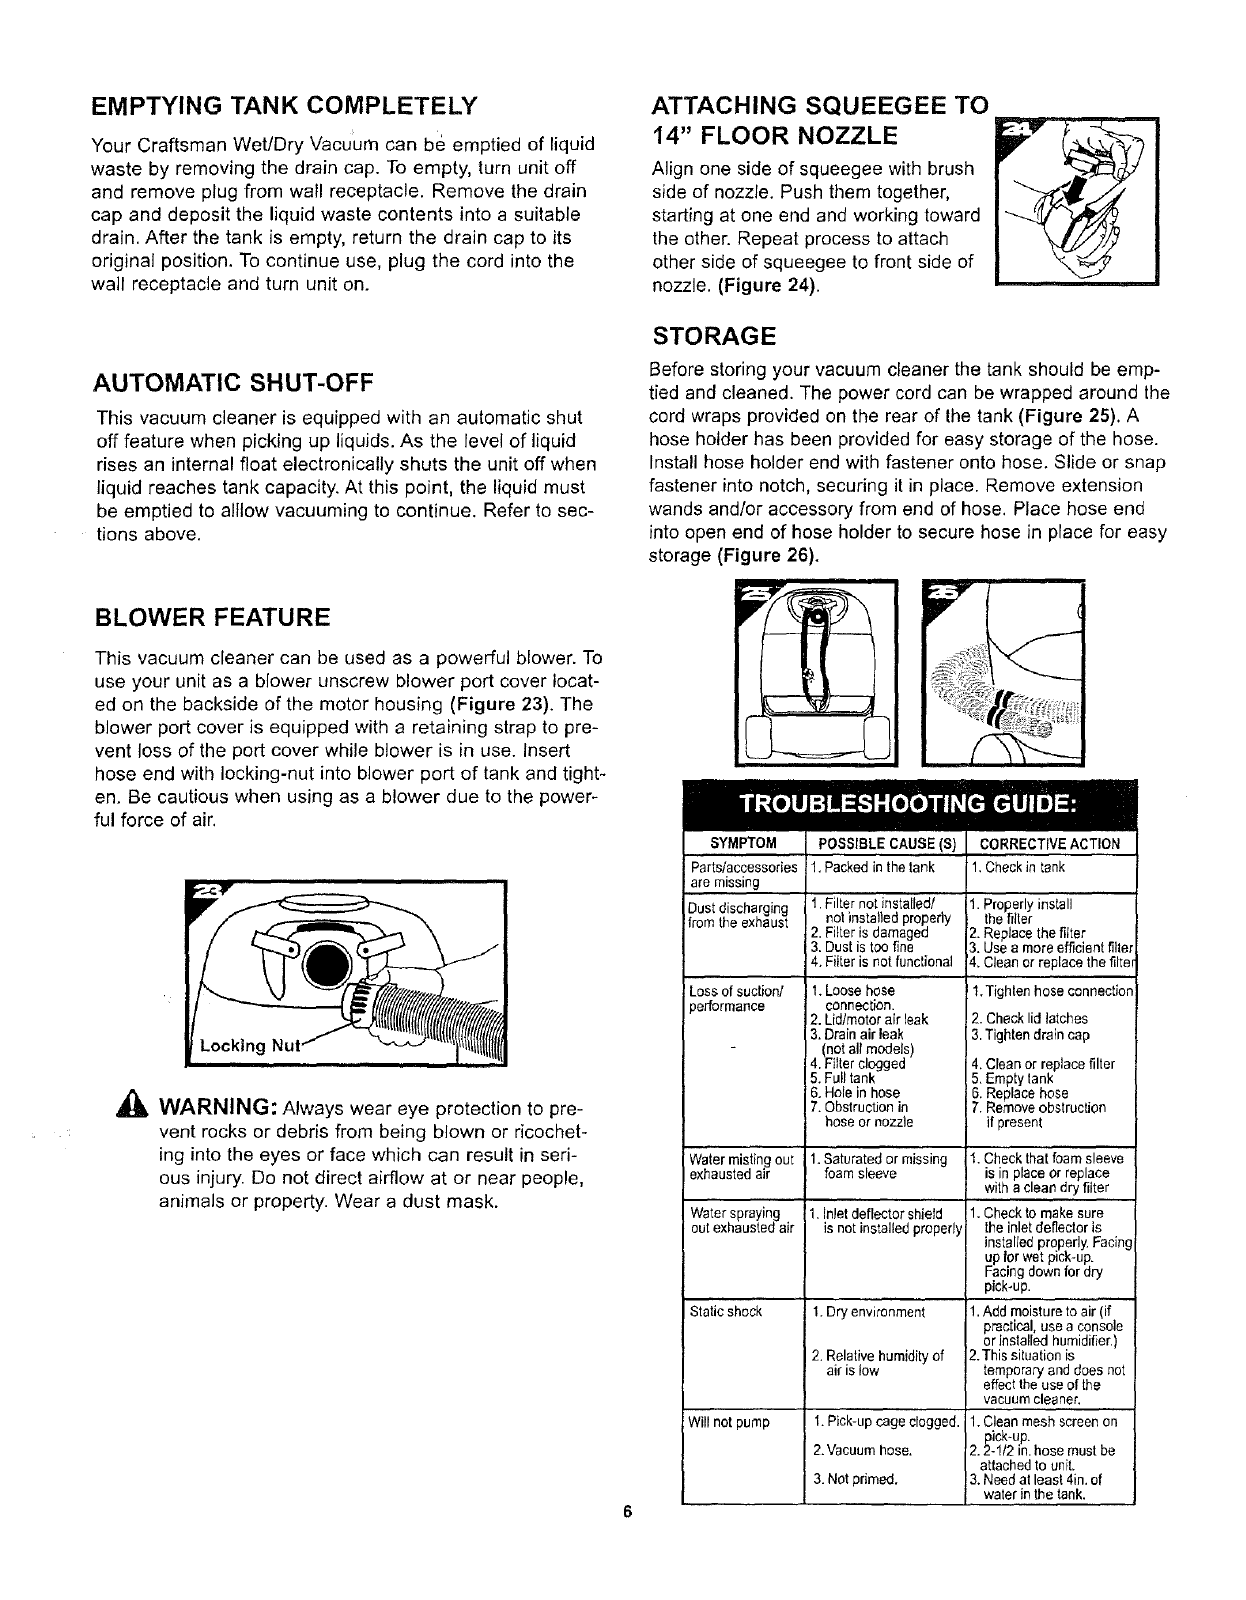
ATTACHING SQUEEGEE TO
14" FLOOR NOZZLE
Align one side of squeegee with brush
side of nozzle. Push them together,
starting at one end and working toward
the other. Repeat process to attach
other side of squeegee to front side of
nozzle. (Figure 24).
STORAGE
Before storing your vacuum cleaner the tank should be emp-
tied and cleaned. The power cord can be wrapped around the
cord wraps provided on the rear of the tank (Figure 25). A
hose holder has been provided for easy storage of the hose.
Install hose holder end with fastener onto hose, Slide or snap
fastener into notch, securing it in place. Remove extension
wands and/or accessory from end of hose. Place hose end
into open end of hose holder to secure hose in place for easy
storage (Figure 26).
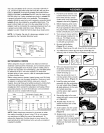
BLOWER FEATURE
This vacuum cleaner can be used as a powerful blower. To
use your unit as a blower unscrew blower port cover locat-
ed on the backside of the motor housing (Figure 23). The
blower port cover is equipped with a retaining strap to pre-
vent loss of the port cover while blower is in use. Insert
hose end with locking-nut into blower port of tank and tight-
en. Be cautious when using as a blower due to the power-
ful force of air.
_, WARNING: Always wear eye protection to pre-
vent rocks or debris from being blown or ricochet-
ing into the eyes or face which can result in seri-
ous injury. Do not direct airflow at or near people,
animals or property. Wear a dust mask.
SYMPTOM POSSIBLECAUSE(S) CORRECTIVEACTION
Parts/accessories 1.Packedinthetank 1.Checkin tank
are missing
Dust discharging 1.Filternotinstalled/ 1.Properlyinstall
notinstalled properly thefiller
from theexhaust 2.Filteris damaged 2.Replacethefilter
3.Dustistoo fine 3.Usee moreefficientfiller
4.Filteris notfunctional 4.Clean or replacethefilter
Lossof suction/
3erformance
Watermistingout
exhaustedair
Waterspraying
outexhaustedair
Static shoGk
Will not pump
I. Loose hose
aonnecfion.
2. Lidlmotor air leak
3. Drain air leak
(net all models)
4. Filter clogged
5. Full tank
6. Hole in hose
7. Obstruction in
hose or nozzle
1.Saturated or missing
foam sleeve
1.Inletdeflectorshield
is notinstalledproperly
1.Dryenvironment
2. Relativehumidityof
airis low
1.Pick-up cage clogged.
2. Vacuum hose.
3. Not primed.
1.Tightenhose connection
2. Checklid latches
3.Tightendraincap
4.Cleanor replacefilter
5.Emptytank
6. Replacehose
7. Removeobstruction
ifpresent
1.Checkthatfoamsleeve
is inplaceor replace
withacleandry filter
1.Checkto makesure
theinletdeflectoris
installedproperly.Facing
upfor ;vetpick-up.
Facingdownfor dry
pick-up.
1,Addmoistureto air(if
practical,usea console
or installedhumidifier.)
2.This skuationis
temporaryanddoes not
effecttheuse ofthe
vacuumcleaner.
1.Cleanmesh screenon
pick-up.
2.2-!12 in.hose must be
attachedto unit.
3.Needatleast 4in.of
water inthe tank.