


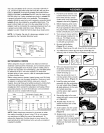

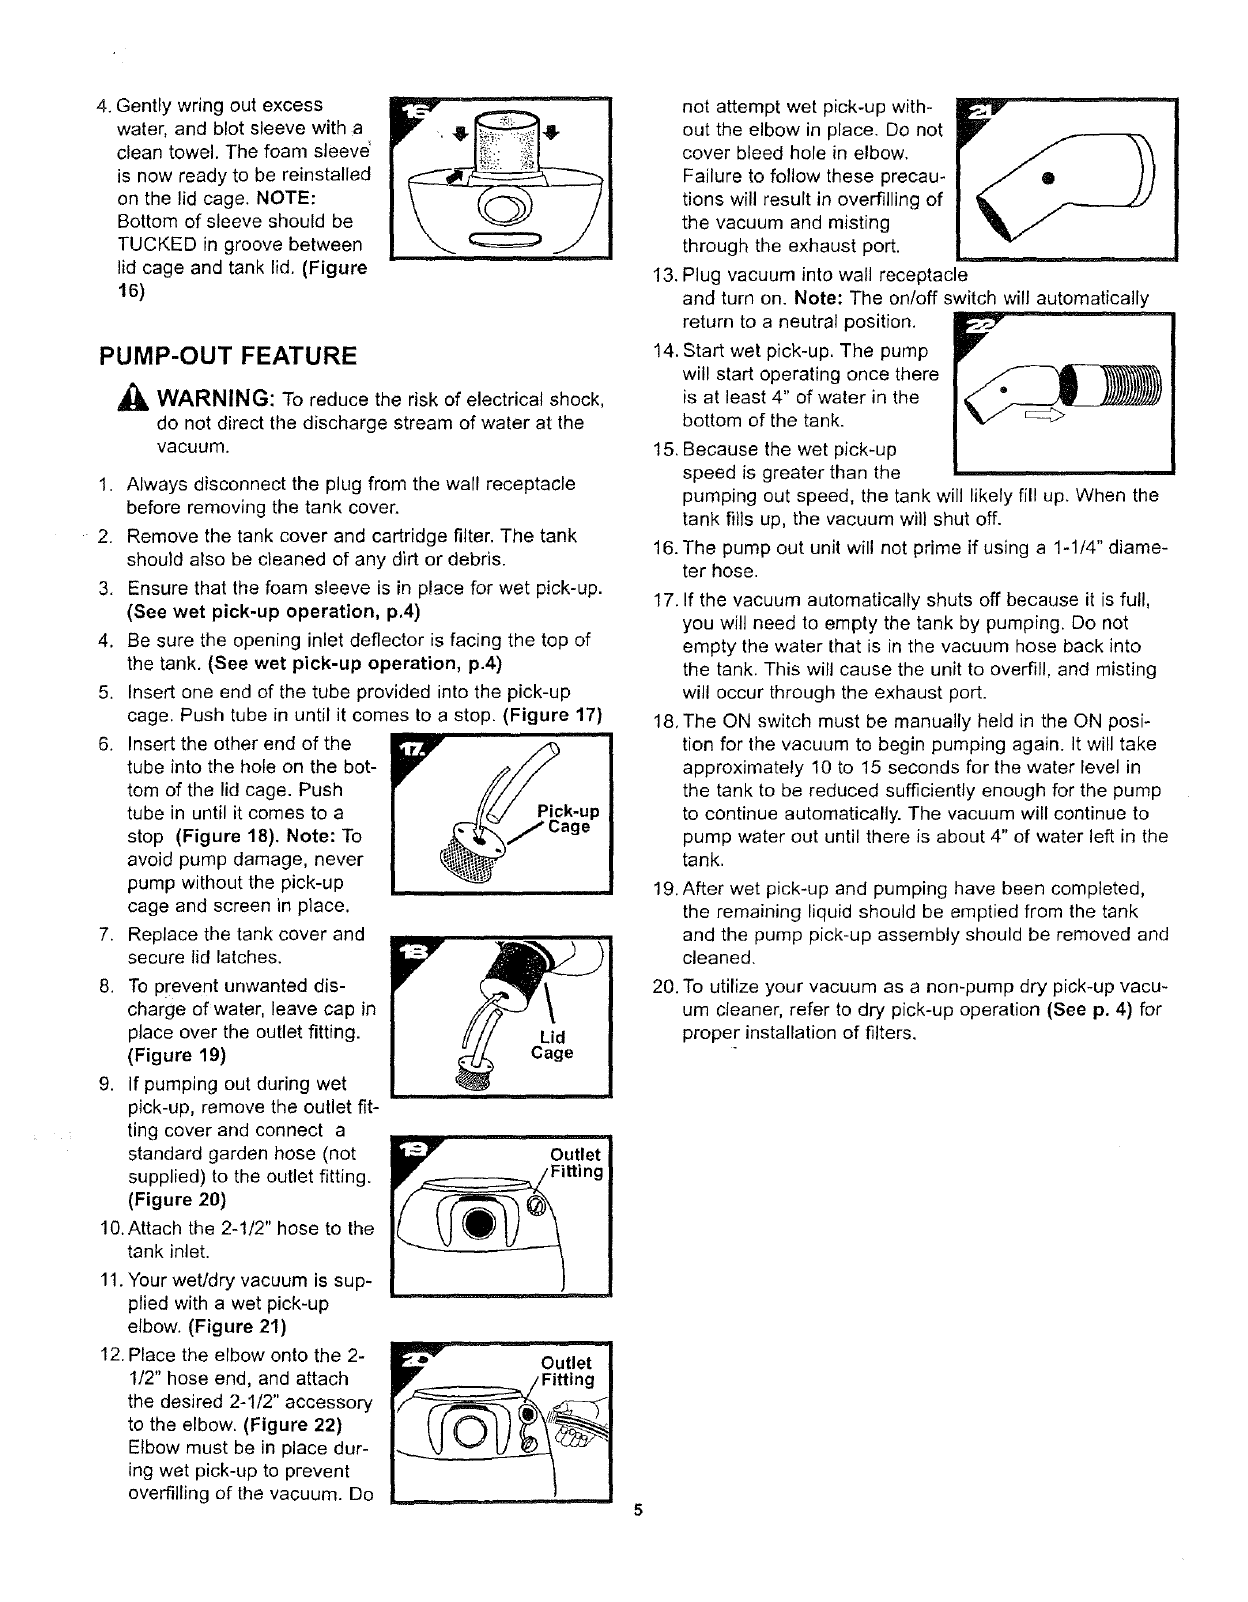
4.
Gently wring out excess
water, and blot sleeve with a
clean towel. The foam sleeve'
is now ready to be reinstalled
on the lid cage. NOTE:
Bottom of sleeve should be
TUCKED in groove between
lid cage and tank lid. (Figure
16)
PUMP-OUT FEATURE
_, WARNING: To reduce the risk of electrical shock,
do not direct the discharge stream of water at the
vacuum.
1. Always disconnect the plug from the wall receptacle
before removing the tank cover.
2. Remove the tank cover and cartridge filter. The tank
should also be cleaned of any dirt or debris.
3. Ensure that the foam sleeve is in place for wet pick-up.
(See wet pick-up operation, p.4)
4. Be sure the opening inlet deflector is facing the top of
the tank. (See wet pick-up operation, p.4)
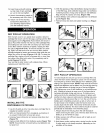
5. Insert one end of the tube provided into the pick-up
cage. Push tube in until it comes to a stop. (Figure 17)
6. Insert the other end of the
tube into the hole on the bot-
tom of the lid cage. Push
tube in until it comes to a
stop (Figure 18). Note: To
avoid pump damage, never
pump without the pick-up
cage and screen in place.
7. Replace the tank cover and
secure lid latches.
8. To prevent unwanted dis-
charge of water, leave cap in
place over the outlet fitting.
(Figure 19)
9. If pumping out during wet
pick-up, remove the outlet fit-
ting cover and connect a
standard garden hose (not
supplied) to the outlet fitting.
(Figure 20)
10.Attach the 2-!/2" hose to the
tank inlet.
11.Your wet/dry vacuum is sup-
plied with a wet pick-up
elbow. (Figure 21)
12.Place the elbow onto the 2-
1/2" hose end, and attach
the desired 2-1/2" accessory
to the elbow. (Figure 22)
Elbow must be in place dur-
ing wet pick-up to prevent
overfilling of the vacuum. Do
not attempt wet pick-up with-
out the elbow in place. Do not
cover bleed hole in elbow.
Failure to follow these precau-
tions will result in overfilling of
the vacuum and misting
through the exhaust port.
13.
Plug vacuum into wall receptacle
and turn on. Note: The on/off switch will automatically
return to a neutral position.
14. Start wet pick-up. The pump
will start operating once there
is at least 4" of water in the
bottom of the tank.
15. Because the wet pick-up
speed is greater than the
pumping out speed, the tank will likely fill up. When the
tank fills up, the vacuum will shut off.
16.The pump out unit will net prime if using a 1-1/4" diame-
ter hose.
17. If the vacuum automatically shuts off because it is full,
you will need to empty the tank by pumping. Do not
empty the water that is in the vacuum hose back into
the tank. This will cause the unit to overfill, and misting
will occur through the exhaust port.
18, The ON switch must be manually held in the ON posi-
tion for the vacuum to begin pumping again. It will take
approximately 10 to 15 seconds for the water level in
the tank to be reduced sufficiently enough for the pump
to continue automatically. The vacuum will continue to
pump water out until there is about 4" of water left in the
tank.
19. After wet pick-up and pumping have been completed,
the remaining liquid should be emptied from the tank
and the pump pick-up assembly should be removed and
cleaned.
20. To utilize your vacuum as a non-pump dry pick-up vacu-
um cleaner, refer to dry pick-up operation (See p. 4) for
proper installation of filters.