


.............. . .. ...........:.,_......... . _
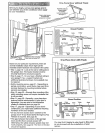
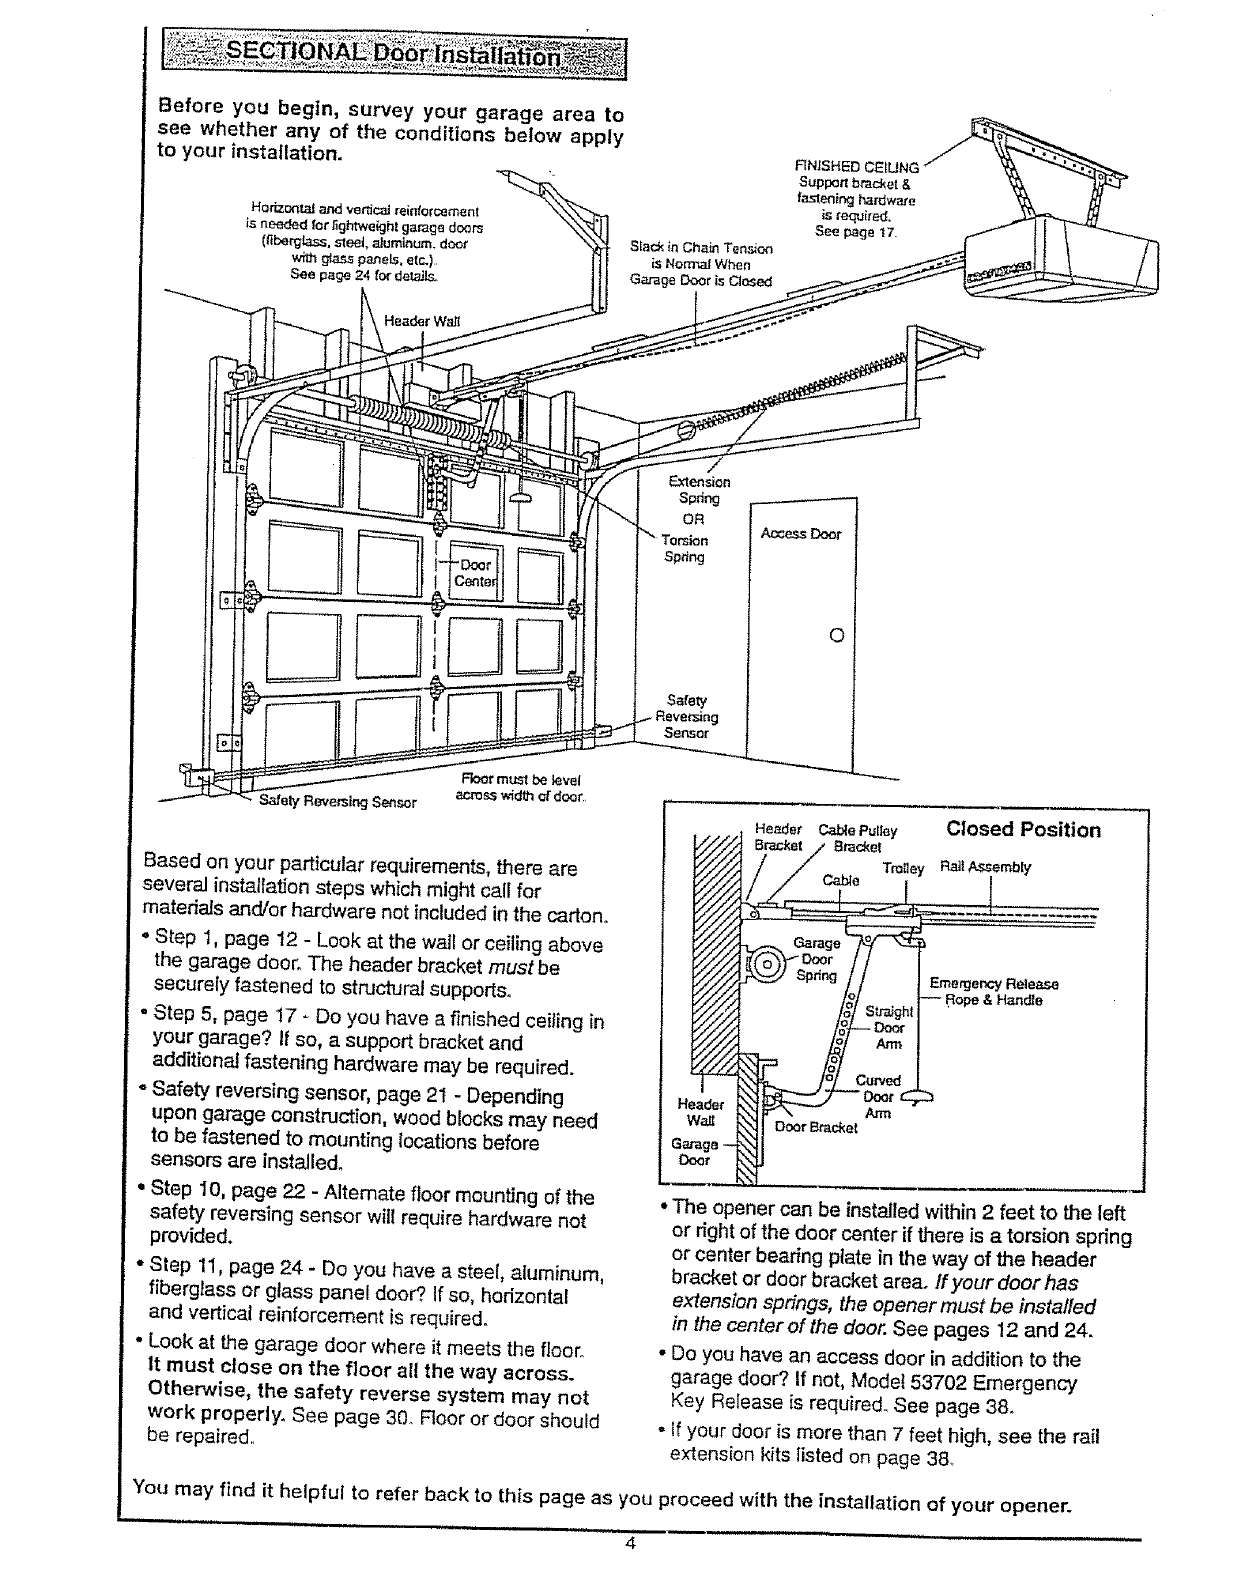
Before you begin, survey your garage area to
see whether any of the conditions below apply
to your installation.
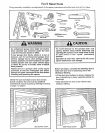
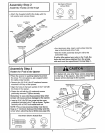
Slack in Chain Tension
is No_ When
Garage Door is Clo_ed
Extension
Sp_ing
OR
Access Door
0
Safety Reversing Sensor
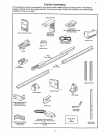
Based on your particular requirements, there are
several installation steps which might call for
matedaJs and/or hardware not included in the carton.
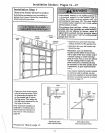
• Step 1, page 12 - Look at the wall or ceiling above
the garage door. The header bracket must be
securely fastened to structural supports.
. Step 5, page 17 - Do you have a finished ceiling in
your garage? If so, a support bracket and
additional fastening hardware may be required.
oSafety reversing sensor, page 2t - Depending
upon garage construction, wood blocks may need
to be {astened to mounting locations before
sensors are installed.
• Step 10, page 22 - Alternate floor mounting of the
safety reversing sensor will require hardware not
provided.
° Step 11, page 24 - Do you have a steel, aluminum,
fiberglass or glass panel door? if so, horizontal
and vertical reinforcement is required°
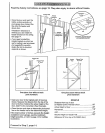
• Look at the garage door where it meets the floor.,
It must close on the floor al! the way across.
Otherwise, the safety reverse system may not
work properly. See page 3& Floor or door should
be repaired.
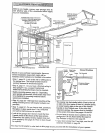
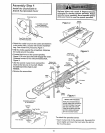
Closed Position
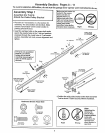
Rail A.'_embly
Emerger, cy Release
-- Rope & Handle
. Header Ca_e Pulley
• The opener can be installed within 2 feet to the left
or dght of the door center if there is a torsion spdng
or center bearing plate in the way of the header
bracket or door bracket area. If your door has
extension spdngs, the opener must be installed
in the center of the door. See pages 12 and 24.
• Do you have an access door in addition to the
garage door? If not, Model 53702 Emergency
Key Release is require& See page 38°
- If your door is more than 7 feet high, see the rail
extension kits listed on page 38.
You may find it helpful to refer back to this page as you proceed with the installation of your opener.
4