5-6
Installation Guide for the Cisco Secure PIX Firewall Version 5.2
78-11180-01
Chapter 5 Opening a PIX Firewall Chassis
Opening a PIX Firewall Classic
Closing a PIX10000
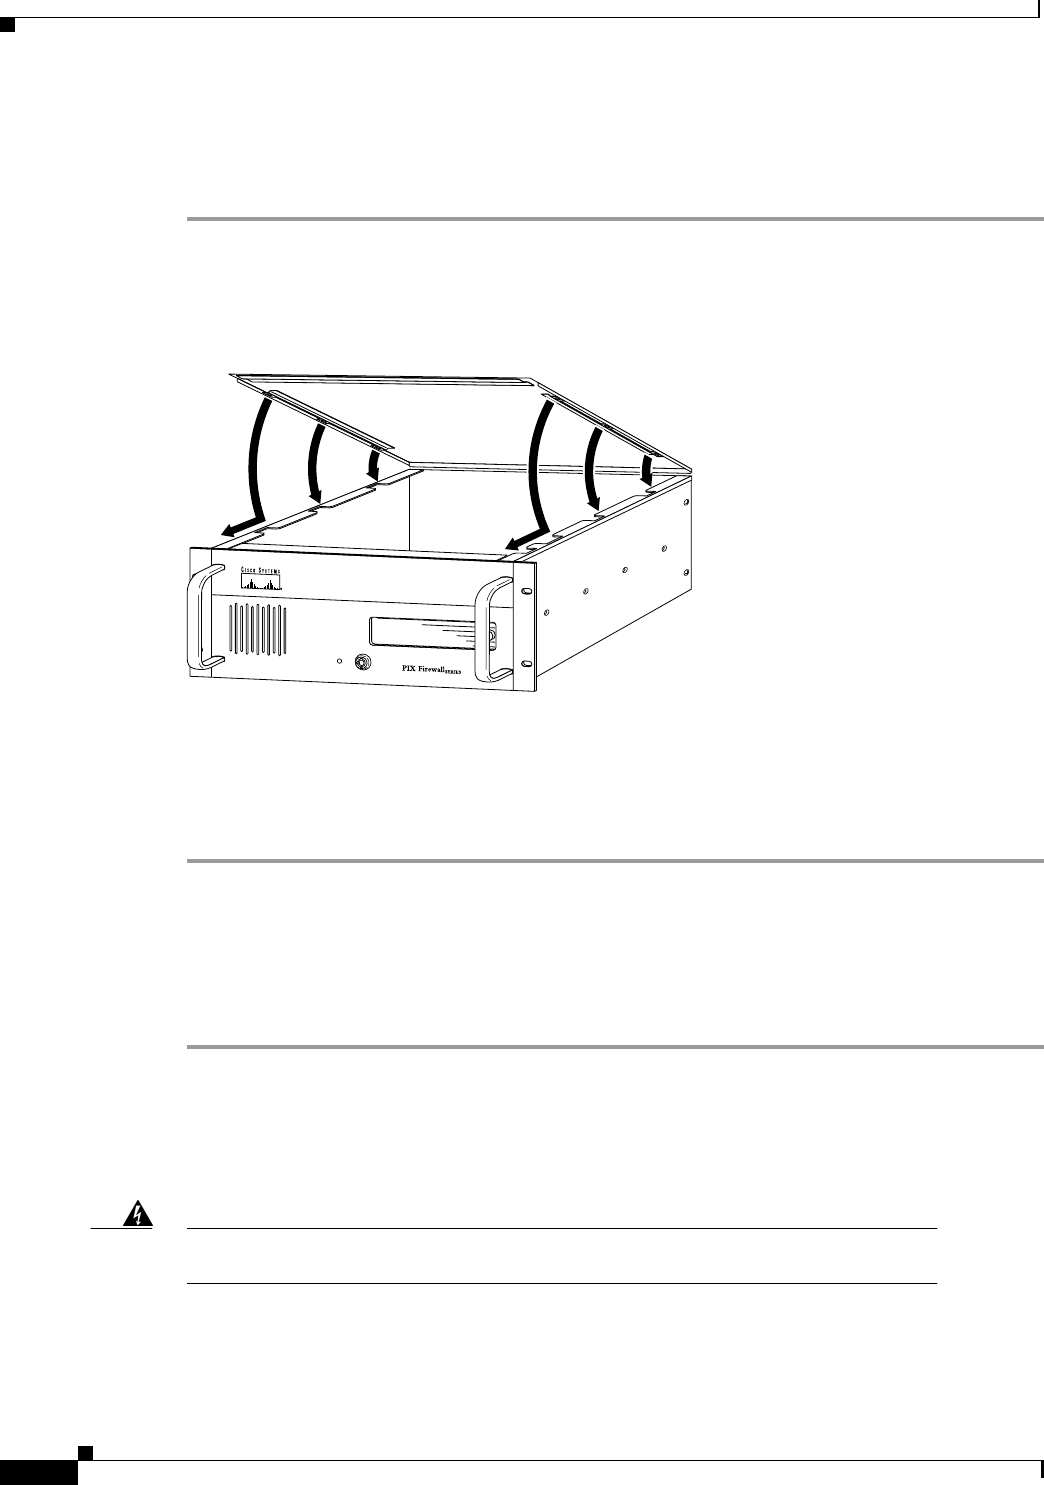
Follow these steps to close a PIX10000 chassis:
Step 1 Attach the top panel as shown in Figure 5-8. The three slots in the top panel must fit into the openings
in the lips at the top of the chassis. Lower the top panel into the cabinet openings and push the top panel
forward toward the front of the unit to secure it.
Figure 5-8 Attach the PIX10000 Top Panel by Matching the Slots
Step 2 Attach the four screws at the rear of the top panel.
Step 3 Put the unit back on the equipment rack and plug in the cables and the power cord.
Step 4 Power on the unit from the switch at the rear of the unit.
Opening a PIX Firewall Classic
Follow these steps to open the chassis for this model:
Step 1 Read the Regulatory Compliance and Safety Information for the Cisco Secure PIX Firewall document
for your respective software version referenced in the section, “Related Documentation” in “About This
Manual.”
Step 2 Ensure that the PIX Firewall is powered off. Unplug the power cord from the power outlet. Once the
upgrade is complete, you may safely reconnect the power cord.
Warning
Before working on a system that has an On/Off switch, turn OFF the power and unplug
the power cord.
Step 3 Open the front panel and power off the unit as shown in Figure 5-9.
H10127


