


41
DV360/580 Series Direct Vent Gas Fireplace
20010667
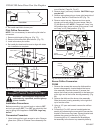
3. Using a 1/2” open end wrench remove the orifices.
(Fig. 67)
CO102a
DV360/580
Gas Conversion
1/28/00 djt
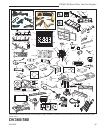
Rear Burner Orifice:
(Refer to Conversion Kit Orifice
Chart)
Front Burner Orifice:
(Refer to Conversion Kit
Orifice Chart)
CO102a
Fig. 70 Burner orifice replacement.
CO101a
DV360/580
Gas Conversion
Manifold
1/28/00
added manifold screw
4/7/00 djt
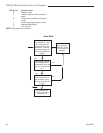
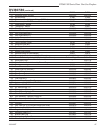
Manifold Assembly
Burner Pan
Pilot Location
Manifold Mounting
Screw
Orifice
CO101a
Fig. 69 Remove manifold assembly.
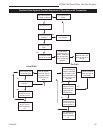
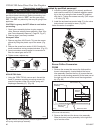
Log Support
(DV580)
Front Burner Orifice
(Refer to Table on
Page 42)
Rear Burner
Orifice
(Refer to Table
on Page 42)
CO130
Fig. 67 Burner orifice replacement.
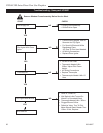
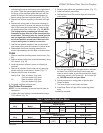
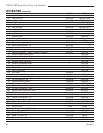
Burner Housing
Gasket
Mixing Tube
CO131
Fig. 68 Replace mixing tube and gasket.
Natural
Propane
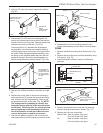
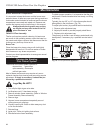
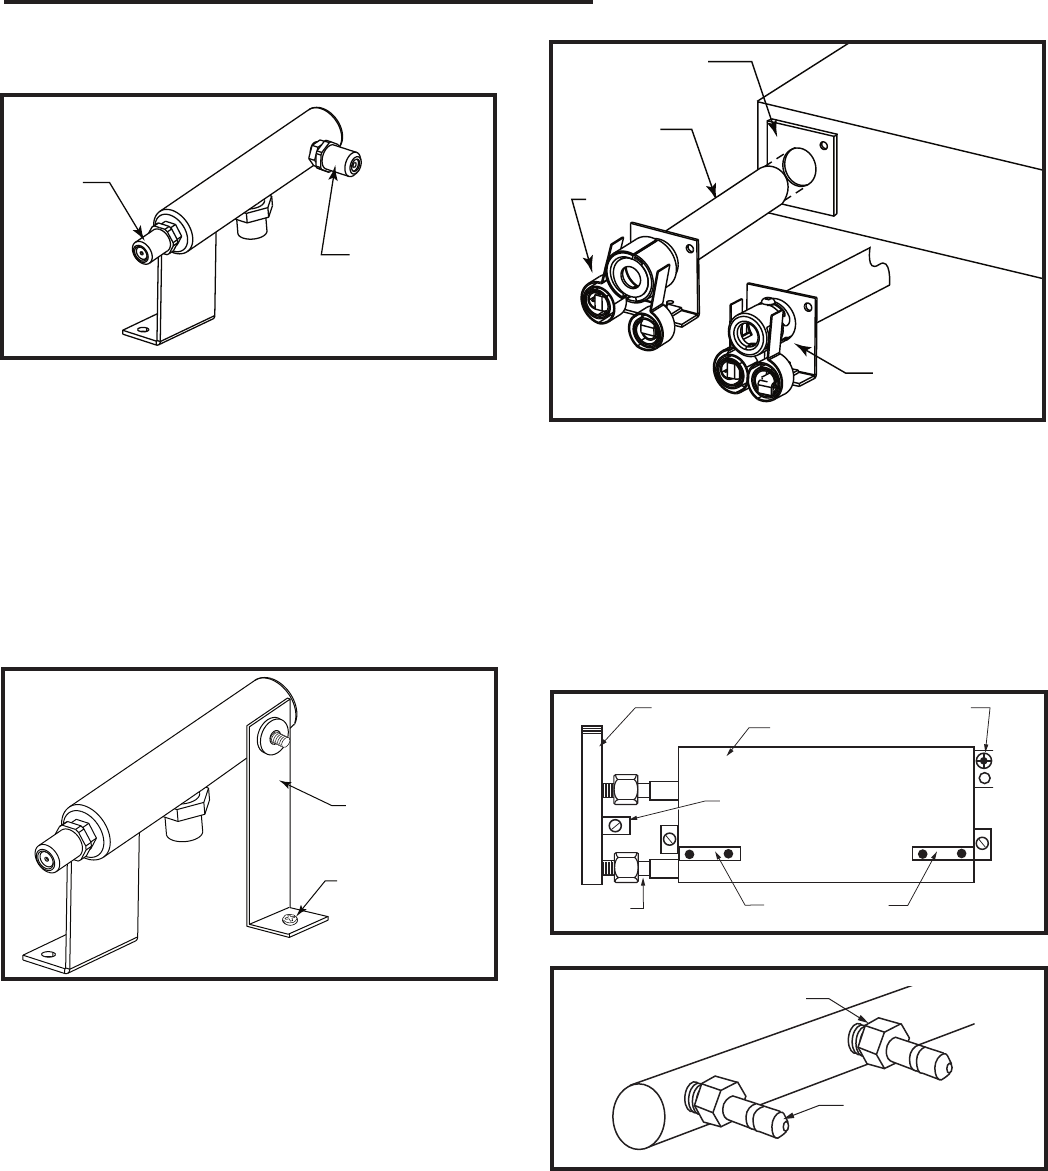
4. Converting LP to NG, remove bracket/gasket as-
sembly by unfastening the screw which secures the
bracket to the burner tray base. Discard bracket and
refasten the screw into the hole. (Fig. 67a)
Converting NG to LP, assemble the bracket/gas
-
ket assembly to the burner tray assembly base by
unfastening the screw on the tray to the right side of
the orifice. Slide the bracket/gasket assembly over
the fitting on the manifold toward the back with the
gasket to the right. Secure the bracket/gasket as-
sembly using the screw removed earlier. (Fig. 67a)
LP Bracket/Gas-
ket Assembly - in
place for use with
LP Gas; remove
for use with Natu-
ral Gas
Screw
CO132
Fig. 67a LP bracket/gasket assembly.
5. Replace the orifices according to the table on Page
42.
6. Replace the mixing tube on the burner housing by
removing the two (2) screws that secure the mixing
tube to the burner housing assembly. Remove the
old gasket behind the mixing tube. (Fig. 68) NOTE:
The mixing tube for propane gas has only two
bimetallic springs that are in the closed position
at cold start. The mixing tube for natural gas has
two spring/shutter collar assemblies that are in
the closed position at cold start. Make sure the
correct mixing tube is used for conversion.
7. Use the new gasket supplied in the conversion kit
and proper mixing tube and replace in reverse order.
8. Reassemble the burner housing assembly, the
burner tube assembly and the fettle in reverse order.
DV580
1. Remove manifold mounting screw from burner. (Fig.
69)
2. Remove burner orifice from manifold assembly using
3/8” wrench. (Fig. 70)
3. Install conversion orifices in place of orifices just
removed.
4. Remove air shutters from burner pan by removing
shutter retaining screw then air shutter. (Fig. 71)
5. Replace only the rear air shutters.
Natural Gas: Rear air shutter, fully open.
Front air shutter, fully open.
LP: Rear air shutter, fully open.
Front air shutter, fully open.