7
BRESCIA (GALLERY EDITION)
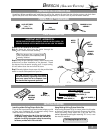
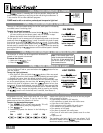
BLADE/BLADE HOLDER INSTALLATION
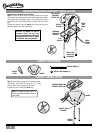
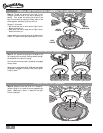
Step 11. Using the screws from the pack,
attach each blade/blade holder assembly to
the motor.
Using the screwdriver, tighten securely by
hand only.
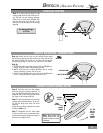
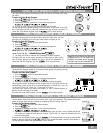
Step 10. On the flywheel remove the four
shipping blocks by unscrewing the screws.
Discard the shipping blocks and shipping
block screws.
REMOVE SHIPPING BLOCKS
SHIPPING
BLOCKS
Your Brescia fan is equipped with a fly-
wheel that allows for both 4 and 5
blade installation. The screw holes sur-
rounded by squares are for 4 blade
installation, while the screw holes in
circles are for 5 blade installation as
shown above.
BLADE
HOLDER
SCREWS
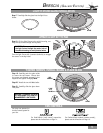
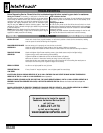
PREPARE SWITCH HOUSING ASSEMBLY
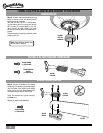
Step 13. Locate the switch housing/cap
assembly and remove the two 8-32 X
3
/8″
screws holding the cap onto the switch
housing. Set the cup aside in a safe lo-
cation, you will need it if you ever decide
to uninstall the light fixture.
CAP
SWITCH
HOUSING
CAP SCREW
8-32 X
3
/8″
(2)
Note: Save these two screws–they
will be used in Step 16!
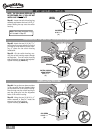
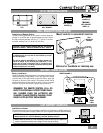
ATTACH SWITCH HOUSING SCREWS
NOTE: IF YOU ARE NOT INSTALLING THE
LIGHT KIT, PLEASE SEE PAGE 10.
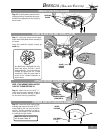
Step 12. Attach the two (2) 5-32 X
9
/32″
switch housing screws removed in Step 8
to fan motor as shown, leaving
1
⁄
8
" space
for the switch housing installation.
SWITCH
HOUSING SCREWS
(FROM STEP 8)


