


42VMC
GB - 12
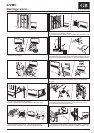
System configuration
System configuration
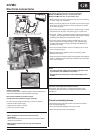
Units are factory configured as heat pumps.
When a cooling only system is installed, it is necessary to change
the factory configuration.
Such operation must be performed by the installer as follows:
Cooling only configuration (of the system)
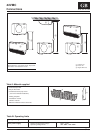
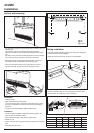
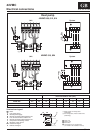
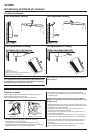
• Check all electrical connections (instructions and wiring diagram).
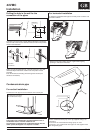
• Insert the batteries into the remote control and leave it OFF.
• Energise the system, turning the power supply ON.
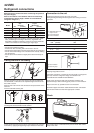
• Press the
and buttons of the infrared remote control and
hold them pressed for more than 5 seconds.
• The display will be cleared, the time segments will display the first
configuration item (rAdr = remote address) and the temperature
segments will display the default value of this configuration item
(Ab = control of both indoor units).
• Press button
repeatedly until “UCFG” is displayed.
• Press either the
or button to change the default value (HP)
to the new value (AC).
• Press
button to transmit the new configuration to the unit.
• Press
button to leave the configuration menu.
For other available configuration options, see table IV.
Note:
When 30 seconds have elapsed and no buttons have been
pressed, the remote controller will automatically exit the
configuration menu and the procedure has to be restarted.
Table V
Shown on Explanation Description
display
“A”: unit A Address indoor unit A.
“CH”“b”: unit B
Address indoor unit
B.
“Ab”: units A and B Default address is both indoor units.
“tU”
“C”: Degrees Celsius Temperature.
“F”: Degrees Fahrenheit Default is °C.
“rc”
“HP”: heat pump Default address is heat pump.
“AC”: cooling only Change address for cooling only.
“HR”
17 – 32: 17°C ÷ 32°C Heating temperature range °C min. and max.
63 – 90: 63°F ÷ 90°F Heating temperature range °F min. and max.
“CR”
17 – 32: 17°C ÷ 32°C Cooling temperature range °C min. and max.
63 – 90: 63°F ÷ 90°F Cooling temperature range °F min. and max.
“CL”
12 : 12: 12 hour clock (AM/PM) Time format (AM = morning; PM = afternoon).
24 : 24: 24 hour clock Default is 12 : 12.
Table IV
Item Shown on Explanation Description
display
“A”: remote unit A Remote address indoor unit A.
1 “rAdr”“b”:
remote unit
B
Remote address indoor unit
B.
“Ab”:
remote units
A and B Default address is both indoor units.
2 “UCFG”
“HP”: heat pump Default address is heat pump.
“AC”: cooling only Change address for cooling only.
3 “UAdr”
1-
2
40 with increase of 1 CCN unit address.
Default = 1.
4 “ZONE”
1-
2
40 with increase of 1 Number of zone.
Default = 0.
5 “GFdn”
1-
2
40 with increase of 1 Number of GFD.
Default = 1.
6 “A St”
“OF”: unit in stop mode Choose of operating mode after a power supply
“On”: automatic restart interruption.
Cooling only configuration (of the remote controller)
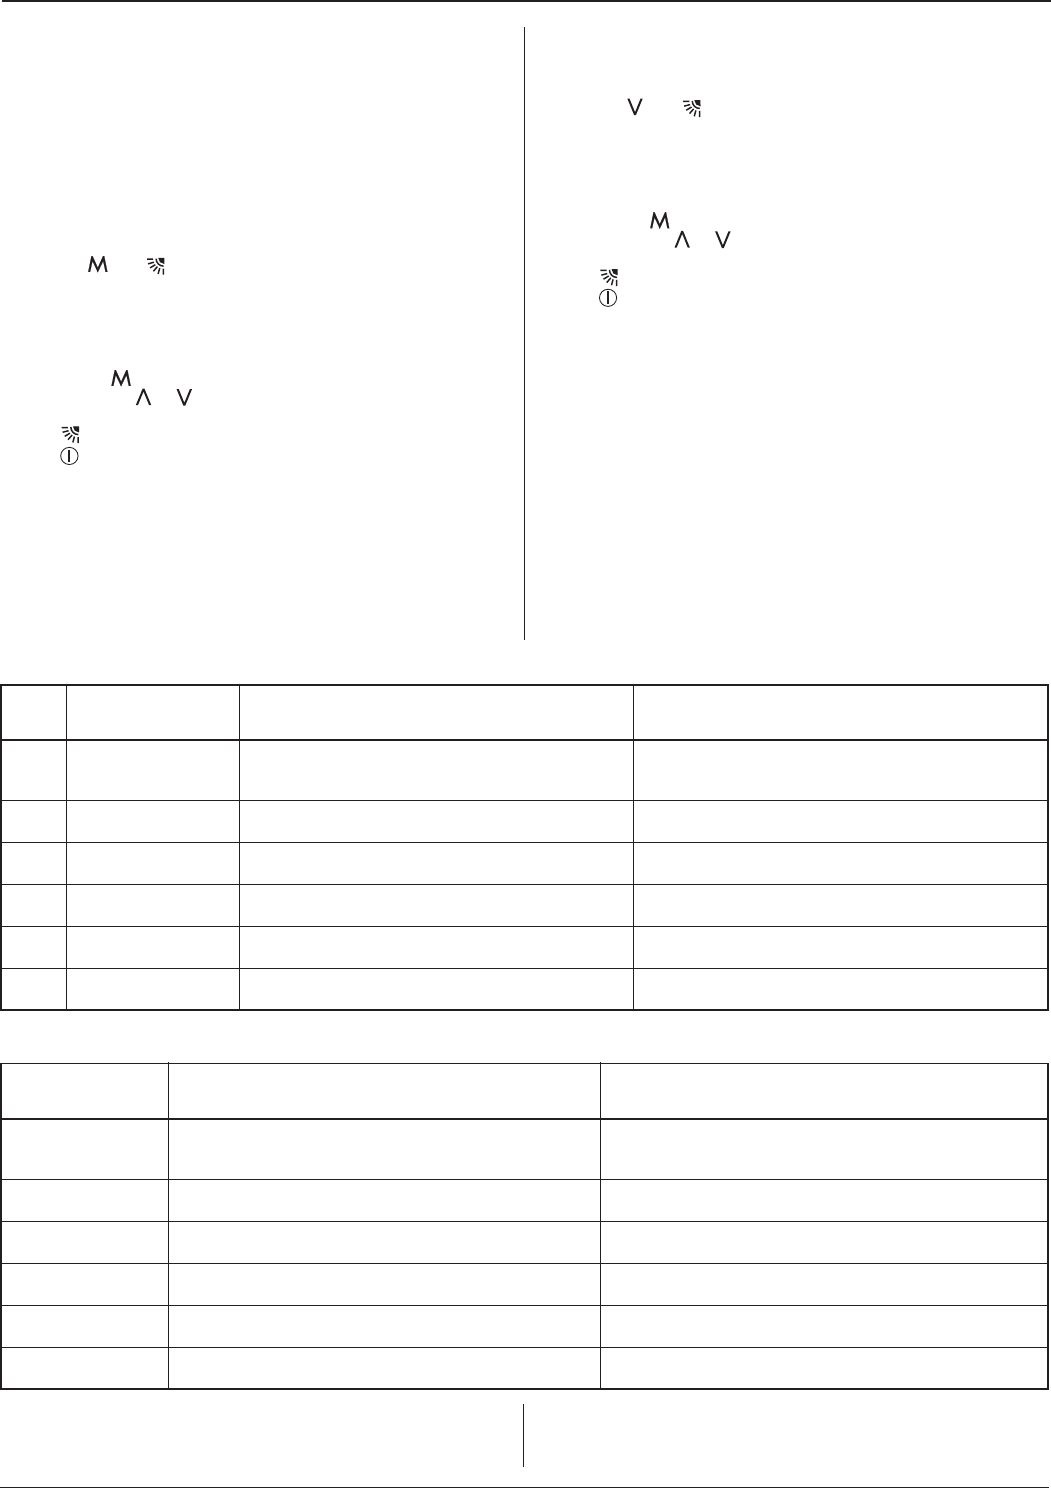
• Insert the batteries into the remote controller and leave it OFF.
• Energize the system, turning the power supply ON.
• Press the
and buttons of the infrared remote control and
hold them pressed for more than 5 seconds.
• The display will be cleared, the temperature segments will display
the first configuration item (CH = remote address) and the time
segments will display the default value of this configuration item
(Ab = control of both indoor units).
• Press button
repeatedly until “rc” is displayed.
• Press either the
or button to change the default value (HP)
to the new value (AC).
• Press
button to transmit the new configuration to the unit.
• Press
button to leave the configuration menu.
For other available configuration options, see table V.
Note:
When 30 seconds have elapsed and no buttons have been
pressed, the remote controller will automatically exit the
configuration menu and the procedure has to be restarted.
NOTE: If the selection is changed from “rc” (HP operation) to
cooling only and the remote control operating mode is auto or
heating, the operating mode is set to cool.
NOTE: If the “HR” is set to a value that is lower than “CR” and the
remote control operating mode is auto, the operating mode is set to
cooling.