


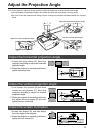
8
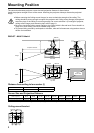
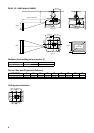
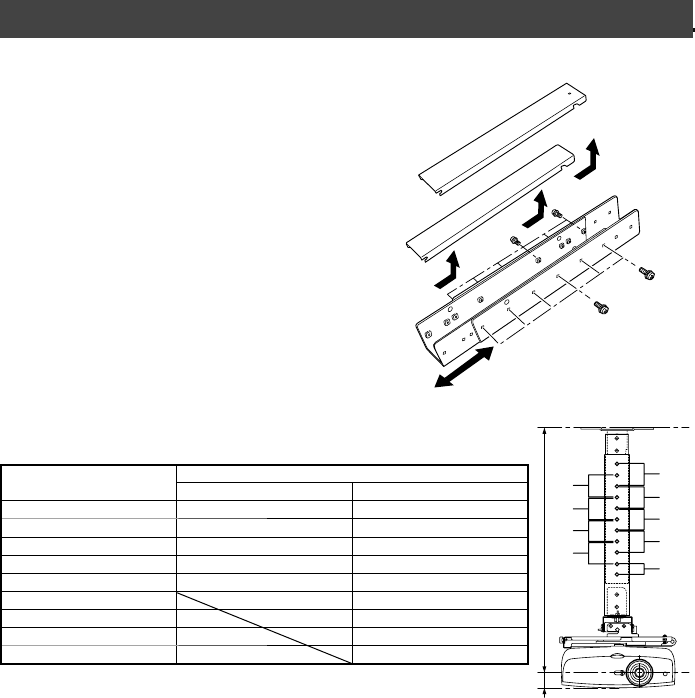
Mountingholeposition
Distancefromceilingtolensaxis(l)
RS-CL08 RS-CL09
a 60
cm/2.0' 80cm/2.6'
b 65
cm/2.1' 85cm/2.8'
c 70
cm/2.3' 90cm/3.0'
d 75
cm/2.5' 95cm/3.1'
e 8
0cm/2.6'* 100cm/3.3'
f 10
5cm/3.4'
g 11
0cm/3.6'
h 11
5cm/3.8'
i 1
20cm/3.9'*
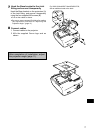
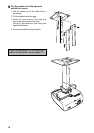
Preparation:
Adjust the pipe length according to
the ceiling height
1 Removethecoversofouterandinner
pipesbyslightlyslidingthemandliftup
asshown.
2 Remove four M5 screws from the
sidesoftheouterpipe,adjusttheinner
pipelengthaccordingtotheprojector
installationheight,andthensecurethe
fourM5screws.
●Whenattachingscrewsinstep2,insertthe
screwsandleaveanunusedscrewhole
betweenthem.Whentheextensionpipeis
stretchedtoitsmaximumlength,insertthe
screwsintwoadjacentscrewholes.
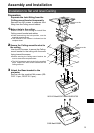
InstallationtoaHighCeiling
UseoptionalextensionpipeRS-CL08orRS-CL09forhighceiling.
1
2
Pipeextensionlength
f
a
b
c
e
g
d
h
l
*
Tousetheextensionpipewithitextendedtothemaximumlength,secureitbyinserting
screwsinthetwoadjacentscrewholes.
l'
=4.1cm/0.14'(WUX10MarkII/SX7MarkII/SX60/X700)/4.5cm/0.15'(SX80MarkII/SX800)
i
l'
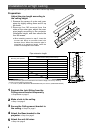
1
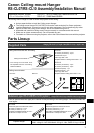
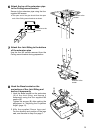
Separate the Joint tting from the
Ceiling-mount bracket temporarily
⇒
Preparation
onpage5
2
Make a hole in the ceiling
⇒
Step
1onpage5
3
Secure the Ceiling-mount bracket to
the ceiling
⇒
Step2onpage5
4
Attach the Base bracket to the
projector
⇒
Step3onpage5
5
Attach the anti-fall wires
⇒
Step4onpage6